

Lesson 3 – Repair Plan- Below are the videos included in this lesson. Click on video to watch.

Lesson 3 - Repair Plan Video
-
Lesson 3 - Repair Plan Video
When a damaged vehicle arrives in the shop, the repair process doesn’t start with grabbing a hammer or paint gun—it starts with a plan. Carefully reading the damage report, assessing the extent and type of damage, and deciding whether to repair or replace parts are critical first steps. Following OEM repair procedures and safety guidelines ensures the job is done right and the vehicle remains safe. A well-organized repair plan outlines the order of operations, lists necessary tools and materials, and includes documentation like photos and labeled parts to keep the process smooth. Preparing the vehicle properly—cleaning surfaces and protecting surrounding areas—prevents additional damage and supports a high-quality finish. By understanding these steps and following the right protocols, you set yourself up for success, whether you’re working in a professional shop or tackling repairs as a DIYer. A solid repair plan is your roadmap to transforming a damaged car back to safe, reliable condition.
Introduction: Where to Begin When the Car Rolls In?
Imagine this: a battered vehicle slowly rolls into your shop. The front bumper is dangling, the fender is crushed, and maybe the headlight is staring off in the wrong direction like it’s had a rough night. The damage is obvious—but where do you start?
Do you rush to the most obvious damage and start pulling dents like a kid trying to pop bubble wrap? Do you immediately decide to repair or replace parts? What does the damage report really tell you, and how do you use it to build a smart repair plan?
These are just some of the critical questions a collision repair technician faces every day. The technician is the expert—the person who must figure out the best approach to restore that vehicle safely and efficiently.
Lucky for you, as a student, you’re learning this craft under the guidance of an experienced instructor. Pay close attention because your instructor is preparing you to be that expert. The more you engage, ask questions, and absorb these lessons now, the smoother your first job will be when you step into the shop.
And if you’re a DIYer working in your garage—welcome to the University of Hard Knocks. Your classroom is videos, manuals, and sometimes trial and error. Trust me, we’re all DIYers in some way. I’m a DIYer when it comes to shooting and editing videos—my first ones were rough, but with practice, I got better. The same goes for collision repair; learning the right process saves time, money, and frustration.
Objectives:
By the end of this lesson, you will be able to:
- Read and interpret a damage report.
- Decide when to repair or replace a part.
- Develop a written repair plan.
- Properly remove, store, and protect parts.
- Prepare the vehicle and workspace before beginning repairs.
- Understand the importance of documentation and labeling.
- Follow OEM repair procedures.
- Identify repair-specific safety considerations.
- Recognize when special equipment or calibration is required.
Don’t Just Start Yanking Parts
Imagine showing up to cook a fancy meal and just tossing ingredients into a pot without reading the recipe. That’s what rushing into repairs without a plan is like.
Before anything happens, you need to:
- Review the damage report to understand listed repairs and assess any discrepancies.
- Communicate with the estimator or shop foreman if anything is unclear, or if you discover additional damage.
- Identify any prior damage not included in the job that may affect the repair process.
- Look for hidden damage behind panels or trim, especially on unibody structures.
- Reference repair procedures from OEM sources using repair databases such as ALLDATA, I-CAR RTS, or OEM-specific platforms.
- Inspect for safety-related damage, including compromised crumple zones, airbag modules, or sensor misalignment.
- Verify if pre-scan and post-scan procedures are required by OEM.
Think of the estimate as your blueprint. If the blueprint says “fix the roof” and you end up painting the tires, we’ve got a problem.
Building the Repair Plan
Now let’s dive into developing a solid repair plan. This includes:
- Assessing Panels:
- Evaluate each damaged panel or component carefully.
- Determine if the part is cosmetic or structural.
- Identify substrate material (mild steel, high-strength steel, aluminum, plastic).
- Review damage type: dent, tear, crack, kink, corrosion.
- Planning Work Order:
- Outline all tasks in a logical sequence.
- Start with disassembly, then metalwork, filler, priming, block sanding, paint prep, painting, and reassembly.
- Note any sublet work (glass replacement, mechanical alignment, framework).
- Listing Tools & Supplies:
- Create a list of tools required (e.g., stud welder, rivet gun, puller, DA sander).
- List materials: masking tape, seam sealer, welding wire, abrasives.
- Confirm access to calibration equipment if ADAS systems are involved.
- R&I vs. R&R:
- R&I (Remove & Install): Used to access hidden areas; original part is reinstalled.
- R&R (Remove & Replace): Part is discarded and replaced due to damage or wear.
Repair vs. Replace Considerations:
- What is considered too damaged to repair?
There is a general rule of thumb, but this is not set in stone. This is the kink vs. bend rule. If the part has a crease—a sharp bend of a small radius at a 90-degree angle over a short distance—it is considered kinked and should be replaced. If the crease is less severe, you may repair it. However, always follow OEM guidelines and use good judgment.
- Is the part available?
Availability strongly affects your decision. If the part is in stock, it may make more sense to replace it. However, if it’s on backorder or rare, repairing might be the only option.
- Will it cost more to repair?
This depends on labor rates and repair complexity. For example, if your shop labor rate is $50/hour, and a dent repair takes 3 hours, that’s $150 labor plus materials. If the replacement part costs $80, replacing is cheaper. But if you’re a DIY with free labor, spending a few hours repairing an $80 part might be worthwhile.
- OEM Repair Recommendations
Always check OEM repair procedures—some parts or materials can’t be sectioned, welded, or repaired by typical methods. For example, boron steel requires special processes.
- Structural Integrity
Never compromise structural safety by repairing parts that OEM says must be replaced, especially in load-bearing areas.
Preparing For Inspection
- Washing the car: Clean surfaces reveal damage and prevent contamination.
- Wax and Grease Remover: Essential to remove invisible contaminants like silicone or waxes.
- Prep Cleaner: Removes oils and fingerprints prior to sanding.
- Inspect: Washing allows you to spot cracks, dents, and other flaws that might otherwise go unnoticed.
Photos, Bags, and Labels
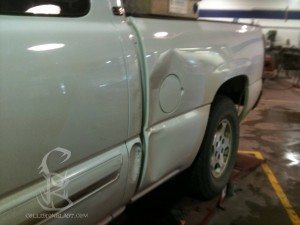
Take photos before and during repairs:
- Capture damage from multiple angles.
- Photograph wiring, clips, and connectors before disassembly.
- Record hidden damage or changes in scope.
- Use photos for insurance documentation and supplements.
Bag and Label Parts:
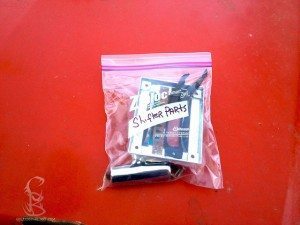
- Use clear zip bags or trays to organize fasteners.
- Label each bag with part name, location, and side (e.g., RF Fender Inner Clip).
- Group by area of removal (e.g., front bumper, hood, RH door).
“A labeled bag today saves an hour tomorrow.”
Bonus Tip:
- Use masking tape to label disconnected electrical connectors.
- Keep a parts cart or bin for each job.
Removing Parts (Without Breaking Things)
Exterior & Interior Parts
- Use trim tools to avoid scratching paint or damaging clips.
- Save reusable clips and note which must be replaced.
- Document panel gaps and fitment before removal.
- Avoid stretching or stressing painted panels.
Mechanical & Electrical Components
- Always disconnect the battery before removing airbags or sensors.
- Tag wiring harnesses and connectors.
- Watch for passive safety systems (occupant sensors, belt pretensioners).
- Check service information for reinitialization or calibration.
Adhesive Components
- Use heat guns or infrared heaters to soften adhesive.
- Use plastic chisels or non-marring scrapers to lift panels.
- Clean remaining adhesive before reinstallation.
Protection Is Key
Protect adjacent panels and parts with:
- Masking tape (multiple layers for sharp edges)
- Aluminum tape for heat shielding
- Welding blankets for grinding/welding zones
- Edge guards to prevent chipping
- Fender covers for underhood work
- Foam pads or bubble wrap for fragile trim
Prevention is faster and cheaper than correction.
Recap: Your Repair Plan Toolkit
Here’s your checklist before starting repairs:
- Read and understand the damage report fully.
- Identify all damaged parts and decide repair vs. replace using kink vs. bend rule.
- Verify part availability and cost-effectiveness.
- Develop a detailed, logical work order.
- List required tools, materials, and special equipment.
- Take comprehensive photos and label all removed parts.
- Prepare the vehicle by washing and cleaning surfaces.
- Follow OEM repair procedures strictly.
- Protect surrounding panels and components during work.
- Ensure safety steps are followed—disconnect battery, handle airbags, etc.
Discussion Questions
- What’s the difference between R&I and R&R?
- Why should you take photos during the repair process?
- What can happen if you don’t wash the car before repair?
- Why is it important to follow OEM procedures?
- How do part availability and labor cost affect repair decisions?
Summary: Developing a Repair Plan
When a damaged vehicle arrives in the shop, the repair process doesn’t start with grabbing a hammer or paint gun—it starts with a plan. Carefully reading the damage report, assessing the extent and type of damage, and deciding whether to repair or replace parts are critical first steps. Following OEM repair procedures and safety guidelines ensures the job is done right and the vehicle remains safe.
A well-organized repair plan outlines the order of operations, lists necessary tools and materials, and includes documentation like photos and labeled parts to keep the process smooth. Preparing the vehicle properly—cleaning surfaces and protecting surrounding areas—prevents additional damage and supports a high-quality finish.
By understanding these steps and following the right protocols, you set yourself up for success, whether you’re working in a professional shop or tackling repairs as a DIYer. A solid repair plan is your roadmap to transforming a damaged car back to safe, reliable condition.
Example of a body repair plan
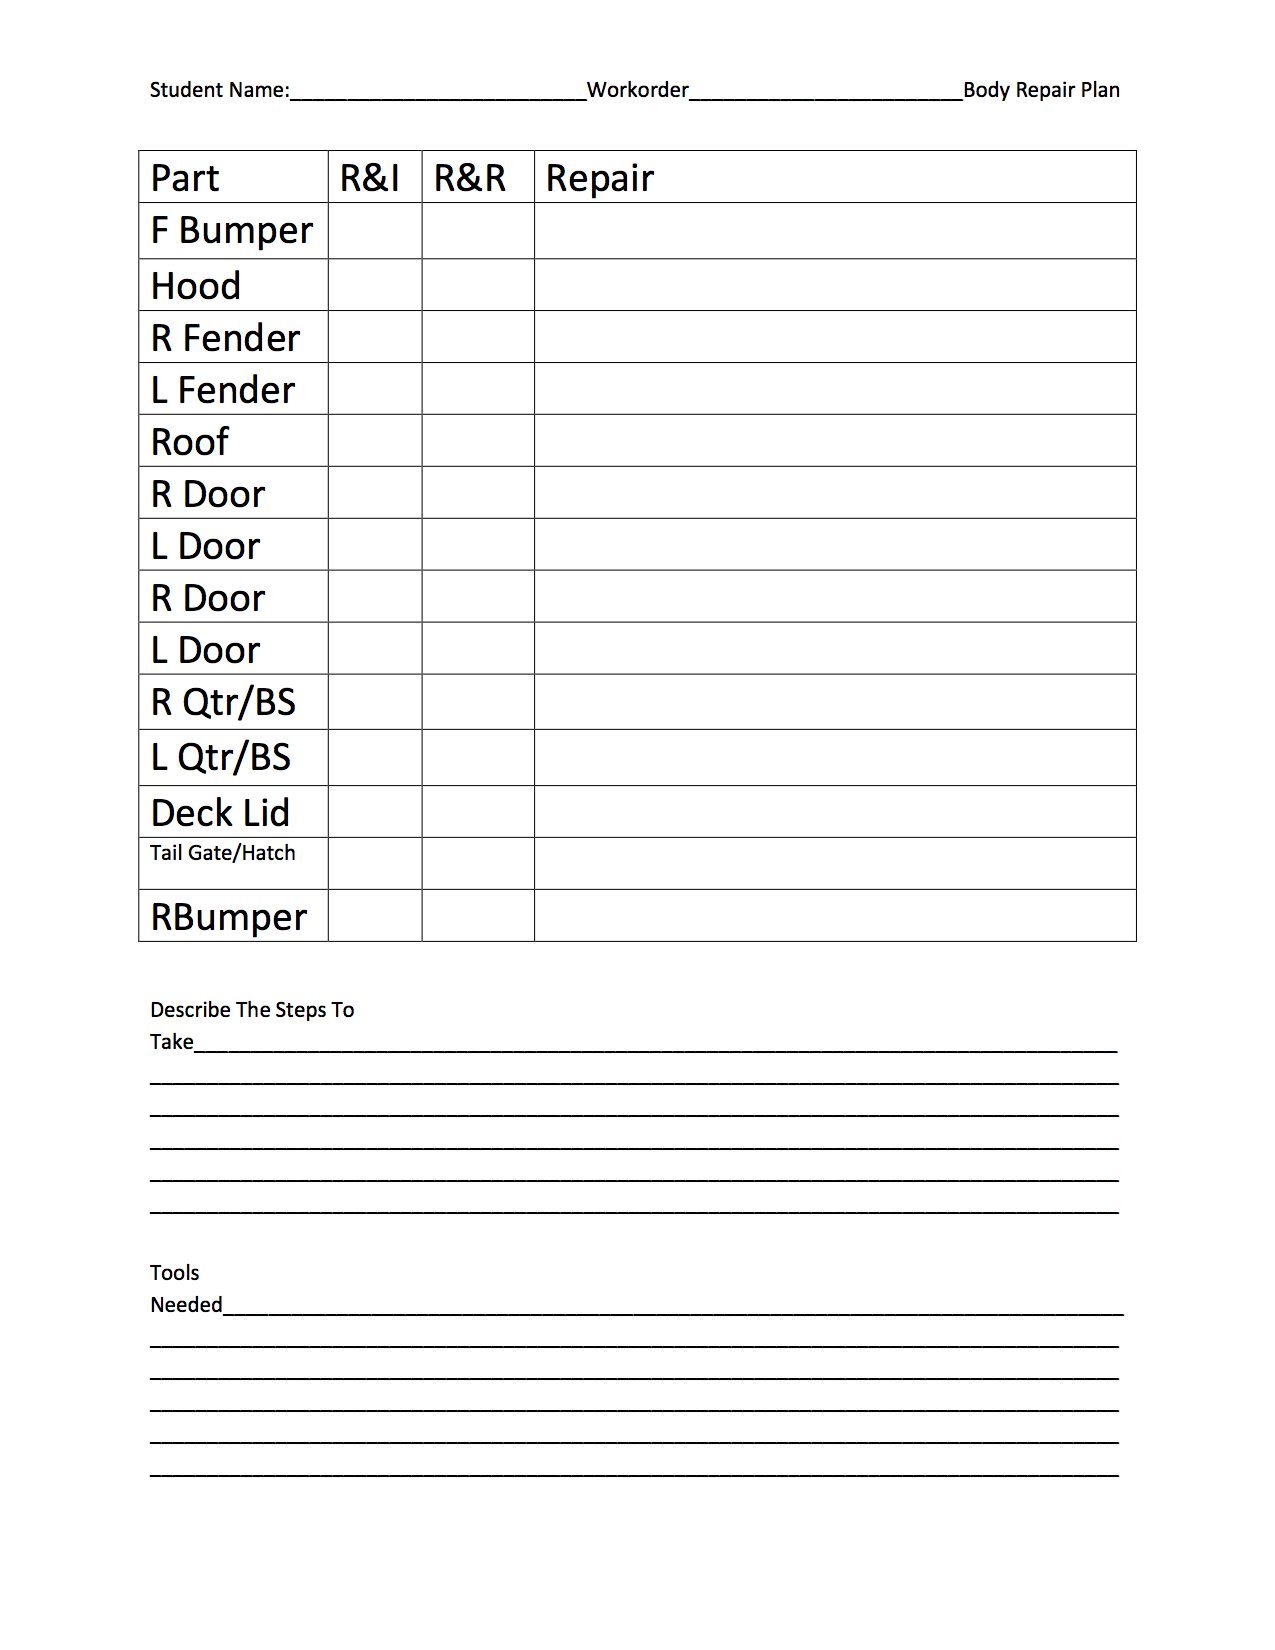
If you would like to print a pdf copy of this repair plan click here.
Example of supply list
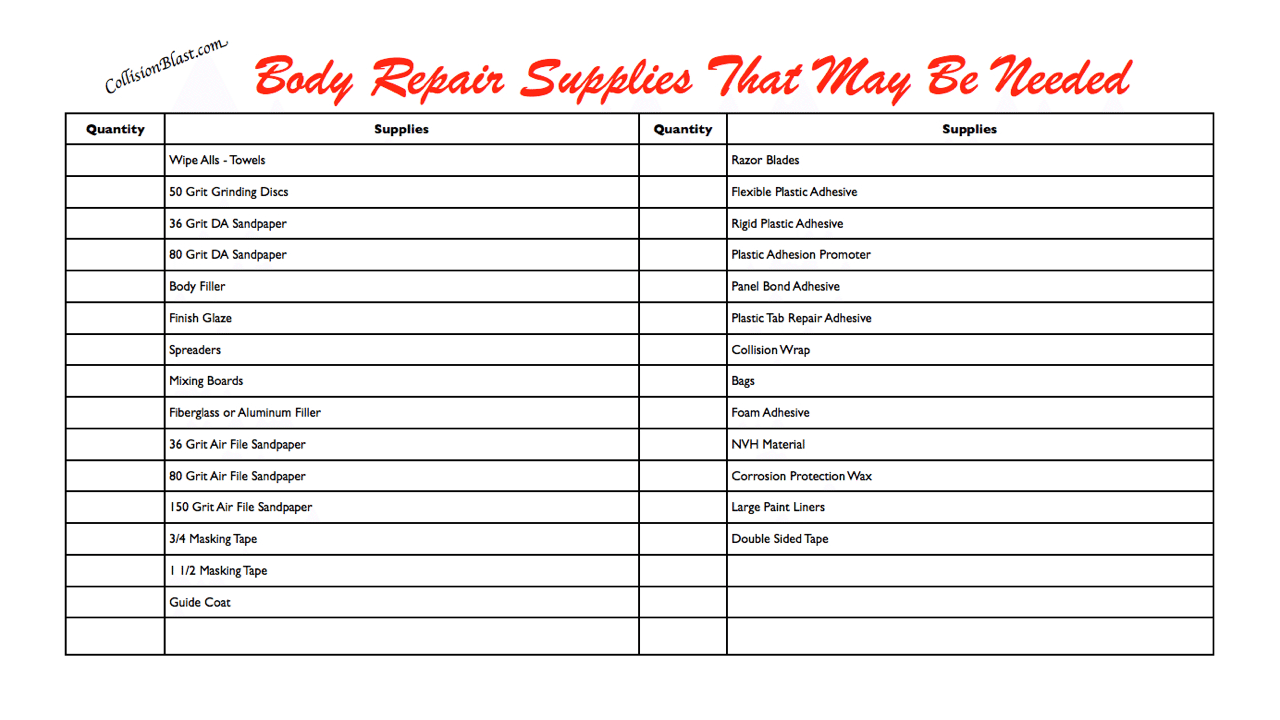
If you would like to print a pdf copy of this supply list click here.