

Lesson 4 – Metal Straightening – Part 1
Below are the videos included in this lesson. Click on video to watch.
Lesson 4 - Metal Straightening - Part 1
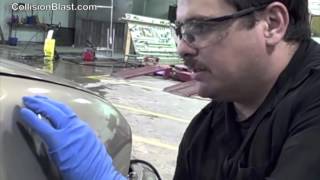
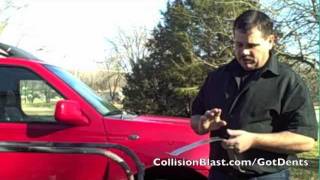
Keep It Simple
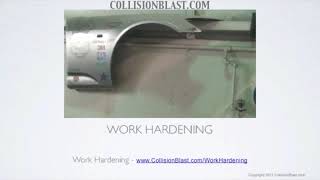
Work Hardening
-
Lesson 4 - Metal Straightening - Part 1
Metal straightening requires knowledge of the material you are working with, an understanding of how it responds to shaping, and the ability to select the most effective repair method. Older vehicles had thick steel panels that could be shaped extensively without losing strength, but required more effort to move. Modern vehicles use thinner panels that are easier to move but more vulnerable to damage from overworking, overheating, or over-grinding. -
Keep It Simple
If you can reach behind the panel and pull out on the low with one hand and push down on the high with the other hand, then simply use your hands to repair the damage. The dent may still need a little hammer and dolly work afterwards, but I have repaired many dents with nothing but my hands. Remember today’s metals are thin and it does not take much to damage a part or to repair it. One word of caution, when I mention using my hands, I am only using force; I am not striking the panel with my palm or fist. Striking the panel with your hand may result in injury. -
Work Hardening
This photo is of a fender that has extreme body lines and contours. This is an example of work hardened areas that were stamped into the part from the manufacture. Work hardening can be caused by an accident when the metal is reshaped out of its original shape. If you remember in vehicle history, we discussed that car makers were able to use lighter weight steel by designing more body lines into the panels. When body lines are designed into a panel, it causes the metal to become work hardened. Therefore, some work hardening is designed into the part when stamped and formed from the manufacture. As mentioned, additional work hardening can be generated from an accident. So why is work hardening important to you, the repairer? This is because work hardened metal is stiffer and harder to reshape. Not only is it stiffer, it is also more brittle. Therefore, care must be taken not to overwork the metal in work hardened areas. I grew up on a farm, but I think you can relate to this. If I needed a piece of bailing wire and did not have a pair of pliers at the time, I would bend the wire back and forth until it broke into. Have you ever done something similar to this? I did this because I saw my dad do it. I’m sure he did this because he saw his dad do it. Probably no one was thinking, I am going to take this piece of wire and bend it back and forth to its work harden state until the wire becomes brittle and breaks into…but that is what happens. With that said, trying to get the metal perfect or trying to metal finish thin metal can result in unwanted tears and rips in the metal. Work the metal as close as you can without overworking it, and then use body filler to fill the small imperfections. Evercoat, 3M, and other companies who make body filler state that body filler can be up to ¼ inch after sanded. I try to get it a little straighter then that, but you should be able to get most dents within ¼ inch of the final contour of the panel with no problem.
Lesson 4 – Metal Straightening – First In, Last Out
Before everything else, getting ready is the secret of success. ~Henry Ford
Introduction
Metal straightening in auto body work is a critical skill that demands an understanding of how metals behave under stress, and how those behaviors differ between older and modern vehicles. In past decades, vehicles were constructed with thick, heavy steel panels that could be reshaped with force and skill. Modern vehicles, however, use thinner metal that requires precision and care rather than brute strength.
This lesson covers the differences between repairing older and newer cars, explores the techniques and tools best suited for each, and explains how to apply key principles—such as “first in, last out”—to achieve the best repair results while avoiding damage.
Objectives
By the end of this lesson, you should be able to:
- Explain the key differences between repairing early model cars and today’s vehicles.
- Identify advantages and disadvantages of thick metal versus thin metal.
- Describe and apply the “first in, last out” rule for dent repair.
- Recognize work hardening and its impact on repair strategy.
- Use the right tools and techniques—like stud welders and dent pulling systems—without overstretching or overheating the metal.
- Understand when to keep it simple and when to use more advanced equipment.
Old School: Repairing Early Model Cars
Older vehicles, especially those built before the late 1970s, were made with thick steel. This allowed a technician to hammer, dolly, and file the metal multiple times without risk of creating holes. Panels could often be repaired entirely without body filler—relying instead on skill, patience, and careful shaping.
If small imperfections remained, they were often filled with lead. The process of working with lead involved heating the panel, softening the lead bar, shaping it with a wooden paddle, and then filing it smooth. While effective, this method was slow, required training, and carried health risks we now better understand.
Advantages of thick metal:
- Greater ability to work the metal without breaking through.
- Easier access to both sides of the panel for hammer-and-dolly work.
Disadvantages:
- Heavy and more difficult to move or shape.
- Lead work was time-consuming and hazardous to health.
Modern Day: Repairing Vehicles of Today
Modern vehicles use thinner metal for weight reduction and fuel efficiency. While this makes panels easier to move, it also makes them easier to damage. Over-filing can quickly lead to weak spots or holes, and access to the back of panels is often limited.
Stud welder guns have become a primary tool for these situations. This device welds small studs to the panel, allowing a technician to pull from the outside using a T-handle or slide hammer. The most effective technique involves pulling while gently tapping down high spots—rolling the metal back into shape rather than forcing it. Forcing the metal can cause stretching, leading to more extensive repairs.
When Did Thin Metal Take Over?
The shift to thinner metal occurred gradually starting in the late 1970s and early 1980s, with some foreign models using thinner panels even earlier. Thickness still varies today depending on make, model, and whether the part is OEM or aftermarket.
Keep It Simple
Not every dent requires advanced equipment. When possible, and if there is access to the back of the panel, the damage can be moved using hand pressure alone. This approach works particularly well with modern thin metals, which require minimal force. When using your hands, apply steady pressure—never strike the panel directly to avoid injury and unintended damage.
First In, Last Out Rule
Direct damage is the area that took the first hit. Indirect damage is the surrounding distortion caused by that impact. Begin repairs with the indirect damage and finish with the direct damage.
Working in reverse order of the impact sequence allows the metal to return toward its original shape naturally. Starting with the direct damage risks stretching the metal and creating highs and lows that will be difficult to correct.
Work Hardening
Work hardening occurs when metal is repeatedly bent or shaped, increasing its stiffness and brittleness. Vehicle panels have some built-in work hardening from the factory due to body lines and curves. Collision damage adds to this, making reshaping more difficult and increasing the risk of cracking.
In modern repair work, avoid overworking work-hardened areas. Bring the metal close to its original shape, then use body filler for final contouring. Today’s premium fillers are flexible, adhere well, and can be applied up to ¼ inch thick after sanding.
Choosing the Right Repair Method
- Hammer and dolly – Ideal if there is access to both sides of the panel.
- Stud welder gun – Best for damage where back-side access is restricted.
- Dent pulling system with reusable electrode – Faster than a stud welder but more expensive.
- Paintless Dent Repair – Specialty PDR tools and glue tabs are becoming widely used in the industry.
Regardless of the method:
- Start with indirect damage.
- Pull lows while tapping highs.
- Avoid overheating or over-grinding thin panels.
Caution with Grinding
Grinding removes metal and produces heat. On thin panels, this can weaken or warp the surface. Keep the grinder moving, or use a DA sander for initial coating removal when preparing for a pull.
Discussion Questions
- Why can’t you file modern thin metal the same way you could with older cars?
- What’s the main health hazard associated with old-school lead work?
- Explain “first in, last out” in your own words.
- What is work hardening, and why does it matter in dent repair?
- Why might a T-handle be preferred over a slide hammer when using a stud welder gun?
Summary
Metal straightening requires knowledge of the material you are working with, an understanding of how it responds to shaping, and the ability to select the most effective repair method.
Older vehicles had thick steel panels that could be shaped extensively without losing strength, but required more effort to move. Modern vehicles use thinner panels that are easier to move but more vulnerable to damage from overworking, overheating, or over-grinding.
Key points to remember:
- Begin with indirect damage, finish with direct damage.
- Roll the metal into shape rather than forcing it.
- Avoid excessive grinding or heat buildup.
- Do not overwork work-hardened areas.
- Use the simplest, most efficient method possible for the situation.
With these principles, you can approach metal straightening with confidence and achieve quality, lasting repairs.
Metal Straightening Terms
BODY FILES: A file used to level highs and identify lows. This is useful on older model cars with thicker metal. Care must be taken if using a body file on newer thinner metal.
BODY HAMMER: A hammer used to straighten steel.
COLD SHRINKING: This is a cold method of shrinking metal using a shrinking hammer.
DA: Dual Action sander. Can be used for removing paint, feather edging, and final sanding. Does not work well for leveling body filler.
DIRECT DAMAGE: Damage that occurs to the area that is in direct contact with the damaging force of impact…Point of impact.
DOLLY: A tool used to straighten metal. Different sizes and shapes to fit the particular contour of the damage being straightened.
GRINDER: An air tool used to grind metal or remove coatings.
HEAT SHRINKING: The process of shrinking stretched metal back to it’s original shape.
INDIRECT DAMAGE: Any damage that occurs as a result of direct damage.
METAL FINISHING: The process of picking and filing the metal to shape without the need for filler to be used.
SLAPPING FILE: A tool used to perform final leveling of steel. Works best on older cars with thicker steel.
STUD WELDER GUN: A tool that welds a small pin to a metal surface to allow puling to remove dents.
WORK HARDENING: Process of metal being made harder by rolling or hammering the material. Can also be caused when metal is formed into parts.