

Lesson 5 – Body Filler – Below are the videos included in this lesson. Click on the video to watch.

Sandpaper Grit To Use
Filler Over Paint
Apply and Block Sand

3M Glaze Putty

Glaze Putty Over Primer

Body Lines
Hail Damage
Fiberglass Filler
-
Sandpaper Grit To Use
Thia Q&A video answers the question of what grit of sandpaper to use when sanding body filler and when removing paint. -
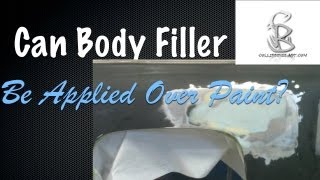
Filler Over Paint
This is a common question I have been asked many times. Whether you\'re a \"die hard must be to the metal fanatic\" or you\'re quick to \"apply bondo over anything kind of a guy\", you may want to read this or watch the video before your next body filler job. I was taught that body filler must be applied to bare metal. Therefore, all coatings must be ground or sanded to bare metal before applying body filler. However, I learned auto body repair during the lacquer/enamel days. Since then urethanes started being used on cars and some technicians started applying body filler over roughed up paint. However, if applied over a sanded paint surface, it must be an OEM substrate. This means a factory paint job that has never been repainted. Now we have waterborne paint to mix into the equation. The problem with this practice is the \"technician see technician do\". Someone notices that body filler is being applied over sanded paint, then they assume this is a standard practice and they start doing the same thing. Before you know it everyone is doing this the same way, but many of them do not have all of the facts. The fact the that paint surface must be an \"OEM finish\" is the missing link, which leads to filler being applied over all painted finishes. -
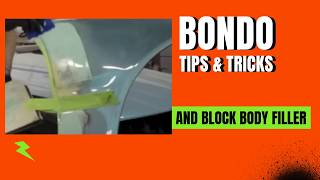
Apply and Block Sand
Auto body filler aka Bondo, polyester body filler, plastic filler, mud, etc. is used to fill small imperfections for auto body repair. A few common problems when using #bondo is over grinding the metal on thin metals which thins and weakens the metal. Another problem is, well making a mess by getting it in cracks, gaps, holes, and places you don\'t need body filler. This takes a lot of time during the shading process to sand and clean the filler out of those areas. This video is going to address these common problems and provide you a few more tips to help you apply and block sand more efficiently and get better results. -
3M Glaze Putty
-
Glaze Putty Over Primer
n this video I was asked if #putty can be applied on low areas after primer has already been applied. -
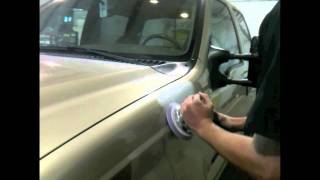
Body Lines
In this video I am going to demonstrate how to apply body filler and sand body filler on body lines of a car. -
Hail Damage
A demonstrate a method for repairing small hail damage. This method is not a PDR method, but when you plan to paint the surface. -
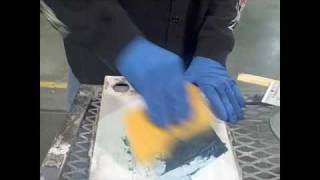
Fiberglass Filler
Video demonstration of how to apply Fiberglass Filler over a welded area on a car repair.
Cross Sanding Is King When It Comes To Block Sanding
Block Sanding Body Filler
The best advice that I can give you when sanding body filler is to cross sand when block sanding and do not over sand the filler. Those are the most two common mistakes I see. Cross sanding will help level the body filler. Over sanding will cause the edges to be undercut, which will show up through the paint after painting.
When sanding bigger repair areas start out by sanding with 36 grit sandpaper using a block and then switch to 80 grit sandpaper on a block to minimize the 36 grit scratches. Guide coat can be used at any time to help determine highs and lows. If there are pinholes or small imperfections, a coat of finish glaze can be applied and blocked with 150 grit. If it does not need finish glaze, finish the body filler by sanding with 150 grit. One more tip! The coarser the sandpaper, the better it levels. The smoother the sandpaper, the more it begins to polish and follow the contour. Therefore, be certain that the filler is level before switching to the smoother grits. Switching to a smooth grit too soon may result in a lumpy finish.
This is another common mistake I see. The objective of sanding body filler is to shape it, not to get it smooth. If the repair area does not feel completely level or if there are still lows, there is no need to be using 150 grit or finer on it. If you identify a low, go ahead and add more filler before trying to get the body filler smooth. Another thing I am not a fan of is using a DA (dual action) sander on body filler. Yes, it helps smooth the surface, but does not do a good job of leveling. A DA sander does a good job of feathering your paint edges after the body work has been completed. However, I am a believer that the DA should not touch your body filler.
If you want to use air tools, I’ll mention air files and 8 inch sanders that work well for sanding body filler. Just remember, the objective is to shape and level the filler, not to get it smooth as glass. This will be done in the final stages and with primer surfacer.
Blocks and Air Tools
Use a sanding block that fits the repair area. Longer blocks work best on large repairs. If the repair is small a shorter block can be used. It’s best to use a longer block when possible to prevent sanding lows in the body filler.
An air file can also be used to speed up the process. However, it’s best to use hand blocks until you become comfortable with the process. Air tools are faster and work great, but can do more bad than good if not performed correctly. Even when I use an air file, I usually finish the repair area by hand blocking.
On large flat areas, an 8 inch orbital sander can be used. This is also known as a mud hog. This works great on roofs, hoods, deck lids and other large flat areas. This tool sands body filler fast, but as with an air file, it can do more bad than good if not performed correctly.
I recommend using hand blocks until you can finish a repair with ease every time before using air tools to sand body filler. The same rules apply when blocking by hand or using air tools. 1) sand in a cross patters. 2) do not over sand each step. You want to leave enough body filler on the surface to make a smooth transition from the body filler to the metal when finishing the filler with 150 grit sandpaper.
Sanding Tips
You can speed up the sanding process by sanding the body filler before completely cured. This is called sanding the body filler in the green state. You will have to do this as the right time. If you try to sand the filler to early, the filler will peel off. If you wait too long, the filler will be fully hardened. You can feel of the body filler with your hand. When it does not feel soft or smear, you can probably use this method. Using a block with 36 grit sandpaper, lightly sand the body filler knocking the highs areas and the excess body filler down. Be careful not to sand too much off, just enough to knock the highs down. Then wait for it to harden before you finish sanding. You can also use a cheese grater for this step. However, a cheese grater can leave some nasty grooves to sand out if you are not careful. I would only use a cheese grater on an extremely large repair area. This tip can save much time and sanding.
Block Sanding Body Lines
You don’t want to build up a lot of body filler on your body lines, but you must make certain to keep them sharp. When block sanding, sand parallel up to each side of the body line. It’s kind of like sharpening a knife…one side at a time. By sanding parallel to the body line the line will become sharp. Don’t worry about it being sharper than the original body line. We will take care of that in minute. Once you are done shaping the filler and you are using your 150 grit to prepare for primer, then go ahead and lightly sand over the body line to shape it to its original shape. I always leave this for last.
If you are having problems keeping the body line straight or if you have multiple body lines, use masking tape to mask each side when sanding. For example, mask the top edge of the body line and block sand the bottom. Then mask the bottom to block sand the top. This will help you keep your body line straight and sharp until the final stages of block sanding are performed.
Determining If Body Filler Is Level
Periodically you need to check your progress by checking for highs and lows. Do not let your eyes fools you. What may look straight may tell a different story when you feel of it with your hand. To check you progress, feel of the repair area with the flat palm of your hand. Your fingers will not detect highs and lows, you must use your whole hand. This may take a little practice to get the hang of it. Some people claim they can feel highs and lows better is they use a rag. Place a rag on the repair area and use it between the repair area and your hand when feeling the panels. This helps take the feel of different texture from your hand. I just prefer my hand, but this is something you may want to experiment with to see what works best for you.
Another way to visually monitor your progress is to use guide coat. This come is a spray can or dry powder form to cover the repair area with a contrasting color. As the guide coat sands off, you will see if there are any low areas, as the guide coat will still be applied in the low areas. If guide coat is still in a spot, don’t try to dig in and sand it out; it’s doing its job. Always keep the block level when block sanding. If there is still guide coat, means you are going to need to add additional filler to that area. I normally use guide coat when I switch grits of sandpaper. It helps me determine when all of the coarser scratches have been sanded out. Don’t be afraid to use guide coat or think you don’t need to. Even the professions use this method and it works great.
One last think I want to mention when check you work is a straight edge. Use a straight edge to see if there are any lows. If it is a big area, a yard stick may work. For smaller areas a ruler may work fine. This method is becoming harder to use on newer cars because there is so many curves. It does not seem like anything is perfectly straight, but on the right repair, this works great.
Finishing Glaze
Finishing glaze does not have to be used, but it does have many benefits and can make the job much easier. Glaze is a thinner filler that spreads smoother and works well as your final coat (skim coat as mentioned above.) Glaze should not be applied too thick as it is designed to fill pinholes and minor scratches and imperfections. In addition to spreading smoother, glaze can also be applied over sanded body filler, sanded paint, sanded primer, or metal. This makes it excellent to apply over the entire repair area, including the sanded paint. The disadvantage of finish glaze is the cost. Glaze is more expensive that body filler.
Finishing Glaze on Hail Damage
Another advantage of using finish glaze is when repairing small hail dents. Since glaze can be applied over sanded paint, it is not necessary to remove all of the paint to the metal. Simply sand the dent area with 180 grit, clean, apply glaze, and block out. This is quicker and you do not have to remove any of the factory e-coat, which is the superior corrosion resistant coating that is on vehicles from the factory.
We’ll cover this and several other hail damage methods in more detail below.
5 METHODS FOR REPAIRING HAIL DAMAGE
We get hit every year with hail season, which leaves many cars needing hail damage repairs. There are several ways to repair the hail damage and we are going to discuss a few them in this article. The last method I am going to discuss is probably the most common method used to repair hail damage when not using Paintless Dent Repair.
1. R&R (Remove and Replace)
Many of the parts that have been hit heavy with hail damage may be replaced instead of being repaired. Parts that may be replaced are bolt-on parts that can be easily removed such as: hoods, fenders, and trunk lids, etc. It is usually less expensive to replace the parts than the labor it would cost to repair the parts. Of course, there is the exception 1 or 2 random hail dents in a panel. However, a car that has severe hail damage requires a lot of R&R (remove and replace).
2. Hail Damage Repairs – Traditional Repair
Another way to repair hail damage is by using body filler. This requires you to grind the repair area to metal, feather edge your paint edges, apply body filler and block sand the body filler. Then you will need to prime, block and paint. When using this method, care must be taken not to overheat the metal when grinding. You may even want to use a Dual Action sander to remove the paint coatings to help reduce the heat. I would not use anything finer than 80 grit to prepare the metal for filler. This will assure proper adhesion.
3. Hail Damage Repairs – Old School (Some dents and thinner metal are not a candidate for this repair method)
This method uses heat to raise the metal. You can use an oxyacetylene torch and heat the metal around the small dent in a spiral motion. Work from the outside towards the center of the dent. This will raise the metal. Then slightly tap the high area with a body hammer to relax the metal. Last, using a body file cross file the metal level and determine if the dent is gone. If there is not a dimple with paint in it, then the dent has been repaired. As the metal cools, the high area will flatten back out to a level flat surface. Then you can feather edge the paint, prime, block, and paint. I have used this method to remove a lot of hail damage. It is quick, fast, and eliminates the filler and block sanding filler steps. However, I caution you…this is not a good method to use on newer vehicles. The metal is too thin and overheating and warping the metal or filing too much metal off when using the body file is a few of the problems you may have. However, if you are restoring an older car, this method works like a champ.
4. Paintless Dent Repair
PDR is heavily used for hail damage. This is the process of getting behind the dent with tools and messaging the dent out without the need to paint the outside of the paint surface. This method is used on many of the parts that are not replaced, such as roofs, quarter panels, bedsides, etc. However, the tools are expensive and requires much practice to master PDR.
5. Hail Damage Repairs – Finish Glaze (for smaller hail – large hail may need to be pulled)
This is one of the most common methods used for small hail damage when not using a PDR method and is a method easy to learn with little practice.
This last method for repairing hail damage is the method that I wanted to highlight in this article. There are other methods, such as PDR that I may go into detail in another article. However, if you are not performing PDR and the dents are small enough to fill with finish glaze, then this method works great. I added a video below that will demonstrate this method. The advantage of using this method is you do not have to remove the paint coating down to the metal. You simply need to rough the paint with 180 grit or courser for the glaze putty to adhere properly. It is best not to sand through the clear coat when sanding the surface. You also want to assure the paint surface is in good condition when using this method.
The obvious advantage is the time it saves from grinding and feather edging. However, another benefit is the factory e-coat (corrosion protection) is not removed from the part being repaired. This will eliminate the need for primers to provide corrosion protection, as the e-coat is already providing optimal protection. I will list the steps, then you can watch a video demonstrating this method.