

Lesson 8 – Paint Prep – Below are the videos included in this lesson. Click on the video to watch.

Basic Steps To Prep a Car

Prep Car For Primer

Prep For Primer and Paint

What Sandpaper Grit To Use

Self Etch vs Epoxy

How To Mask For Primer

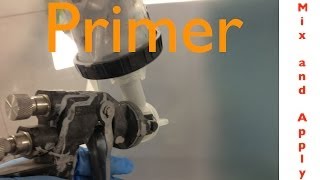
How To Mix Epoxy Primer

How To Spray Epoxy Primer

How To Spray Primer Surfacer
Mix and Spray Primer

Mistakes To Avoid When Priming

Block Sanding Primer

Waterborne Surfacer

Block Sanding Primer

Block Sand Primer

Wet Sanding

Dry Sand OEM Part
Spraying Primer Sealer

Does Sealer Have To Be Used

Mask Door Jambs

Foam Tape

Mask Windshield Moldings

Tube Tape

Mask To Paint
-
Basic Steps To Prep a Car
Video 1 - How To Prep Paint - This video tutorial covers how to prep paint including: cleaning, feather edging, primer, block sanding, final sanding, and everything else needed to properly prep a car before spraying. -
Prep Car For Primer
How to prep a car and get it ready for primer and paint are the steps we are taking in this Eastwood video series. We talk about applying glaze putty, feather edging, final sanding and sanding jambs. -
Prep For Primer and Paint
Video 2 - In this video I am prepping the car finish before priming. -
What Sandpaper Grit To Use
-
Self Etch vs Epoxy
Bare metal must have epoxy primer, self etching primer, or DTM Direct to metal primer. Primer surfacer should not be applied directly to bare metal. In this video, I will discuss the three primers and let you decide which one you prefer. -
How To Mask For Primer
Video 3 - In this video we are going to demonstrate how to mask a car that has been repaired for primer. In other training videos, we\'ve repaired the dent, applied and block sanded body filler and finishing glaze. Now we are ready to mask so we can prime. -
How To Mix Epoxy Primer
Video 4 - Demonstrating How To Mix Epoxy primer. -
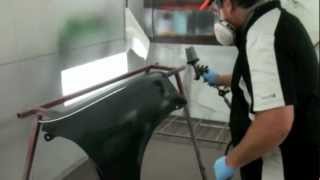
How To Spray Epoxy Primer
Video 5 - In this video, we are applying epoxy to the area that has been repaired. Epoxy is the superior primer for adhesion and corrosion protection. This is why I like to apply one to two coats before applying primer surfacer (for filling.) If the repair did not require all coating to be removed, epoxy may not be needed. For example, using 180 to rough up an area to apply finish glaze putty. Like a small hail dent. Other procedures may include applying self etching primer to the metal to acheive the desired adhesion for other coating. After applying the epoxy, we\'ll apply two coats of primer surfacer. What types of primers do you use on repair areas? Self etching, epoxy, or other methods? -
How To Spray Primer Surfacer
Video 6 - -
Mix and Spray Primer
-
Mistakes To Avoid When Priming
-
Block Sanding Primer
DIY tips how to block sand a car that has been repaired and sprayed with 2K high build primer surfacer. In this video I will go over a few do\'s and don\'ts when block sanding. This is one of the steps that can make a car look show quality or not. You\'d be surprised how proper block sanding techniques make in the paint job results. -
Waterborne Surfacer
-
Block Sanding Primer
Video 7 - In this video we are going to learn some tips for block sanding when using Motor Guard\'s new A -- 3 blocking kit.. The new blocking kit by motor guard works well for blocking all types of surfaces. The kit provides different blocks rigid and flexible for the different shapes of contours and surfaces that you will be sanding on. When blocking it\'s important to cross sand the surface, as it will provide a level surface and help feather edge all filler edges to a smooth transition from filler to the metal. Another thing you want to do when block sanding it to use long blocking strokes. This will prevent a choppy wavy appearance that may be seen after painting the surface. This kit also comes with a new flexible pad that works real well around corners by allowing the block to wrap completely around the corner to properly sand the repair area. If you have not tried this blocking kit I encourage you to give it a try. I think that you will really like the blocks and how it fits the different contours on a vehicle body. -
Block Sand Primer
-
Wet Sanding
Video 8 - In this video I am demonstrating how to final sand a car using a hand sanding technique. This method work well to prep the surface to paint a car. -
Dry Sand OEM Part
Video 9 - Demonstrates how to dry sand OEM part. -
Spraying Primer Sealer
Primer Sealer, In this video we\'ll show the basics steps for spraying primer sealer to an aftermarket fender. The fender has already been prepped. We talk about wiping with wax and grease remover, using self etch primer on bare metal, using a tack cloth, and spraying primer sealer. -
Does Sealer Have To Be Used
-
Mask Door Jambs
-
Foam Tape
-
Mask Windshield Moldings
-
Tube Tape
FREE access to training at http://CollisionBlast.com - Tube tape is a new product used to mask door, trunk, and deck lid jambs. There are many other ways this tape can be used as well. For more information about tube tape visit http://tubetape.works Use code word Donnie for 10% off. Share this video https://youtu.be/VW5LO6Jj5Bc Also be sure to subscribe to this YouTube to stay tuned with upcoming videos every Tuesday at http://www.youtube.com/subscription_c... PLAYLISTS Donnie and Jess - https://youtu.be/RO0_SKodbUk?list=PL4... Eastwood Video Series - https://youtu.be/uPgIOHkr0oE?list=PL4... Plastic Repair - https://youtu.be/XrJ7t6KwdNs?list=PL4... Rust Patch - https://youtu.be/LwTBmRMRkbg?list=PLF... Spraying Matte Colors - https://youtu.be/Xc6f1tTam0w?list=PL2... Spray Gun Adjustment - https://youtu.be/AY8_2qx4htw?list=PL9... Join me on Twitter at http://Twitter.com/DonnieSmith7 Join our Facebook page at http://Facebook.com/CollisionBlast For free access to DIY auto body and paint training, please subscribe to Collision Blast at http://CollisionBlast.com Thanks for watching the my videos, and be a resources by sharing the links to the videos with your friends on Facebook and Twitter. -
Mask To Paint
Lesson 8 – Paint Prep
It’s All About Prep
“It’s better to look ahead and prepare than to look back and regret.” ~Jackie Joyner Kersee
In this lesson, we will cover how to prep a car properly, which is where most of the hard work lies, but perhaps the most critical steps in producing a professional-quality paint job.
Paint Prep is one of the most important things you need to do when painting a car is to prep it properly. Without proper preparation, the rest is useless. It’s like an iceberg; you see about 10% to 20% of it sticking out of the water. However, what you don’t see is the other 80% to 90% that is underwater. Well, in painting, we see the paint, the finished product. However, over 80% of that awesome paint job is due to what you can’t see: the hours of prep. It is a common mistake to rush through the prep step and then try your hardest to paint like a pro. However, that does not work. It’s just like trying your hardest on a test for which you did not study. No matter how hard you try on test day, you’re not going to do well without learning the information first. In this book, we are going to focus on cleaning. That must be important, as I keep bringing it up. I hope to have this etched into your mind by the end of this e-book. We’re also going to focus on featheredging, block sanding, final sanding, and, once again, cleaning before putting it in the paint booth. **The Professional Paint Job Is Not About A Fancy Paint Gun** All the awesome auto paint colors are what make cars look great and attract interest from car enthusiasts around the world. Ed Roth broke the mold in the 1960s by altering the stock look with modified body parts, pinstripes, and custom paint. Since then, people have begun customizing cars in every way imaginable. This has created a lot of interest in custom painting.
However, the same rule that applied then still applies today: it does not start with the paint gun; it begins with the wash mitt. As a collision repair instructor, I see the same thing many times when it comes to painting a car. Students tend to rush through the preparation stage and then expect superior end results. Painting is an art, and it does take practice. Travel speed, distance, spray pattern overlap, and technique are necessary to learn to produce professional results. Still, more attention needs to be concentrated on preparing the car for paint than on the spraying itself. Here is an example that I give my students to illustrate this point. Let’s say that we did not properly wash and clean the vehicle.
Then we sanded the car, but fast and sloppy. Lastly, we slapped on a bit of tape and paper to mask it off. If Chip Foose (who is well known for his painting abilities) came in and painted the car, how would it turn out? It would likely have dirt in it because we rushed through the preparation process. It probably has fish eyes in the paint and has paint overspray on the glass and moldings, where paint seeped through. Overall, it would look horrible. The paint would probably peel later due to a loss of adhesion. All of Foose’s abilities would be useless if the car were not prepped correctly. This is similar to spending $200,000 building a nice home on top of a bad foundation. Even if you use the best materials to make the house, it will fall apart if the foundation is not correct. Therefore, ensuring that you have a good foundation is essential before building a home, just like having a properly prepped car before painting it. I know that I stress this point, but it is often overlooked. So get your wash mitt out and spend extra time washing the car before starting repairs. Then take your time and ensure that all the surfaces to be painted are sanded so the top coating will properly adhere.
Always re-clean the area to remove all dirt. Dirt in crevices may blow out with the air pressure of the paint gun and get into the paint job if you do not blow the car off thoroughly before masking it off. Use good-quality paper and masking tape to protect glass and any other items you don’t want painted. Wipe the surface with quality wax and grease remover to remove all traces of contaminants, waxes, silicones, etc. Use a tack rag to remove final dirt and lint before applying the paint coatings. Now you can start spraying the car. Spend 80% of your time and efforts becoming a good prepper and 20% of your time perfecting your spraying techniques. This is what it takes to produce a professional paint job that will look great and turn heads.
**Featheredging** After the bodywork has been completed and finished with 150-grit sandpaper, many shops send it from the body shop to the paint shop. However, there are many variations in how shop owners like to divide this process; traditionally, after being blocked with 150, it’s sent to the painter. We finish our bodywork with 150-grit. However, this may vary from shop to shop. Depending on preference, the bodywork may be finished with anywhere from 150 to 220 grit sandpaper before applying primer. The first thing a painter needs to do before priming and painting is to prep the repair area. The block left 150 grit scratches on the filler and the surrounding area.
There may also be grinding marks and edges where the paint coatings meet the metal. To smooth the paint edges and other scratches, you will need to feather-edge. This is done using a dual-action sander with 220-grit sandpaper. This is the only exception when you can tilt the DA on its edge. This will help you make the transition from paint to metal easier. You want to bevel each layer of paint or primer at least 1/4 inch so it will look like you have rings around your repair area. Each ring should vary from 1/4″ to more. If this is not done correctly, the rings may show up after the car has been painted. **Sanding** Now that the featheredging is completed, we can sand everything else that is going to be painted. But why do we sand? Many people think it’s to provide a smooth surface, but it’s the opposite. We are roughing up the surface so the paint will stick. Think about painting a piece of glass; it is easy to imagine the paint peeling off because the glass is so smooth. The end result is that sanding provides adhesion to prevent peeling.
**Mechanical Adhesion** Primer and/or paint will not adhere to an unsanded panel. The surface must be roughened up, which will produce mechanical adhesion. Not properly preparing the surface will result in a loss of adhesion and peeling. Most paint starts peeling from an edge, so be sure to pay special attention to the edges. **When Painting the Entire Panel** Before you start priming and masking, prepare the entire panel for paint or clear coat. First, sand several inches around the repair area with 320-grit on a DA sander (this is the feather edge area we just discussed). If the entire panel is going to be painted, go ahead and sand the whole panel with 500-grit on a DA sander (you can also hand-sand). Make sure that when final sanding with a DA, you use the interface pad. Once the panel is sanded with a DA sander or by hand with 400 to 500 grit, use a red scuff pad to scuff the edges and all other areas that are hard to reach with a DA sander. Do not rush this step, as edges are very important; if paint or primer is going to peel, it usually starts from an edge. Once you have completely sanded the panel, clean the surface with compressed air and wipe the panel with wax and grease remover. Clean the surrounding areas where tape may be applied to ensure that the tape will adhere properly. **Blending Within a Panel** What if you’re blending within a panel? Blending within a panel involves painting only the repair area and not the entire panel.
This still requires sanding the entire panel, as the whole area will need to be clear-coated. This uses the same methods, but you must switch to finer-grit sandpapers. I want to give you a heads-up on how to do this, so don’t get stressed about blending; we’ll cover that later. To repair a blend within a panel for primer, sand past the repair area with 320 grit using a DA with an interface pad. Sand several inches past your repair area. Then switch to 500 grit DA using the interface pad and sand an additional 2-4 inches past the repair area. Now switch to 800-grit sandpaper using a DA with an interface pad to sand the remaining panel surface. Once the entire panel is sanded, use a gray—make sure it is gray, not red—scuff pad to scuff the edges and hard-to-reach areas of the panel. Now you’re ready to clean the surface as explained above. Blow with compressed air and wipe with wax and grease remover.
Eliminate Peeling** By sanding the entire panel before priming, you will ensure that all primer adheres properly. If your primer sprays a little further than you intended, you will be safe, as the panel has already been sanded. I have seen primer applied over unsanded paint before. If left this way, it can cause the primer and any subsequent coatings (paint and clear coat) to peel off with it. That is something you do not want to happen. Now that the panel is repaired and prepped, you can get it ready to mask and prime.
Masking
The repair area has been repaired and finish sanded with 150 grit sandpaper, featheredged and the panel prepped for primer. Now it is time to get some primer on the repair area.
Masking Before Priming – No Hard Edges
Once the body filler or glaze putty is block sanded with 150 grit and featheredged with 220 and the panel is final sanded and prepped for paint, now we are ready for primer. The first thing that you need to do is mask the adjacent panels and areas that you do not want to get primer to get on. This sounds simple enough, but many mistakes are made doing this. One of the common mistakes is making hard edges with the primer. This is done by masking a square around the damaged area. During the priming process, primer is sprayed against the tape edge causing a hard edge. This creates additional work trying to feather the primer edge smooth.
Take Time To Save Time
The purpose of masking is to prevent primer overspray from getting on the areas that it is not intended to be. With the types of primers used today, it is necessary to take all measures to make certain that overspray does not get onto the unintended surfaces. First, the two-part epoxy and urethane primers are very difficult to remove. Back when we used to use lacquer primer, all the overspray could be cleaned with a little thinner on a rag. However, today’s catalyzed primers do not wipe off that easily. The second reason is that these primers carry a long distance. Again, with the old lacquer primer, if it traveled more than 12 inches it would be dust by the time it landed on the surface. However, the primers of today can travel the full length of the vehicle and still stick to the painted surface, glass, moldings, etc. With this said, more care should be taken to properly mask a vehicle for primer. The extra time spent properly masking a repair area for primer will save you much time rubbing, sanding and buffing to remove unnecessary overspray.
No More, No Less
You need to be certain to primer everything that needs to be primed. That is any metal, filler or scratches made by the 150 – 220 grit sanding. However, there is no need to prime anything else. For example, if you have a 6″ diameter repair area, there is no need to primer the entire or even half of the panel. This is something that I have noticed some students tend to do. You only need to prime the repaired area. The spray will slightly exceed the repair area, but try to keep it small as possible. Another thing to remember is to keep primer out of areas that it does not need to be. For example, molding edges and jambs. There is nothing sloppier than to open a car door after it has been completed and see primer overspray, or see primer on the edge of a molding. The reason this happens is because many times when masking for primer, the person masking thinks, well, this is just for priming and rushes through the masking process. Then when masking to paint, more care and attention to detail is taken. You may not have paint on the unwanted areas, but you have primer, which looks even worse than the paint would have. So be certain to take as much pride in masking the vehicle for priming as you do for getting it ready for paint.
When masking off jambs, mask to the edge of the panel. There is no need to allow any primer to wrap into the jamb area. Therefore the edge of your tape should be at the edge of the panel to prevent overspray from getting into the jamb area. Now when we mask for painting, we will mask back from the edge slightly to allow a little overspray to spray onto the jamb. This eliminates noticeable lines, but for now, mask right on the edge of the panel.
Nothing Hard About It – How To Eliminate Hard Edges
The only hard edges you should have when priming are the jamb edges. You should try to avoid all other edges if possible. Hard edges are a definite “no-no.” Let’s take the same 6 inch diameter repair area and mask an 8 inch square around it. You only get primer where you want it, but now you have hard edges to featheredge out. Let’s look at another approach to mask the 6 inch repair area. Mask all adjacent panels and anything near the repair area that you do not want primer on. Then you can go out 12″ and back mask if needed. Back masking is the process of masking something and flipping the paper over, creating a smoother edge. When correct, the paper will now have the bottom side of the paper facing up. For instance, if the top of the paper is blue and the bottom of the paper is white, now the white will be showing. Now that we have it back masked, we still do not need to spray primer all the way to the paper. Try to avoid that if possible. Ideally, try not to have any edges at all. The overspray makes an easy area to sand with as little effort as possible.
If In Doubt…Cover It
Overspray is something that you do not want to get on unwanted surfaces. So must the entire car be covered? The answer is, if in doubt cover it. It only takes a few minutes to unroll plastic and cover the car. If we take the 6 inch diameter repair area and mask around it using 18 inch paper and set the spray gun using low pressure, you may be all right. However, just a little overspray can cause you hours of cleanup and grief. This is something that you need to get a feel for, but if in doubt, bag the car with plastic. If you’re priming the entire panel, be certain to cover the entire car with plastic. A little time spent in the front end will save much time in the back end.
Tell-Tale Signs
Masking is perceived by amateurs as being unskilled and unimportant. However, I think you will agree that the best looking paint job can look horrible if you see paint and/or primer on moldings or in jambs. The idea is to make invisible repairs. Improper masking is the easiest and fastest way to determine that a vehicle has been repainted.
We’re masked and ready to prime. So let’s discuss primers.
Priming the Repair Area – Why Prime and What Types of Primer to Use
What Is Primer?
According to Wikipedia, “primer is a preparatory coating put on materials before painting. Priming ensures better adhesion of paint to the surface, increases paint durability, and provides additional protection for the material being painted. The term primer comes from the Latin word primus meaning first because it precedes the other coatings.”
Adhesion Is Key, But There is More
Adhesion is a key reason to use primer. However, in automotive primers, it also provides corrosion protection too. Therefore, a primer that provides both good adhesion and corrosion protection is needed. I recommend using an epoxy primer to provide these needs. Most epoxies can be applied on most types of substrates and is compatible with most top coats. Some technicians prefer etch primer to apply on bare metal to provide good adhesion. Etch primer has a high acid content that bites into the metal, but does not have the corrosion protection like epoxy does. I will talk about when etching primer in an aerosol can come in handy in a little bit.
Mixing Epoxy – It’s Like The First Day Of Class
We use PPG and Shopline (a line of PPG) products, but other brands may have similar directions. Be sure to read the manufacturer’s procedure page to determine what they recommend. However, many epoxies have an induction time. This is an amount of time the two chemicals need to be mixed together before using. It’s like going to a new town or your first day of class. You’re quiet and nervous until you get to know the people around you. Once you get to know everyone, you feel much more comfortable. After mixing the catalyst with the epoxy primer, the chemical needs a little time to accept each other as well. It may only be 15 to 20 minutes, but be sure to read the procedure page for the specific product to know for sure.
Spraying The Primer
According to the new 6H rule, all primer needs to be sprayed inside an approved spray area if spraying more than 3 oz. If you’re priming a small area, you may consider lowering the fluid, narrowing the fan pattern and turning the air pressure down. This will allow you to spray a smaller area with less overspray. Be certain to cover all areas that were sanded with 220 grit or coarser. Apply two medium wet coats to the repair area. Remember not to spray primer all the way to your masking paper. Keeping the primer area as small as possible will provide the easiest repair.
Additional Note: Epoxy primer is my preferred primer for superior epoxy primer. However some technicians prefer self etch primer. This is a single stage primer that contains acid, which etches to the metal. Either primer, epoxy or self etch primer can be used on bare metal.
Flash Time – Don’t Even Think About Passing Go
Flash time is the amount of time that is needed between coats. Rushing the flash time throughout the car refinish process is something I see often, which results in many different problems. Each coat must have time to flash to allow all the solvents to evaporate. If you apply another coat before the primer has flashed off, it will trap the solvent and cause a number of problems. Loss of adhesion and solvent popping are a few of the most common problems. You must also realize that the time given in the procedure page is probably for a temperature of around 70 degrees. If it is 50 degrees in the shop at the time you spray the primer, then flash time must be extended. One coat at a time. No double coats or rushing the flash times. You’ve spent a lot of time on the repair; don’t blow it now.
Primer Surfacer – The Final Fill
The Purpose
Primer surfacer is the final step or your final chance to produce the perfect surface with the correct texture before painting. Scratches and small imperfections can be repaired with this fill primer. Filling is the main purpose of this type of primer: you can think of it as final filler. We finished the body filler or glazing putty with 150 grit, featheredged, cleaned the surface, masked, applied two coats of epoxy, and now we’re ready to apply primer surfacer.
Flash and Window Times
After the epoxy has been applied, you can now apply the primer surfacer. Be certain to allow the epoxy to flash the recommended amount of time. The manufacturer’s procedure page or technical data sheet will tell you how long of a flash time needed before top coating. With PPG you need to let it flash at least 30 minutes. However, you also have a window. This is the time that you have to apply another coat without sanding. Most epoxies have a long window time. The epoxy that I am familiar with has a 72 hour window. If you wait more than 72 hours to apply the primer surfacer, it must be lightly scuffed to ensure proper adhesion.
Adhesion – Mechanical vs. Chemical
I keep talking about adhesion. I would like to expand on this and tell you why this is important. Adhesion is just another word for stick-to. For instance, in upcoming lessons we will refer to glue as adhesives. To prevent body filler, primer, paint, etc., from peeling it needs to adhere to the surface. There are two ways to provide adhesion. The first is a mechanical adhesion. This is why we sand the surface before we apply the coating. That is why it is so important to sand the edges extremely well. If a panel is going to peel, chances are it will start peeling from an edge. The second type of adhesion is chemical adhesion. This is when there is still a chemical bond with two products. For example, the 72 hour window with the epoxy primer is the time the surface will produce the chemical bond. After that, the chemical bond will no longer adhere. That is why after the 72 hour window, the surface will need to be re-sanded. Since we no longer have the chemical adhesion, we now have the mechanical adhesion to take its place.
Applying The Primer Surfacer
All right, I took a little rabbit trail, but I wanted to make sure that you understand flash times, window times and the types of adhesion. Now, let’s talk about applying the primer surfacer. After the epoxy has flashed off the recommended amount of time, apply your first coat of primer surfacer. Only apply enough to cover the epoxy primer. Check the procedure page to determine the recommended number of coats needed to achieve the desired thickness or mils. Normally, two to three coats are sufficient. I usually apply two wet coats allowing each coat to flash off. Apply each additional coat a few inches past the first coat.
What’s Next?
We’ve applied epoxy primer to provide additional adhesion and corrosion protection. Then we applied primer surfacer to fill the minor scratches and small imperfections. Now we’re ready to apply guide coat and block sand the primer.
Block Sanding Primer
The car has already been prepped for priming, masked and sprayed. Now we need to allow the primer surfacer to dry. First let me clear something up so there is no confusion. Some technicians call primer surfacer, primer filler. This is because it is designed to fill small scratches and other imperfections. However, it is the same thing. Another thing to remember about this type of primer is that it must be block sanded.
What You See Is What You Get
Block sanding is performed to level the surface. All lows, scratches or any other minor imperfections must be completely removed. If you leave a small chip or scratch it will show up in the paint job. In fact, sometimes the glossy clear coat will magnify the imperfection. That is why I say in the title, what you see is what you get. If you can see it in the primer, you will definitely see it in the paint.
Some Steps Cannot Be Rushed
You’re almost done, it’s primed, now all that you have to do is block it and get it in the booth to paint. It’s tempting to rush the drying time, but not allowing the primer surfacer to fully dry is a common mistake made by students. This can cause problems for you. Primer may feel dry to the touch, but it may still have solvents evaporating. As solvents evaporate, the primer shrinks. Therefore if you rush the sanding process, you may have it perfectly sanded. However, after the solvents evaporate the primer shrinks and may actually suck up into the scratches that it was sprayed over. This is called sand scratch swelling. And I have even seen it happen after the car has been painted. To eliminate this be sure to wait the recommended dry time according to the primer p-pages. Every product and paint company is going to be different so read the p-page for the specific primer that you are using.
Is Bigger Better?
This is true in this case. The bigger the block the better results you will get. Use a block that fits the panel contour and use one that is big, but fits the area. You can think of blocking like leveling. If you were going to level the ground, would you want to use a tractor with a narrow blade that covered about 4 ft. or would you use a blade that covered 10 ft.? Well, of course you would want to use the biggest one, but if you were only leveling a 4 ft. wide strip for a sidewalk, the smaller blade would do a better job. The 10 ft. blade may tear someone’s yard up. Blocking primer is the same way: bigger is better, but make sure it is a fit for the job. The last thing you want to do is hit an adjacent panel or molding on the vehicle.
Cross Sand
Cross sanding is sanding in one direction, then cross sand going the other direction. This will produce a level surface. You will also want to use long sanding strokes. Little short strokes may make your finished product to look choppy. Back to the tractor leveling the ground. Would you blade little short passes back up and additional short passes or would you blade with long and even passes across the entire area being leveled? I have never done this kind of work, but I imagine that I would want to use long even passes to level the grade. Therefore, cross sand using long, even passes.
Work Smarter, Not Harder
Use tools and methods to help make the job easier for you. One of the methods is to use aguide coat. This is a spray or dry coating that you can apply to the surface that has a contrasting color. This will help you identify the lows, scratches, etc. The goal is to sand all the guide coat off without sanding through to the filler or metal. However, DO NOT use the edge of the block or try to sand the guide coat by hand to remove it. If it is not coming off when blocking, then it is doing its job. It is identifying a problem. Now you can fix the problem.
Remember this is the step that counts. This is where you need to have a flawless repair. Whatever is not taken care of during the blocking process will show up in the finished project. So make sure what you see is that the repair is ready for paint.
Final Sanding
We took a long time to get here, but professional bodywork takes time. This is the one time we can say, if there is no body work needed and the paint on the vehicle is in good condition (we’ll talk about what good condition is later) then skip all the other steps and advance to this one. Well, I’m sure that you know that we can’t skip every step…remember proper cleaning. It’s going to stay with you, I promise. Seriously, many times people just want to know how to sand a paint and car…well here it is.
One Dime Equals Two Nickels
I have mentioned earlier that there are many ways to get from “A” to “B.” Many correct ways, but there are always ways you want to avoid, too. The secret is knowing what you can get away with and what you can’t. The end result is what matters, but never sacrifice quality work for speed. I am going to give you several answers for this topic. I do not want to confuse you though. Just pick which one fits you and go with it. However, a word from experience: If you go to work for a shop, they may have an exact system of how they want things done. Never go in there as a know-it-all. That will be the fastest way to make enemies. Once they see that you will work hard and do things the way they want them done, they may listen to an idea that you have. However, prove your work ethics first, as no one likes someone new trying to prove how much you know…they don’t care. All right, off a little. Work ethics is something I focus on with my students. Very important. Back to final sanding.
Wet Sanding
Wet sanding was the preferred method by many and may still be the favored method for some professionals. Wet sanding was the way I was taught and is actually my preferred method. However, with the vacuum systems many shops have, dry sanding systems have became popular, considering environmental concerns of where the waste water drains. It may be required in your state that the water be captured and hauled off by truck to a waste plant. This may be something that you want to check into before determining a method.
Sizing and Folding
This is how I sanded many cars. If you purchase 3M 400-500 grit wet/dry (black) sandpaper, it normally comes in a 9×11 sheet. If you take the sheet and fold it long ways and tear it, it will give you two pieces of sandpaper. Now take the piece and fold it into thirds. This will make you a nice size to sand with. Be certain to fold the creases tight or the paper will move around on you when sanding. Now you’re ready to start sanding.
Sand One Section At A Time
This is a big tip, which I learned on my own. I used to sand cars with the entire car in my mind the whole time. The job would grow and grow, and grow. The project would become so big in my head; it would actually take me forever to get it sanded. Then I started imagining sections. The hood may be four sections, the fenders would consist of upper and lower and so forth. I would imagine these sections and tell myself that I am not sanding the whole car, I’m just sanding that one small section. Then when I was done with that section, I would move to the next section. Now that was the only section that I was working on. This may sound silly, but it really works. It helps you with a couple of things. First, it breaks the job down into small manageable tasks, rather than one huge overwhelming task. Second, it allows you to thoroughly sand the car without having to go back over it two or three times due to glossy spots. For instance, do not move to the next section until the section you’re working on is completely finished. If you don’t use this method, you may find yourself sanding a little here and a little there, which leads to the missed areas. Lastly, you know exactly where you are at. If you go to lunch or take a break, you can come back and pick back up exactly where you left off without even thinking about it. So one section at one time.
The Process
Now, I will share with you a few tips and things to avoid when wet sanding. Remember, if paint is going to peel, it’s going to start from an edge many times. This is why we need to sand the edges extremely well. It is a common mistake to see a student sand the heck out of the easy-to-get areas and do a fast and sloppy job on the hard-to-get-to areas and edges. It should be the exact opposite. Well, we don’t want anything fast and sloppy, but we do need to focus on the edges.
With this in mind, to start, I sand the edges of the section that I’m sanding first. I make sure to get in the crevices, edges, and hard-to-get areas. I also follow up with a scuff pad, but we’ll cover that later. When I get my edges sanded, I switch to a new piece of sandpaper so that it is nice and smooth to sand the remaining portion of the section. Once done, I move to the next section and do the same thing. Use my edge piece for edges and my smooth piece for the flat areas. Easy enough, but are few things that you want to avoid. Always do the edges first. If you do them last you may leave marks in the paint from the sandpaper. Also, use your hand as a block. Do not use your fingers to sand. Use the flat part of your palm creating a block. Sanding with your fingertips may leave marks that show up in the finished paint job. Some professionals use hand pads to eliminate this problem. They work well for the flat areas. One last thing before we move on. When sanding, sand in all directions. You can still use your cross sanding method. However, be sure to make long smooth sanding passes. Short scrubbing style may result in a choppy finish.
Complete Paint Job Made Easy
In a nutshell, wet sand the entire car (if complete paint job) with 400-500 grit sandpaper. Break the job into smaller tasks by imagining sections on each panel. Do not move to the next area until completely done with the area you are working on. Sand the edges first followed by sanding the remaining part of the section. This exact process is how I sanded many cars. Now you’re ready to scuff wash, mask and paint.
Dry Sanding
I am going to pause in the process for just a minute as the remaining steps are going to be the same. As I mentioned, many shops prefer to dry sand, rather than wet sanding. Similar steps can be used, but a different sandpaper is used. One tip when dry sanding is to have a piece of scuff pad and use it to frequently rub it against your sandpaper to clean the sanding dust off. This will also keep the sandpaper from clogging and scratching the paint surface. You can also use a dual action sander with a 6 inch sanding pad. When using a dual action sander when final sanding, always use the interface pad. Below there is a video demonstrating how to final sand a new OEM part. The same process could be used for a complete paint job if needed. This method is much faster than sanding by hand, but requires more skill to control the dual action sander without scratching or marring the surface. Regarding the sanding method, now we can continue the prepping process.
Scuff Wash
I don’t know if scuff washing is a textbook term or not, but it’s a system that I developed to assure the vehicle was clean and sanded, and all silicone and other contaminants were removed.
The car has been sanded with 400 to 500 grit sandpaper. Now we’re ready to wash it and get it ready to mask. So scuff washing is using a red scuff pad (when painting the entire car) and Comet or Ajax, and water. Sprinkle a little Ajax on the wet scuff pad (Scotch-Brite) and scrub the vehicle. This is your chance to scuff all the hard-to-get areas and edges extra well. Be sure to get your edges well, but be very careful not to hit molding, glass, chrome or adjacent panels that are not going to be refinished. Nothing looks worse than an awesome looking paint job with sanded and scuffed moldings. Now, this is just an extra step that I take, but you can just dry scuff the entire car if you would rather. I just think that the cleanser helps kill any silicone and contaminants. If you do use the water and cleanser, extra time washing and rinsing the car is needed to make certain that all the residue is completely removed.
WASH
Now the car is scuff washed or dry scuffed, back to the soap and water. Thoroughly wash the car. You also need to keep in mind all the dirt in all the crevices that may end up in the finished paint job if not cleaned properly. So start out by washing the jambs in the engine compartment, door jambs and trunk jambs. Don’t forget to wash wheel well areas. Use a different wash mitt and wash bucket when washing jambs. You do not want the dirty and greasy mix that comes from jambs to get smeared into the wash job of the outside of the car. Once all jambs are washed, I normally shut all the doors, hood and trunk lid, then rinse the entire car off really well. If you have a pressure washer, that works even better.
Now wash the outside of the car from top to bottom and rinse or pressure wash well. Now that we washed the car really well, all the residue from the cleanser and/or sanding dust is off the surface and the car is clean. I usually allow the car to air dry at this point. Blowing with compressed air will speed the drying process, if you need to speed up the process.
THE LAST STEP
I normally do one more step before masking. That is to blow the car off with compressed air. I concentrate on panel gaps, wheel opening, molding, or anywhere else that dirt may be hiding. Now we are ready to mask the car and finally get some paint on it.
MASKING FOR PAINT
I have already discussed masking for primer. Masking for paint follows the same concept, but there are a few things that differ. Remember when I said to mask to the edge when priming? That is because you do not want primer where it does not need to be. Well, with painting, you want to mask about 1/4” inset into the jambs. For instance, you want a little of the paint overspray to lap over the jambs. If you mask to the edges, you will see a hard edge that is very noticeable.
JAMBS FIRST
While I am discussing masking jambs, you also want to do your jambs first. You have to think about it. If you mask the outside of a door first, it may be difficult to open the door without ruining the masking job.
JAMB MASKING TECHNIQUES
There are several different methods to achieve this. One method is to mask 1/4 inch back from the jamb edge. You can use 3/4 inch tape and 3 inch masking paper. However, straight masking with this method will leave a hard edge from the paint.
BACK MASKING
This is a reverse mask technique that makes a softer edge. Basically, you simply fold the paper over and allow the tape to be slightly pulled, creating a soft edge. Check out the video and back masking will make sense.
APERTURE TAPE
This is a foam that makes a seal between the two jamb areas. This method works extremely well and is a fairly simple and quick method.
TRANSITION TAPE
If you want an absolutely invisible repair, then consider using the transitional tape. This tape is amazing. It has adhesive in the middle of the tape, which creates smooth edge. May or may not be recommended by paint manufacturer, but you can literally apply this tape on a body line and not be able to see the clear coat line. Be sure to watch included videos to grasp the full understanding of these masking techniques.
DO NOT DRAW OUTSIDE OF THE LINES
Remember in kindergarten how the teacher had us outline everything in black? They would tell us to keep it in the lines. Well, masking is a similar process. Now that the jambs are masked and the doors are shut, you can start on the outside of the car. First you need to outline everything with 3/4 inch masking tape. So for example, mask around the doors glass, windshield, back glass, or anything else that you are masking off. One piece of advice when outlining your project: It’s better to have a little paint on the molding than to have the masking tape on the part being painted. You want a clean job, but it’s better to see a trace of paint on a molding than an unpainted chunk on the part. Also, if the paint and clear coat coatings bridge, that is the coatings completely cover the tape and part without a line left behind, you will probably pull a chunk of paint and clear off when unmasking. Besides, you can always clean a little paint off a molding, but a chunk of paint missing is going to require a repaint.
Tips For Masking Windshields and Glass
There are several ways to mask a windshield, which we will discuss. This is a critical area and has caused a lot of problems due to the molding setting close too the paint surface. One of the problem this causes is when the clearcoat is applied. Clear coat requires heavy mills and can bridge over from the painted surface to the tape edge. This means that the clear makes a complete seal filling in the gap. After the clear is dry and the masking tape is removed, this will make a sharp jagged edge. Even worse, if the tape does not pull off straight, it may take a chunk of clear coat off the painted surface, which will result in respraying the panel. The good news, is there are several ways to avoid this problem.
Let’s start off discussing techniques to mask the glass. First, we want to avoid creases in the paper. Creases in the paper creates a place for dust and dry overspray to land. When the pressure from the spray gun hits it from the next coat, it may blow the dust out of the crease and into the paint job. This will require extra buffing, which is extra time spent on the job that could be eliminated.
To create a creaseless masking job, do not bend the masking paper when masking. Easier said than done, but let me go through the steps with you. First, use ¾ masking tape to outline the glass molding. Then using 18 inch masking paper with ¾ inch tape to cover the remaining portion of the glass. It is best to tear of sheets off the masking paper to cover the entire length of the glass with one sheet to eliminate seams that will need to be masked. Now start by placing the masking tape on the masking paper to the center section of the masking tape that is already attached to the car. From the center, pull each side of the masking paper straight back making a straight line. This will probably not follow the molding, but that is alright. If you follow the molding, the paper will create creases, which is what we want to eliminate. Now that the paper is straight across the glass area, use a razor blade to cut the paper around the molding. Care must be taken not to cut the glass or molding. This can be done by holding the paper up while making the cut. Once the masking paper has been cut to fit, use ¾ inch tape to mask around the remaining edges. Now the paper should be masked completely around the glass to the tape that we used to outline the glass molding with.
If you use this method you will have minimal creases in your masking paper. If you do have a crease, tape the crease solid using masking tape. If one layer does not completely cover the width of the glass use another piece of paper on the other end and repeat the process. Once all edges are completely taped, mask the seam of the two layers of masking paper. When completed, all edges, creases, and seams should be taped. This will complete a seal, which will eliminate overspray from entering the paper and getting on the glass or molding. This will also eliminate pockets and creases in the masking paper that can attract dry overspray and dust. This will provide a cleaner job and less dirt in the finished paint job. This will result in less sanding and buffing after the paint job is completed to remove dirt nibs.
How To Avoid The Clear Coat From Bridging on Molding That Fit Close To or Touch The Painted Surface Being Sprayed
Many times a molding fits tight against or even touches the painted surface. The problem with this is that the clear coat may fill in the gap or crack between the molding and paint surface. In other words, the clear coat bridges over from the painted surface to the masking tape. When the paint is dried and the masking tape is removed, the clear coat will have a rough edge from the clear coat. Even worse, it may even pull a chunk of clear coat from the painted surface. If this happens, the surface may have to be sanded, re-painted, and cleared.
There are several ways to avoid this. If the glass molding is soft and flexible enough a small diameter rope can be used to shove under the molding. This will lift the edge of the molding up, which will allow the paint coating to flow underneath the molding. Once the paint is dry, remove the rope, which will allow the molding edge to sit back on top of the newly painted surface.
There is also a special masking product, which has a hard plastic edge on one end and adhesive tape on the other end. First place the hard plastic edge underneath the edge of molding. Then fold the adhesive side over and stick to the glass. This will lift the edge of the molding up, which will allow paint coatings to flow underneath the moding. When the trim mask is removed, the edge of the molding will set back on top of the newly painted surface.
Sometimes the molding is too rigid and the molding is difficult to lift. In these cases, there is another method that can be used. When outline the molding with ¾ inch masking tape, leave about ⅛ inch of the molding exposed. Then mask the glass as you normally would using masking paper. Once completely masked, use ¼ inch fine line tape to go around the edge of the molding. This tape will cover the the molding edge and the masking tape that was used to outline the molding. It is important to apply the i/4 inch tape last so it will be easy to pull off. Immediately after applying the last coat of clear coat, pull the ¼ inch tape from the molding. Care needs to be taken not to let the tape hit the fresh clear coat finish. This will produce a smooth transition instead of creating a hard edge if removed after the clear has dries. This will also eliminate the risk of pulling a chunk of clear from the painted surface.
A Tip For Masking Hose Lines and Wiring
Another problem you may run into when masking is masking off hoses and wiring. I have seen them wrapped in masking tape, but the problem is unmasking. This can be a tedious time consuming job. However, there is a quick fix for these parts. Use aluminum foil to wrap around these parts. The foil will form around the part to protect the part from paint. The cool thing is that the foil is as easy to remove as it is to put on. This works great for parts such as: fuel lines, door wiring harness, inside door parts when paint the inside of a door, inside door handle, etc.
Tips For Covering Holes
To mask holes such as tail light access holes, windshield wiper holes, door handle access holes, place masking tape to the back side of the hole to seal the hole shut. Let’s say you have the car masked off and you realize a small windshield washer hole is not masked off. Before you start opening your door and hood ruining the masking job, try this little trick. If it is a small hole, use a foam ear plug. You can squeeze the ear plug making it small to fit inside the hole, then as it expands, it will seal the hole shut. Of course, this will not work for large holes, but the larger holes are as often overlooked when masking. It’s the small holes that is often forgotten about until the car is already masked off. Well, that should not be a problem now!
Paint Prep Quiz
Now test your knowledge. There is not a time limit set on this quiz so take your time. Find the correct answer if you do not know for sure. The objective of this quiz is to help you learn the information if you do not know the answer, not guessing. Good Luck!
Paint Prep Quiz – Password (simple)