
Lesson 4 – Metal Straightening – Below are the videos included in this lesson. Click on the videos to watch.
Lesson 4 Part 2 Video
Work Hardening
Dent Repair Using Stud Welder Gun
Basic Body Repair Tools

Hammer Off Dolly
Hammer On Dolly

Using a Slappin Spoon
PDR Demonstration
Hammer and Dolly Basics
Dent Repair Process
-
Lesson 4 Part 2 Video
-
Work Hardening
This photo is of a fender that has extreme body lines and contours. This is an example of work hardened areas that were stamped into the part from the manufacture. Work hardening can be caused by an accident when the metal is reshaped out of its original shape. If you remember in vehicle history, we discussed that car makers were able to use lighter weight steel by designing more body lines into the panels. When body lines are designed into a panel, it causes the metal to become work hardened. Therefore, some work hardening is designed into the part when stamped and formed from the manufacture. As mentioned, additional work hardening can be generated from an accident. So why is work hardening important to you, the repairer? This is because work hardened metal is stiffer and harder to reshape. Not only is it stiffer, it is also more brittle. Therefore, care must be taken not to overwork the metal in work hardened areas. I grew up on a farm, but I think you can relate to this. If I needed a piece of bailing wire and did not have a pair of pliers at the time, I would bend the wire back and forth until it broke into. Have you ever done something similar to this? I did this because I saw my dad do it. I’m sure he did this because he saw his dad do it. Probably no one was thinking, I am going to take this piece of wire and bend it back and forth to its work harden state until the wire becomes brittle and breaks into…but that is what happens. With that said, trying to get the metal perfect or trying to metal finish thin metal can result in unwanted tears and rips in the metal. Work the metal as close as you can without overworking it, and then use body filler to fill the small imperfections. Evercoat, 3M, and other companies who make body filler state that body filler can be up to ¼ inch after sanded. I try to get it a little straighter then that, but you should be able to get most dents within ¼ inch of the final contour of the panel with no problem. -
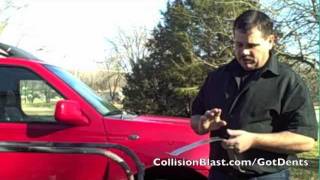
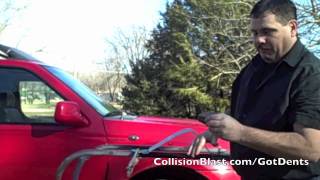
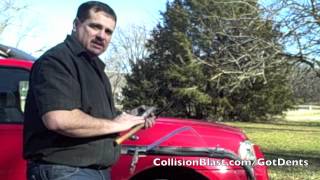
Dent Repair Using Stud Welder Gun
A stud welder gun is a tool that welds a small stud to the metal surface. This stud provides something for the t-handle or slide hammer to grab on to. Force can then be applied to remove the damage. -
Basic Body Repair Tools
Hammer and dolly is probably the easiest repair method, but it requires that you have access to both side of the panel being repaired. However, newer cars have many areas that do not allow you to use hammer and dolly, as there is limited access. Hammer, dollies, and other tools such as spoons and slapping files are used for straightening metal. They come in different shapes and sizes to fit the specific damaged panel you are working on. A large flat area needs a flat dolly and hammer. If the repair area has a crown, you will need a hammer and dolly to fit the contour of the panel. Choose tools that fit the shape of your panel. -
Hammer Off Dolly
Hammer Off Dolly Hammer off dolly is used to remove a majority of the dent. Same rules; start with the indirect damage and move towards the direct damage. Use your dolly to push your lows and your body hammer tap down on the highs or vice-versa. Hammer off dolly should be used until the final straightening stages. TIP: Use your dolly to strike the back side of the dent to rough out much of the damage. Then use the hammer off dolly method to continue the repair process. -
Hammer On Dolly
Hammer on dolly is used in the final stages of metal straightening to level the smaller imperfections. Once you have straightened the metal using the hammer off dolly, use the hammer on dolly to level out the ripples. Hammer on dolly is also extremely effective when repairing the edges on panels. Please be careful not to use hammer on dolly too much, as this stretches the metal. If metal is over stretched, it must be shrunk. -
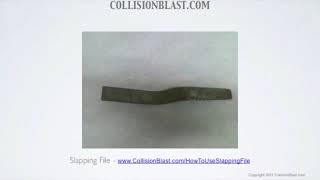
Using a Slappin Spoon
This tool can be used with a dolly as well. This is similar to hammer on dolly, as you hold the dolly on the back side of the repair and strike the front side with the slapping file to straighten the metal during the final stages. This spreads your strike over a larger area and the file has small teeth on it, which reduces stretching the metal. This tool works best on older thicker steel, but I still find it useful on certain repairs on the thinner steels. -
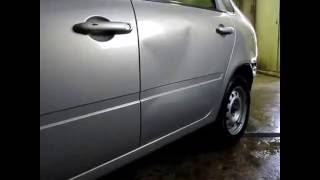
PDR Demonstration
This video demonstrates how to remove a door dent using paintless dent removal methods. -
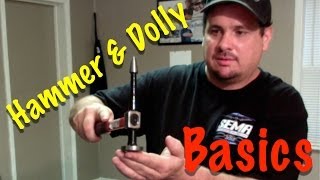
Hammer and Dolly Basics
Hammer and dolly basics are covered in this YouTube video. We\'ll also talk about selecting the right tool for the job. The auto body tools covered in this video are: universal dolly, toe dolly, heel dolly, wedge dolly, chisel hammer, pick hammer and shrinking hammer. As mentioned in the video, it is more important to focus on the shape of the tools than the names of them, but it is good to know both. Just remember to keep it simple....use what works. -
Dent Repair Process
This is a video demonstrating the dent repair process.
Lesson 4: Metal Straightening – Part 2
Introduction
Metal doesn’t like being pushed around… but accidents push it anyway. Our job is to convince it—gently—that it should go back where it came from. One of the best ways to do that, especially when you can’t get behind the panel, is by using a stud welder gun.
This handy tool has earned a permanent spot in almost every collision repair shop. It lets you weld small studs directly to a dented panel, giving you something to pull on without drilling holes or removing the panel entirely. It’s efficient, effective, and just a little bit satisfying when you see the metal move back into place.
But as with most collision repair tools, there’s a right way and a wrong way to use it. Used correctly, you’ll get a smooth panel ready for finishing. Used incorrectly, you might end up with stretched, overheated, or paper-thin metal — and that’s when the repair bill (and your frustration) skyrockets.
Objectives
By the end of this lesson, you will be able to:
- Explain how a stud welder gun works and when to use it.
- Prepare a damaged panel for stud welding.
- Apply the “first in, last out” pulling method.
- Use a T-handle or slide hammer correctly (and know when not to use the slide hammer).
- Remove studs and finish the surface without thinning or overheating the metal.
- Identify alternative dent removal systems and understand their pros/cons.
- Recognize stretched metal and know how to shrink it.
Stud Welder Gun
A stud welder gun works by welding a small metal stud directly to the surface of a panel. Once attached, that stud acts as a grab point for tools like a T-handle or slide hammer. The pulling force applied to the stud allows you to move the damaged metal outward, while tapping down surrounding high spots helps relax and realign the metal’s molecules.
Before you even think about pulling, the surface has to be prepped correctly. This means removing all paint and coatings in the repair area until you have clean, bare steel. A 3-inch grinder is a common choice for this, but you must be careful — modern vehicle panels are thin, and grinding too much can make them even weaker. If the grinder lingers in one spot for too long, the heat it generates can warp the panel. You might get away with welding without distortion, only to ruin the job in seconds with careless grinding. Many technicians prefer to use a dual-action (DA) sander for removing paint to reduce heat, then use the grinder only to remove the studs after pulling.
Once the panel is prepped, it’s time to weld the studs. Here, the “first in, last out” rule applies. The damage should be reversed in the opposite order from how it was created. Start with the indirect damage — the areas surrounding the deepest part of the dent. Weld studs in these outer areas first, pull them outward with the T-handle, and at the same time lightly tap down any high spots with a body hammer. Sometimes those highs are easy to see and feel, other times you’ll have to trust your hands and experience. Even if you’re not sure where the highs are, it’s a good idea to lightly tap around the dent while pulling; this relaxes the metal so it moves more easily.
Once you’ve made progress on the outer areas, begin welding studs closer to the direct damage — the deepest part of the dent — and repeat the pull-and-tap method. Keep in mind that the slide hammer should only be used if necessary. Its jerking motion can stretch the metal at the pulling point, making the repair more complicated. The T-handle offers more control and allows you to work the metal slowly and deliberately.
When the panel is back in shape, the studs have to be removed. This can be done by cutting them off close to the surface with a pair of diagonal cutters (dykes) and then grinding the remaining weld smooth. Keep the grinder moving to prevent heat buildup, and remember that every pass of the grinder removes metal. An experienced technician can sometimes lightly tack weld the stud so it’s strong enough to pull but loose enough to be wiggled free by hand — this eliminates the need for grinding altogether.
While the stud welder is a go-to tool, it’s not the only game in town. There are dent removal systems that use a reusable electrode instead of single-use studs. The main advantage is speed — there’s no stud to grind off — but the trade-off is cost, and the equipment can be bulkier. Despite the convenience, many technicians still prefer the stud welder gun they’ve used for years.
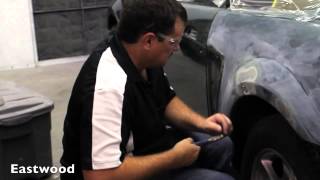
Hammer and Dolly
Traditional hammer and dolly work is another method, but it requires access to both sides of the panel — something that’s not always possible on modern cars. When it is possible, the hammer-off-dolly method is excellent for removing most of the dent, pushing up the low spots from behind while tapping down highs. The hammer-on-dolly method is reserved for fine-tuning and final leveling, especially around panel edges, but it must be used sparingly to avoid stretching.
Specialty tools like body files and slapping files can also help. A body file is useful for finding highs and lows and shaving the metal surface flat, but excessive use can thin the panel. A slapping file spreads the impact over a larger area and its teeth grip the surface, making it less likely to stretch the metal — particularly effective on older, thicker steel.
Paintless Dent Repair (PDR) Tools, Suction Cups, and Glue Tabs
Paintless Dent Repair (PDR) is a technique used to remove minor dents and dings from vehicle panels without sanding, filling, or repainting. Instead of covering damage, PDR tools are designed to carefully massage the metal back to its original shape while keeping the factory finish intact.
- PDR Hand Tools (Rods and Picks):
- These are long, specially shaped metal rods and picks that technicians insert behind a panel.
- By applying controlled pressure from the inside, they can slowly push the dent outward.
- The tools come in different lengths, tip shapes, and curves so they can reach tight spots like door panels, fenders, and hoods.
- Suction Cups (Pullers):
- Used when there is no access behind the dent.
- A suction cup attaches to the exterior of the panel and allows the technician to gently pull the dent outward.
- They’re best for larger, shallow dents and can sometimes be used as a quick first step before refining with rods.
- Glue Tabs and Slide Hammers / Pullers:
- Glue tabs are small plastic tabs applied to the center of the dent with a special hot glue.
- Once the glue cools, a pulling device (like a slide hammer or mini lifter) attaches to the tab to pull the dent outward.
- After the pull, the glue is safely removed with a release agent, leaving no residue.
- This method is very effective for dents where tool access is limited or for precision pulling.
Together, these tools allow technicians to repair dents without damaging paint, reducing repair time and preserving vehicle value.
Shrinking Metal
In some situations, metal shrinking is necessary—particularly when a panel has been stretched during a collision or repair. Stretched metal often develops an “oil can” effect, where the surface pops in and out with just light pressure. To correct this, technicians use a controlled heat-shrinking process. A small area, roughly the size of a dime, is heated until it reaches a dull red color. The area is then lightly tapped with a hammer to realign the metal’s structure and quenched with water or compressed air to contract the molecules. This shrinks the metal, stiffens the panel, and eliminates the oil-canning effect. For less severe cases, a shrinking hammer with serrated teeth can be used, though it is generally less effective than heat shrinking on heavily stretched areas.
Discussion Questions
- Why is bare steel necessary when using a stud welder gun?
- Describe the “first in, last out” method and how it applies to dent pulling.
- What is the risk of using a slide hammer instead of a T-handle?
- Why must you keep a grinder moving during use?
- What does “oil canning” mean, and how can it be corrected?
Summary
The stud welder gun is an essential tool for repairing dents when there’s no access to the back of the panel. By welding studs to bare steel, pulling with a controlled tool like a T-handle, and tapping highs while pulling lows, you can reverse the damage without over-stressing the panel. Preparing the surface properly, following the “first in, last out” principle, and avoiding excess heat or metal removal are critical to a quality repair.
Other methods — from reusable electrode systems to hammer and dolly work, body files, slapping files, suction cups, and heat shrinking — each have their place depending on the damage and vehicle design. But no matter the method, the principles remain the same: control the metal, work it gradually, and let skill, not brute force, guide the repair.
Metal Straightening Quiz
Lesson 4 Quiz
Now test your knowledge. There is not a time limit set on this quiz so take your time. Find the correct answer if you do not know for sure. The objective of this quiz is to help you learn the information if you do not know the answer, not guessing. Good Luck!
Metal Straightening Quiz – Password (simple)