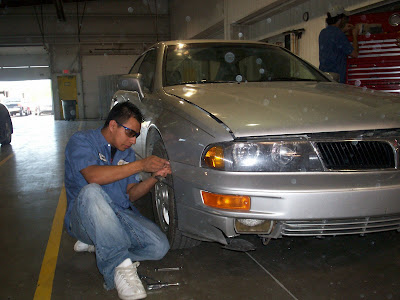
 Students begin work on a 1997 Silver Mitsubishi Diamante. This vehicle had the bottom half of the bumper cover ripped from a curb. Damage only included the front bumper cover and the splash shield underneath the vehicle; however, we decided to blend into the front fenders. Blending is the process of blending the new paint into old paint, in order to have a color match. Some vehicles are very difficult to match due to color variance, age of the existing paint and other variables that make blending necessary.
Here is an example of how it works.

BLENDED
The top panel has been blended. By looking at it, its hard to tell that there are two colors. We painted the whole panel white, then we blended with a different shade of white. If you notice the top half is the end we painted, as you can see the paint on the masking tape. The bottom is the original color. There is no paint on the tape. Once blended we cleared the whole panel.
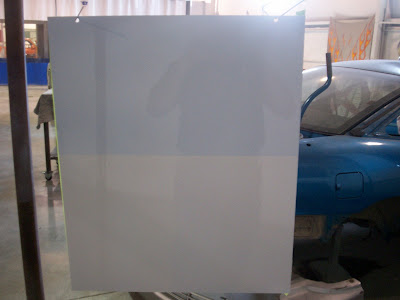
NOT BLENDED – This is how a mis-match will look if not blended.
Here are the actual two colors that are on the above blended panel. Obviously, this would not be a blendable match, but it works well for explaining why blending is necessary. The bottom half is the original color of the panel and the top is the second color we painted. The slightest mis-match even a shade from the flip or flop angel will be very noticeable if not properly blended.

The Process
First the old parts had to be removed from the car. Then we properly prepared the new plastic bumper cover by using PPG’s One Choice Plastic Prep System. This is a system that properly cleans, scuffs, and provided adhesion for topcoats to be applied. We prepped the front fenders to be blended by using a scuff paste and a fine scuff pad. You can also use 1200 to 1500 grit sandpaper to sand the surfaces. Then the car was sent to the paint booth and masked off. We then masked the entire vehicle, except for the front fenders that were going to be blended. We wiped all the parts to be coated with a wax and grease remover, tacked them with a tack cloth and primer sealed the new bumper cover with an epoxy primer with flex agent added. You must add flex agent to primers, when applied on flexible parts. Not doing so may result in cracks in the finish. Next we painted the bumper cover with base coat. Once that was done we, started the blending process by painting the edges of the fenders where the bumper cover meets with base coat and blending the paint into the existing paint on the fenders. After all the painting was completed, we clear coated the bumper cover and the fenders. Now when we install the bumper cover, it will match perfect because both, the bumper cover and the edges of fenders, were painted with the same paint.
Completion
 The bumper cover was installed, we buffed a few spots of dirt out of the paint, cleaned the car and it is back in service. This was a minor job. As you can see, a lot of work goes into preparing vehicles back to their pre-accidental condition. Check back to learn more about what goes on at BCC Collision Repair.
If you have any questions or comments, feel free to contact me.
Donnie Smith
316-323-6890