These lessons are now open to help collision repair students learn from home. I am lifting the Patron fee to access this content during this time, as many schools are closed. However, I do appreciate your support and hope my Patrons continue to support this website and training.
If you would like to help and support this website, then I would greatly appreciate it. For more information visit. www.Patreon.com/CarAddictGarage
Click Button Below For Lesson
I hope you enjoy this training module. Let me know if you have any questions, or suggestions you may have to make this training module a better learning experience for you. Donnie

Lesson 4 – Metal Straightening
First In, Last Out
Before everything else, getting ready is the secret of success. ~Henry Ford
In this lesson we are going to cover metal straightening. There are different types of steel such as mild steel, high strength steel, ultra high strength steel, boron, etc. However, this lesson is going to focus on mild steel, as mild steel is used on many of the body parts. If you restore older cars, probably all the steel that you work with will be mild steel. Many of the other types of steels are used on structural parts and on some of the newer car designs.
This page is the full lesson, which includes text content, videos and resources. I also broke it down to only the videos and resources. Just click the button below if you prefer to view only the videos or resources. Note: some browsers and mobile devices may not play videos below…but they should work on the videos page. If you are still having problems viewing videos, then you can watch the playlist on YouTube.
Video Overview
This video is an instructional overview of the dent repair process. I also have demonstrational videos below to show some of the topics.
Instructional Video Overview – Basic Dent Repair
The Difference Between Repairing Early Model Cars and Cars of Today

First we’re going to talk about the difference between older and newer cars and the repair considerations that you will need to make before repairing.
Repairing Early Model Cars
On early model vehicles the metal was thick, which had advantages and disadvantages. First, the older cars had a lot metal to work with. This allowed body men to hammer, dolly, and pick on the metal, then file the top surface, knocking the high areas down. Then they could repeat the process, working the metal and filing the surface level. This allowed the body man to metal finish much of the damage without the need of body fillers. This is called metal finishing. If there were still a few imperfections on the metal that could not be worked out, the body man would use lead to fill the lows and file the surface level and smooth.
Advantages and Disadvantages
The advantage of working on older cars was the possibility to straighten and work the metal without the use of fillers as we’ve mentioned. If we tried to use those metal finishing methods on many of the modern-day vehicles today, we would have a hole in the part from filing through the part. If we didn’t file a hole through the part, it would be very thin and weak. Another advantage of working on early model vehicles is being able to get to both sides of the panel. There was ample space making it easy to get to the back side with dollies and other tools used to repair the damaged area. Vehicles today have limited access, which makes it hard to get behind most panels to use the hammer and dolly methods. Therefore, new tools have been developed to help us make the necessary repairs, which we will discuss shortly.
The disadvantage of working metal on early model cars was the strength and thickness of the steel; it was harder to move, unlock, and reshape. It took a lot more force to move the thick metal when straightening, than the thinner steel used on newer cars. The lead filler that was used also took more time and skill to fill the small imperfections. In fact, I learned how to use lead, back in the day, as my students would say. It involved a process of tinting the steel with lead, then using a torch and lead bars to soften the lead and smooth is out with wooden paddles, then using a body file to shape the lead level. I am old enough that this method was still being taught, but they had body filler as well. They taught us this method in case there should be a shop still using this method, but we used body filler for most of the repairs. I know there are some old timers out there that were very good at using lead, but for me, I like using body filler much better. It is easier, faster, and the newer premium body fillers are more flexible and have great adhesion to bare steel. Another disadvantage about lead is the health hazards. However, we are more educated about lead today and the health safety hazards it produces.
Repairing Vehicles of Today

Today’s vehicles are thinner and have very limited access. However, improved fillers, such as body filler, and tools have made the job easier. The most common tool to use for repairing dents is a stud welder gun. The cost of a stud welder gun ranges from $200 to $500. This tool tacks a small nail or stud to the surface. Then you get a slide hammer or t-handle to pull on the stud nail. Therefore, you tack the nails to the low areas and lightly tap on the high areas using a body hammer. It is important to do this at the same time. Trying to just pull out on the lows is another common mistake I have seen over the years.
Just pulling out on the low area will cause the metal to be over-pulled and stretch the metal. Just hammering in on the highs may cause the entire area to be hammered in too much. This is referred to as chasing your damage around. It is always better to have multiple forces at one time. You need to think of it as rolling the damage out, rather than hammering or beating it out. The metal wants to go back to its original shape; you just need to help persuade it to. Forcing metal will result in stretched metal. Another thing taping on the highs with a body hammer while pulling the damage will do, is allow the metal to relax, which will allow you to pull the damage with less force. I am going to discuss a method for removing dents later, but remember not to just grab the slide hammer and go to popping the dent out. I am not a fan of using the slide hammer and I will tell you why not shortly.
When Did Thin Sheet Metal Start Being Used?
After writing this lesson, I was asked when the cars switched from the older thick metal to the newer thin metals. Therefore, I added this part to comment on this if you should be wondering too.
There is no exact answer to give for this. Still to this day some makes and models use much thinner metal that others. For example, a Chevrolet Cavalier has much thinner metal than a Cadillac. An aftermarket part compared to a OEM part can vary in metal thickness as well. So there is some experience that goes with determining how much the metal can be worked.
However, in the late 1970’s and earlier 1980’s is when lighter metal started showing up. Foreign car may even be earlier than that. To me, it seems like the metals on cars have gradually became thinner over the years from the 1950’s.
Care must be taken not to over work, over file, or overheat any metal. Anything manufactured after the 1980’s need extra care to prevent these problems. The late 1980‘s early1990’s bring more considerations of high strengths steels, which can be destroyed if overheated.
I know this may not be the best answer, but it is going to take experience to know what you can and can’t get away with.
KISS Keep It Simple Silly

When you have access to both sides of the damage, a hammer and dolly can be used. This is probably going to be the fastest and easiest way to repair the damage. Therefore, when you are determining how you are going to repair a dent, think of electricity. Electricity moves where ever it is the easiest for it to pass through. This is called the path of least resistance. This is why a ground wire is used on homes. If lightning hits your house, it will follow the ground wire attached to a ground rod that is hammered in the ground, as that is the path of least resistance. When determining how to repair a dent, try to think of what would be easiest. Just because you have an expensive piece of equipment does not mean that you have to use it every time. If you can reach behind the panel and pull out on the low with one hand and push down on the high with the other hand, then simply use your hands to repair the damage. The dent may still need a little hammer and dolly work afterwards, but I have repaired many dents with nothing but my hands. Remember today’s metals are thin and it does not take much to damage a part or to repair it. One word of caution, when I mention using my hands, I am only using force; I am not striking the panel with my palm or fist. Striking the panel with your hand may result in injury.
Demonstrating Roughing Out Dent Using Hands
There is another lesson to be learned from using our hands. This lesson applies to a dent repair or even repairing frame damage. Imagine that you were strong enough to repair the damage with your hands. Where would you place your hands? How and from what angles would you push and pull with your hands? As you give a little thought to this, you probably have a good strategy and it’s usually the correct method to repair damage. Now all you have to do is to make the tools do this for you. You will be surprised at how much of a different approach you will take if you use this strategy. Try it and see what happens.
What Ever It Takes
Whether you’re working on early or late model vehicles, always remember to select the tools that will make the job easiest to make the repair. Don’t over work the thin metal on late model vehicles, as the metals are thin. The use of body filler will help you repair the surface back to its original shape.
First In Last Out
When beginning repairs, the first thing that you want to determine is the direction of damage. This is important so you can reverse the damage during repairs. In collision repair we have a general rule “the first in last out rule.” This means that the direct damage or point of impact is the area first hit in an accident, which makes it the first in. Therefore, this should be that last area to repair.
Direct Damage
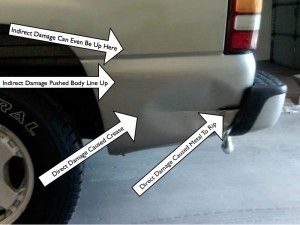 This photo shows an example of indirect damage and direct damage.
Direct damage is the most obvious damage as it is easy to visually see. If you try to pull the direct damage first, you will stretch the metal, pull highs in the metal, and still have low areas. You are going to chase your damage around while work hardening the metal until the metal becomes to work hardened, brittle and cracks. The first in, last out rule is golden in dent repair so be sure to make mental note of this.
Indirect Damage
Indirect damage is the damage that is caused by the direct damage. For example, as the point of impact is pushed in, it causes the surrounding metal to slightly move as well. If pushed far enough, the indirect damage can cause misaligned body gaps, cracked seam sealer, and/or popped spot welds. The indirect damage is less noticeable as it may not be visually noticeable without close observation. The indirect damage is the damage that happened last during the accident; therefore, this damage should be repaired first.
Always remember the “first in last out” rule when developing a repair plan. This will save you hours of time and frustration when it is all done.
Work Hardening
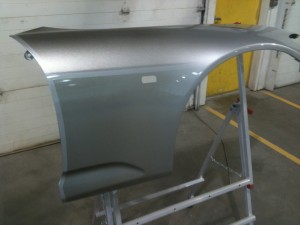
This photo is of a fender that has extreme body lines and contours. This is an example of work hardened areas that were stamped into the part from the manufacture.
Work hardening can be caused by an accident when the metal is reshaped out of its original shape. If you remember in vehicle history, we discussed that car makers were able to use lighter weight steel by designing more body lines into the panels. When body lines are designed into a panel, it causes the metal to become work hardened. Therefore, some work hardening is designed into the part when stamped and formed from the manufacture. As mentioned, additional work hardening can be generated from an accident.
So why is work hardening important to you, the repairer? This is because work hardened metal is stiffer and harder to reshape. Not only is it stiffer, it is also more brittle. Therefore, care must be taken not to overwork the metal in work hardened areas. I grew up on a farm, but I think you can relate to this. If I needed a piece of bailing wire and did not have a pair of pliers at the time, I would bend the wire back and forth until it broke into. Have you ever done something similar to this? I did this because I saw my dad do it. I’m sure he did this because he saw his dad do it. Probably no one was thinking, I am going to take this piece of wire and bend it back and forth to its work harden state until the wire becomes brittle and breaks into…but that is what happens.
With that said, trying to get the metal perfect or trying to metal finish thin metal can result in unwanted tears and rips in the metal. Work the metal as close as you can without overworking it, and then use body filler to fill the small imperfections. Evercoat, 3M, and other companies who make body filler state that body filler can be up to ¼ inch after sanded. I try to get it a little straighter then that, but you should be able to get most dents within ¼ inch of the final contour of the panel with no problem.
Video Explaining Work Hardening
Choosing a Repair Method
Once the damage is analyzed and you have determined the direction of damage, and where the direct and indirect damage is located. Now it is time to decide which repair method is the best choice for the repair. If you can get to both sides of the panel a hammer and dolly method may be the easiest repair method. If you cannot gain access to both sides of the panel a stud welder gun may be a better choice. Other considerations, such as corrosion protection and noise preventions should be considered as well.
Don’t Force The Metal; Roll The Metal Back To Its Shape
Regardless of the repair method, the same principles apply. Start with the indirect damage and pull out on the lows and push in on the highs. You should roll the metal back into shape, rather than try to force it back into shape. Forcing the metal back into its shape may result in highs and stretched metal. Pulling on the lows while rolling the highs out of the metal is the key to metal straightening, regardless of repair method used.
Repairing A Dent Using A Stud Nail Gun
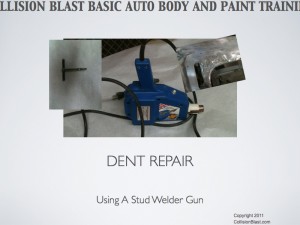 This photo is a picture of a stud welder gun made by Motor Guard. Learn more at: www.CollisionBlast.com/StudWelderGun
A stud welder gun is a tool that welds a small stud to the metal surface. This stud provides something for the t-handle or slide hammer to grab on to. Force can then be applied to remove the damage.
3 Inch Grinder – When using a stud welder gun, you must remove all paint and coatings from the panel until you have bare steel, as the stud welder gun will not work on painted surfaces. The tip on the gun must make direct contact with the metal surface to produce the weld. When using this method or any method, remember the rules mentioned earlier. First in last out and roll the metal, don’t just force it. Starting at the outsides (indirect damage) of the damage weld studs to the metal. Then pull the damage with a t-handle and you use a body hammer to tap lightly down on the highs. Sometimes the highs may be difficult to find, but there is usually high spots. If not, I still recommend to tap lightly around the dent while pulling on the dent to relax the molecules in the metal. This will allow the metal to be straightened with less force. Once the damage begins to pull out, start welding on additional studs and pulling towards the center of the damage (direct damage) using the same technique. I would also advise you to only use the slide hammer as a last resort. It is very easy to over stretch the metal using the slide hammer. I prefer using the t-handle and body hammer. Once you have completed the pull, you will need to remove the stud nails. This can be done by cutting the studs with a pair of dykes and grinding the surface smooth. Tip: with a little practice, you may be able to lightly tack the stud nail to the surface enough to make a light pull, but still be able to remove the stud nail by wiggling it. This will eliminate having to cut and grind the stud smooth.
Caution: Grinding Removes Metal and Heats
Keep in mind that the metal on newer cars is very thin. Therefore, you do not want to remove too much metal making it thinner and weak by over grinding. Grinding also produces heat, which is something that you want to avoid as well. Keep the grinder moving around and do not hold it in one spot too long. I have had students shave door handles without warping the panel during the welding process. Then get carried away with the grinder and warp the panel severely. To prevent these problems you may consider using a DA sander to remove the paint coatings when preparing the damaged to be pulled. However, a grinder will still need to be used to grind the studs smooth.
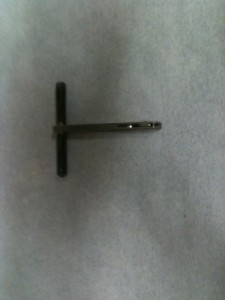 This is a photo of a t-handle to be used to pull the studs when using a stud welder gun.
Caution: Grinding Removes Metal and Heats
I prefer using a t-handel over a slide hammer. This allows me to apply force on the low area and tap on the high areas with a body hammer. The slide hammer tends to pop and force the metal, which causes it to stretch at the pulling point.
How To Use a Stud Welder Gun
Demonstration of Using a Stud Welder Gun
Dent Removal System
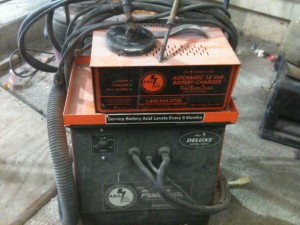
This photo is a picture of a dent pulling system that has a reusable electrode.
This dent repair system works well, but is more expensive than a stud welder gun.
There are several different types of dent removal systems, but they all use the same idea to removing damage. The dent repair system with the reusable electrode is similar to the stud welder gun, but the tip that welds to the metal surface is reused and does not require to be ground off. This saves time and allows you to pull a dent out much faster. However, this type of system is much more expensive and probably not going to be in the DIY’s budget. I have also noticed through the years that students still favor the stud welder gun. Perhaps they feel that this system is too big and bulky. I’m not sure, but either method will produce the same results.
Other than the few differences, it is used the same way. It must be used on a metal surface to make contact, first in last out, and use a multiple repair method (pull on the lows and tap on the highs). This system also required a ground cable that must be attached to a metal surface.
Hammer and Dolly
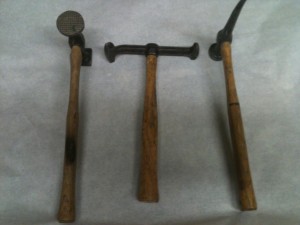 In this photo, there are three different types of hammers used for body repair.
Hammer and dolly is probably the easiest repair method, but it requires that you have access to both side of the panel being repaired. However, newer cars have many areas that do not allow you to use hammer and dolly, as there is limited access.
Hammer, dollies, and other tools such as spoons and slapping files are used for straightening metal. They come in different shapes and sizes to fit the specific damaged panel you are working on. A large flat area needs a flat dolly and hammer. If the repair area has a crown, you will need a hammer and dolly to fit the contour of the panel. Choose tools that fit the shape of your panel.
Basic Body Repair Tools
There are two techniques when using hammer and dolly. Hammer off dolly and hammer on dolly.
Hammer Off Dolly
Hammer off dolly is used to remove a majority of the dent. Same rules; start with the indirect damage and move towards the direct damage. Use your dolly to push your lows and your body hammer tap down on the highs or vice-versa. Hammer off dolly should be used until the final straightening stages.
TIP: Use your dolly to strike the back side of the dent to rough out much of the damage. Then use the hammer off dolly method to continue the repair process.
Demonstration Using Hammer Off Dolly
Hammer On Dolly
This is a photo of dollies used for auto body repair. Notice the different sizes and shapes designed to fit the different shapes of the panel you are working on.
Hammer on dolly is used in the final stages of metal straightening to level the smaller imperfections. Once you have straightened the metal using the hammer off dolly, use the hammer on dolly to level out the ripples. Hammer on dolly is also extremely effective when repairing the edges on panels. Please be careful not to use hammer on dolly too much, as this stretches the metal. If metal is over stretched, it must be shrunk.
Demonstration Using Hammer On Dolly
Body Files
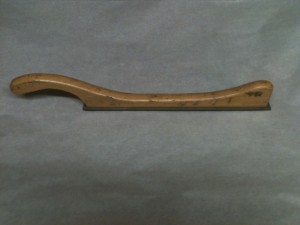
This is a photo of a body file. Body files are used to help identify highs and lows. Body files will also shave the top of the metal surface resulting in a level surface. However, care must be taken on newer metals not to thin or weaken the metal. This technique work well for thicker steel and for metal finishing.
Slapping File
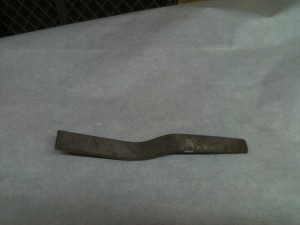
This is a photo of a slapping file used for metal straightening.
This tool can be used with a dolly as well. This is similar to hammer on dolly, as you hold the dolly on the back side of the repair and strike the front side with the slapping file to straighten the metal during the final stages. This spreads your strike over a larger area and the file has small teeth on it, which reduces stretching the metal. This tool works best on older thicker steel, but I still find it useful on certain repairs on the thinner steels.
Demonstration Using Slapping File
Suction Cups
Does a bathroom plunger work for removing dents? I get this question a lot. Suction cups can be effective for roughing out the damage, but there is usually going to be highs and lows that will need to be straightened after that. So if it is a shallow dent, a plunger may work, but probably will not have enough suction power pop the damage out. If it does pop out that easy, what keeps it from popping back in with just a slight push? The metal must be worked and locked back into place.
They make suction cups that grab better than a bathroom plunger, but they still do not provide a complete fix. We have some suction cups that hook up to air that creates additional vacuum. These work well for roughing out the damage. Just keep in mind, this works best rough roughing out big shallow dents. The dent may still need additional straightening and shrinking.
Demonstration Using Suction Cup
Demonstration Using Air Assist Suction Cup
Using Heat To Raise Dents
This is an older method many people used to use on the older cars with thicker metal. You would have to be very careful on thinner metal not to overheat and wrap the metal. If you can get behind the panel, it helps to push out on low area to move damage out and prevent it from sinking in the wrong way. This method is quick, but does not work on every dent. If you see the metal start to sink in, stop and use another method on that dent.
This works well in you have an older car with small dings and dents that you plan on repainting. This is not PDR as you are going to file the paint surface. You can do a lot of dent in a short time with this method, but it does take a little practice.
I normally use oxy/acetylene torch because you can pinpoint the heat to raise the low easier. But I was at my house and did not have oxy/acetylene so I used a propane torch. It did not work as well, but it got the job done.
Demonstrating Removing Dent Using Torch
Metal Shrinking
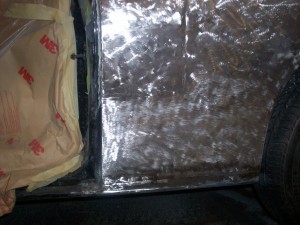 In this photo we ran into a repair gone wrong.
Someone left holes in the panel and had several inches of body filler covering it. This led to rust. We welded a patch to the quarter and had to metal shrink several areas to get this repair back to normal. This is the bad thing about working on previous repairs…you never know what you’re getting in to.
It may be necessary to shrink the metal. The metal may become stretched in the repair process or it may have been stretched during the accident causing the damage. For whatever reason the metal is stretched, this is very easy to identify and correct. There is a term called “oil canning, which is referring to stretched metal. This is where the metal pops in and out like the top of the old style oil cans. If you are younger, you may not remember this type of oil can that I am talking about, but it is similar to a coffee can. Anyway, this is where the metal pops in and out very easy. You certainly would not want to repair a car and have someone barely lean against the car and the fender pop in. This is cause by stretch metal or too much metal in the area. They make body hammers that have small teeth (shrinking hammer) to slightly shrink the metal. However, many times it will require heat to shrink the metal. This can be performed by using a torch or stud welder gun. Heat the highest area (stretched area) to a dime size until red. Then using a body hammer lightly tap the red spot to help spread the molecules in the metal. Lastly, cool the repair with a wet sponge or compressed air. This is the only time that you want to use air or water to cool the repair area. Normally, you want to allow the areas to cool naturally. Quenching is only used for metal shrinking. The heat will expand the metal which is the opposite of what you want to do, but when quenching it with water or compressed air, the metal will shrink more than it expanded resulting in the metal to shrink back to its original shape. This also makes the metal stiff to eliminate it from popping in and out. This process may need to be performed several times to completely correct and shrink the damaged area.
Demonstration of Heat Shrinking Metal
Suction Cups
Does a bathroom plunger work for removing dents? I get this question a lot. Suction cups can be effective for roughing out the damage, but there is usually going to be highs and lows that will need to be straightened after that. So if it is a shallow dent, a plunger may work, but probably will not have enough suction power pop the damage out. If it does pop out that easy, what keeps it from popping back in with just a slight push? The metal must be worked and locked back into place.
They make suction cups that grab better than a bathroom plunger, but they still do not provide a complete fix. We have some suction cups that hook up to air that creates additional vacuum. These work well for roughing out the damage. Just keep in mind, this works best rough roughing out big shallow dents. The dent may still need additional straightening and shrinking.
Demonstration Using Suction Cup
Damage on Body Lines
Body lines can be difficult to repair. They are work hardened as we mentioned earlier and car must be taken not to over grind or thin the metal.
There are several ways to repair body lines, but I am trying out a new tool and demonstrating how we repaired the body line on this Mustang.
ADDITIONAL REPAIR METHODS
This section of the lesson I am going to mention a few other methods to repair dents. However, the basics you need to master have already been mentioned earlier. Think of this section as a bonus or additional tips. Do not let this section get you confused, as that is not my intentions. If you feel this is information overload, then skip this section for now. You can always come back to it later if you wish.
I am going to start this section with how I got started repairing dents and a few of the tools I used. I will also mention a few other methods, but remember to keep it simple; master the basics mentioned earlier first.
The Tool I Started With:
When I was in high school, my dad, brother and I always had different automotive projects going on. However, I guess I was the oddball because I am the only one that really had an interest in the body and paint side. Well, I’m not going to say I was the only interested one; we just did not have much knowledge for this type of work. We would overhaul engines, swap parts, and get them running good. You know how it is, if you do not know much about something, you avoid it. Anyway, I became interested and lucky for me; I had a neighbor, Dewey Barton, who took an interest in me, as he was a retired body man. He taught me a few of his tricks and gave me many of the tools I started this career with. To this day, I favor many of the tools he showed me how to use.
I have mentioned several of the tools Dewey taught me how to use. Body hammers, dollies, slapping files, body files, etc. However there are a few other tools he taught me to use that I still favor to this day.
Morgan Nokker
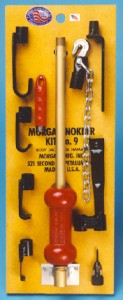
This is a photo of the Morgan Nokker, which is one of my favorite tools to this day. You can learn more at www.CollisionBlast.com/MorganNokker
This is a big slide hammer that has different attachments that can be screwed on the end. It works great for edges to pull them back into alignment. Many times if there is damage near the front door and fender area, the door will not open, as it catches at the gap area. Usually this is because the fender has been bent in which catches the door edge. This also creates additional to the door by trying to open it. Anyway, using the Morgan Knocker, use an attachment that will fit around the fender edge and give it a few pulls. This will realign the fender that the door can be opened and closed.
We all know that aftermarket parts do not always fit properly. The Morgan knocker also works great to align or tweak a panel to fit properly. For instance, let’s say the front of the fender is too close to the hood. All adjustments have been made, but the gap is still too tight. The slide hammer can be used to knock the fender over slightly to correct the gaps. You will want to place several paint sticks between the slide hammer hook to spread the blow and to protect the fender.
This is one of those tools that come in handy for many different repairs. It would be impossible to list them all, but once you see how the tool works, you will see many uses or maybe even things I have not ever considered. This tool is not a must, but it is a great tool to have around.
The Two Holer
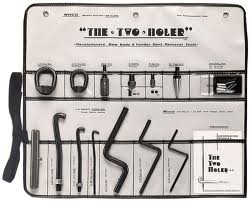
This is a photo of the two holer tool. This is another great tool to have. For more information visit www.CollisionBlast.com/TheTwoHoler
This tool is for more severe damage, but another tool Dewy showed me how to use. If you have a panel severely damaged and it needs to be pulled out, it is hard to find something to grab onto with to make the pull. However, the tool does require two holes to be drilled. If the panel is not going to be replaced, the holes should be welded up after the straightening has been completed. However, it the panel is going to be replaced, the holes are not going to matter.
You may be wondering why pull a damaged panel that is going to be replaced! Actually, this is very important to do. This will realign the metal and parts the damaged part is attached to. Then the new part can be replaced without alignment issues.
This is more of an advanced topic, which can get into structural straightening. I do not want to stray off basic metal straightening much, as this book is focused on the basics and I do not want to overload you. I want to keep this simple, but I thought this was worth mentioning and one of the tools I started with.
Pull Rods
Pull rods have been around for many years. They have been phased out with the stud welder gun. For more information about pull rods visit www.CollisionBlast.com/PullRods
I know people used to drill holes and use screw in slide hammers, but I was taught from the beginning not to use one as it just pulled the metal causing stretched metal. However, when I started, I had never heard of a stud welder gun. I was taught to use pull rods. This is rods with hooks in them.
This method required to drill holes the pull rods could slide through and pull the lows out. The same methods of pulling the lows while tapping down on the highs were followed. The same repair sequence is followed as using stud welder gun. Except for drilling the holes, soldering the holes up using solder and a soldering gun, and filing the solder level. Then the solder would need to be neutralized using water and baking soda. Then the repair could have body filler applied on top of the repair if needed. This system actually worked well, it just had a few extra steps involved.
I have pulled many dents using this method. In fact, this method was still being taught when I attended WyoTech in 1988. They had the stud welder guns, but they were new at that time. At WyoTech, we all had to pass a one minute metal finish task. This was a small dent, such as a hail dent, which did not require hammering the highs. They would make the dent, then we would have to drill two holes to use the pull rods to pull the dent out, use a bigger drill bit to tapper the edge to allow the solder to stick better, heat the hole with a solder gun and apply the solder in the hole, and file the solder smooth. The metal would have to be filed completely smooth and level. This sounds like a lot of steps, but it did not really take that long. I think we had to do that in one minute, maybe it was two…it’s been a long time, I can’t remember for sure. I have not used this method in years, but it worked.
PAINTLESS DENT REPAIR
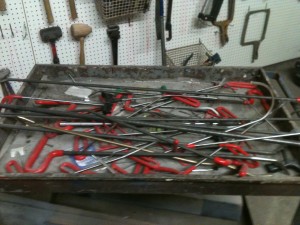
This is a photo of various PDR tools. Notice they come in many different sizes, lengths, and shape to gain access to different dent locations. For an assortment of PDR tools visit www.CollisionBlast.com/PDRTools
I do not want to overdo it with information, as I am a firm believer of learning to do fewer things well than to teach too many things at once, which leaves you confused. I thought about not even adding paintelss dent removal. However, I decided to do a quick overview about it so you will have an understanding about it.
Paintless Dent Repair; aka paintless dent removal or PDR is the process of removing dents without having to repaint the outside of the damaged surface.
Not every dent is a candidate for PDR. If the paint was chipped or scratched, the surface with need to be repainted. However, small dents such as hail dents work well with PDR repair methods.
PDR HISTORY
I do not exactly when PDR repair methods begin, but I started noticing it the the 1990’s. There was a lot of controversy about PDR. The first methods recommended drilling hole near the damage to access the damage with the PDR tools. After the repair was made, a plug would be used to fill the access holes. However, this was frowned on by car manufactures. They were concerned the access holes that were drilled may cause corrosion and/or change the integrity of the vehicle design. Most PDR repair methods have do not drill holes any longer, but there is still a concern and not recommended by some car manufactures. Again, they are afraid the coating on the backside of the panel may be damaged with the tools, which will result in corrosion.
What Determines Which Dents Will Have PDR Repairs?
Despite the controversy, PDR is very effective and used on many repairs. Repairs such as hail damage and small dings can be repaired much cheaper than the traditional repair methods.
During a hail storm, the PDR folks stay busy. They may follow storms or a body shop may even have their own PDR technician. Generally, panels that can be easily replaced are replaced, such as a bolt-on hood, fender, or deck lid. However, weld-on panels that require more time to replace or repaired using PDR. These panels include: roof panels, quarter panels, bedsides, etc.
The Repair Process
Let’s look how a fulcrum point is used as leverage to raise a dent on of a roof panel.
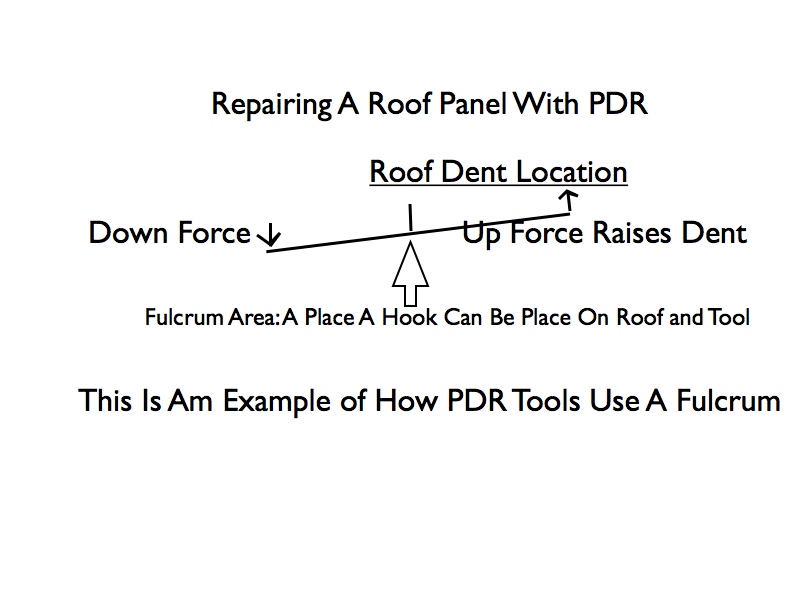
The diagram above is to show how a fulcrum point is used to gain leverage when raising a dent. This is an example of how the tool would be set up on a roof panel.
To PDR a roof panel, the headliner much be removed to access the back side of the damage. Once the headliner is removed, PDR tools, (special pry bars and pick designed reduce damaging the surface) are used. Most tools require a fulcrum point. This is to gain leverage as the dents are removed.
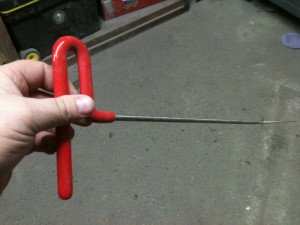
This photo is a shorter PDR tool. This tool would be used to reach dents near the access location.
The removal process requires a slower technique than traditional methods, to prevent damaging the surface being repaired. I have heard of it as messaging the dent out. A light is usually set up as well to help catch the reflection. This will allow you to better see the dent as it is being removed.
For other panels, such as quarter panels you will need to remove vents, tail lights or anything else you can remove to gain access to the back side of the panel. However, as mentioned earlier, holes should not be drilled for this purpose. Here are a few YouTube videos demonstrating PDR repair.
PDR Demonstration
ADHESIVE PULL TABS
Adhesive pull tabs are also used to remove dents without disturbing the paint. This is the process of using hot glue to attach a pull tab to pull from. This repair method is not for every dent either. For example, the pull tabs are generally bigger that many hail dents. Therefore, the pull would be spread over an area too big to remove the dent.
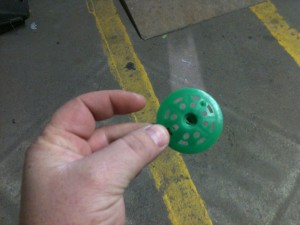
This photo show a tab used when hot glueing tabs to the surface to make a pull.
MIXING REPAIR METHODS
PDR requires more skill and hours of practice to master. However, using some of the tools and techniques can work well for body repair. For instance, using a PDR pry bar to raise a dent enough to apply body filler works. If you do not have enough access to get behind the dent with a dolly or if you do not have a stud welder gun, this can be an effective way to repair dents. Or using glue tabs to pull from the outside.
RESOURCES
This video was taken at SEMA 2011. I am very proud of this picture because I am taller than Kevin Tetz. That does not happen!

The videos below are to help reinforce what you have learned. Video is an excellent method to visually see how it all works.
- Selecting The Right Hammer and Dolly – This is a video discussing the different types of hammers and dollies.
- www.CollisionBlast.com/DentRepairProcess – This is a 30 minute video covering the dent repair process.
Product And Tool Information
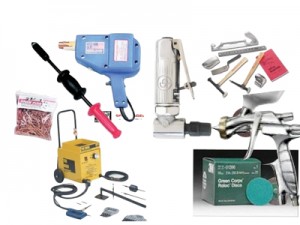
Learn more about the tools and materials used for dent repair. Below you will find some of the most common tools and supplies I recommend along with part numbers and prices used for straightening metal.
Dish Soap – Dawn, Ivory, Etc., Can get this at most stores. Just make sure the soap does not have any special ingredients to keep your hands soft, as this may not strip wax and grease as well. If you use a car soap, make sure it does not have any wax or silicone ingredients in it.
- www.CollisionBlast.com/WaxandGreaseRemover – Wax and grease remover used to remove contaminates.
- www.CollisionBlast.com/3inchGrinder – 3 inch grinder used to remove paint and grind metal.
- www.CollisionBlast.com/3inch36Grit – 36 is a coarse sandpaper used on the 3 inch grinder.
- www.CollisionBlast.com/3inch50Grit – 50 is a medium sandpaper used on a 3 inch grinder. On newer cars with thin metal, 50 grit should be used, rather than 36 to remove less metal.
- www.CollisionBlast.com/StudWelderGun – This is Motor Guards new stud welder gun.
- www.CollisionBlast.com/DentFixSystem – This is a dent pulling repair system.
- www.CollisionBlast.com/MartinBodyHammer – Martin make very good body hammers.
- www.CollisionBlast.com/SlappingFile – Slapping spoons are useful when working with older thicker steel.
- www.CollisionBlast.com/Morgannokker – This is a heavy duty slide hammer used for many different repairs.
- www.CollisionBlast.com/TheTwoHoler – This is a tool used for heavy pulling.
- www.CollisionBlast.com/SuctionCup – This is a suction cup used for roughing out large shallow dents.
- www.CollisionBlast.com/AirSuctionCup – This is the air assisted suction cup.
- www.CollisionBlast.com/PDRTools – This is an assortment of PDR Tools.
- www.CollisionBlast.com/AdhesivePullTabs – This is an adhesive pull tab kit used for PDR.
 It is always important to read the TDS for any products are supplies you use. This is the information that tells you exactly how to use the specific product you are using. Note that one TDS may not be equal from different brands. If other brands are used, ask your supplier to provide this for you. There may also also be directions on the can or package, but the TDS is more detailed. Here is a TDA as an example.
www.CollisionBlast.com/WaxandGreaseRemoverTDA pdf

Every product that contains chemicals has a MSDS. This provides all of the hazards of the products, who you needs to contacted in case of an emergency, flammability, etc. www.CollisionBlast.com/WaxandGreaseRemoverMSDS

Training Activity

Stop by a body shop or wrecking year to pick up a few junk fenders. If they do not have damage already make damage by using a hammer. Then try to use the methods taught in this module to repair the damage.
Note: If you are a student attending a collision repair program, follow the lab activity instructions provided by your instructor.

First in last out….why do you think it works this way? Name a few of the problems that you may have if you do not follow this rule.
NOTE: If you are a student attending a collision repair program or an employee at a repair facility, review the steps below and discuss them with your instructor or supervisor. After the discussion, determine if this outline fits with your schools curriculum or shop procedures. If this needs to be tweaked, write or type the steps to take at your specific school or repair facility. Once completed, add the steps to your notebook for future reference.
OVERALL
1. Wash the car with dish soap and water, not car soap. Many of car soaps are designed to leave the wax and silicone on the finish. However, you want to strip the wax off. Like one of the Dawn slogans, “Strips the grease away.” That’s what we want.
2. Wipe the car with wax and grease remover.
3. Remove any moldings, trim, etc., that may interfere with the repairs that need to be made.
4. Bag and label parts.
5. Protect adjacent panels.
6. If there are any dents, repair the damage by determined repair method during the repair planning process. Remember to use the easiest repair method.
7. If heat shrinking is needed, shrink the metal. Slight shrinking can be achieved using a cold method with a shrinking hammer. However, many times the heat method will need to be used. Use a torch or your stud gun with a shrinking tip, tap metal and quench.
8. Once the metal has been straightened, now prepare the metal for body filler. Body filler must be applied directly over steel; therefore, all coating must be removed. To do this grind or sand the surface with 36 to 50 grit sandpaper using a dual action sander or grinder. Care must be taken when using a grinder not to overheat or remove too much metal. Grind the coating 4 inches around the damage. This will assure that the body filler will not be applied over paint. Once ground, blow the repair area with compressed air.
USING HAMMER AND DOLLY
- Properly clean the repair area with soap and water.
- Wipe the repair area with wax and grease remover.
- Remove any parts needed to gain access to the back side of the damage. Door panel, wheelhouse liner, tail light, etc.
- Using a dolly that fits the shape of the part you are working on, reach behind the damaged area and push out of the low area. Start from the outside of the damage (indirect damage.)
- Hammer Off Dolly: while pushing on the low area of the damaged area, use a body hammer to lightly tap on surrounding high areas. You may want to analyze and mark high areas ahead of time.
- Hammer off dolly: continue moving dolly as need working from the outside towards the center of the damage.
- To help determine highs and lows use a body file or long sanding block, file or sand the damaged area. Highs will be identified with metal; lows will be identified with glossy paint that has not been filed or sanded. The remaining areas will show file marks or sand scratches.
- If needed, continue to hammer off dolly to level metal.
- Hammer on dolly: once the damage is close the the desired shape, begin hammer on dolly to finish leveling the metal. Do not use the hammer on dolly method too much or you will stretch the metal. A slapping file can also be used for this stage.
- Check the metal to determine if it is stretched. Push on the damage area to see if it pops in. If metal does not stay locked when pushed, the metal is stretched and will need to be shrunk.
- If shrinking is needed, you can try a cold method first. Try shrinking the metal with a shrinking hammer. This is a hammer with teeth. Locate the highest area and lightly strike the area while drag the metal away from stretched area.
- If cold method does not work use a heat method. Again, locate the highest part of the damage and heat a spot in the metal about the size of a dime until dull red.
- Using a body hammer, lightly tap the red spot.
- Using compressed air or a wet sponge, quench the metal.
- If metal is locked in place, finish straightening the metal. The pick end of a pick hammer can be used to knock small highs down.
- Pick and file the surface until level if metal finishing thicker metal; Or straighten metal within 1/4 inch to prepare for body filler.
STUD WELDER GUN
- Properly clean the repair area with soap and water.
- Wipe the repair area with wax and grease remover.
- Grind or DA sand the repair area to metal using 36 grit to 80 grit sandpaper. Remove all coating 3 to 4 inched past the damaged area. A small die grinder or dermal may be needed to remove paint in some areas.
- Using a stud welder gun, tack studs on the metal surface starting on the outside of dent location. Using a t-handle, pull out on the stud.
- While pulling on stud, lightly tap on high areas of the damage.
- Continue straightening the metal using this methods working from the outside towards the center of the dent.
- Using dykes or wire cutters, cut the studs.
- Using a grinder, grind the head from the stud off.
- Once ground smooth, check the repair area to determine if more pulling will be needed. If so, repeat process until damage is pulled back to the correct shape.
- As a last result, if the t-handle is not pulling or unlocking the metal, use a slide hammer to pull the damage.
- If metal is stretched, use a cold or heat method to shrink metal as described above.
- Once metal is locked in place and you are within 1/4 inch of the origional shape, prepare for body filler.
Advice

Always work on quality first, speed will come with practice and time. When practicing, make certain that you are following the recommendations in this module, such as, first in, last out. Picking up bad habits are easy, but breaking a bad habit is hard.
Metal Repair Key Terms

BODY FILES: A file used to level highs and identify lows. This is useful on older model cars with thicker metal. Care must be taken if using a body file on newer thinner metal.
BODY HAMMER: A hammer used to straighten steel.
COLD SHRINKING: This is a cold method of shrinking metal using a shrinking hammer.
DA: Dual Action sander. Can be used for removing paint, feather edging, and final sanding. Does not work well for leveling body filler.
DIRECT DAMAGE: Damage that occurs to the area that is in direct contact with the damaging force of impact…Point of impact.
DOLLY: A tool used to straighten metal. Different sizes and shapes to fit the particular contour of the damage being straightened.
GRINDER: An air tool used to grind metal or remove coatings.
GUIDE COAT: Coat spray or dry powder that contrasts with the color you are sanding. This helps you identify highs and lows.
HEAT SHRINKING: The process of shrinking stretched metal back to it’s original shape.
INDIRECT DAMAGE: Any damage that occurs as a result of direct damage.
METAL FINISHING: The process of picking and filing the metal to shape without the need for filler to be used.
SLAPPING FILE: A tool used to perform final leveling of steel. Works best on older cars with thicker steel.
STUD WELDER GUN: A tool that welds a small pin to a metal surface to allow puling to remove dents.
WORK HARDENING: Process of metal being made harder by rolling or hammering the material. Can also be caused when metal is formed into parts.
Metal Straightening Quiz
Lesson 4 Quiz
Now test your knowledge. There is not a time limit set on this quiz so take your time. Find the correct answer if you do not know for sure. The objective of this quiz is to help you learn the information if you do not know the answer, not guessing. Good Luck!
Metal Straightening Quiz – Password (simple)
Copyright 2011 CollisionBlast.com
