These lessons are now open to help collision repair students learn from home. I am lifting the Patron fee to access this content during this time, as many schools are closed. However, I do appreciate your support and hope my Patrons continue to support this website and training.
If you would like to help and support this website, then I would greatly appreciate it. For more information visit. www.Patreon.com/CarAddictGarage
Click Button Below For Lesson
I hope you enjoy this training module. Let me know if you have any questions, or suggestions you may have to make this training module a better learning experience for you. Donnie

Lesson 5 – Body Filler
Cross Sanding Is King When It Comes To Block Sanding
“Safety is something that happens between your ears, not something you hold in your hands” ~Jeff Cooper
Experience Is The Name Every One Gives To Their Mistakes ~Oscar Wilde
In this lesson you will learn about the different types of fillers, “body filler, fiberglass filler, glaze, etc.” We are also going to cover the uses of these fillers, application,, and sanding techniques.
This page is the full lesson, which includes text content, videos and resources. I also broke it down to only the videos and resources. Just click the button below if you prefer to view only the videos or resources. Note: some browsers and mobile devices may not play videos below…but they should work on the videos page. If you are still having problems viewing videos, then you can watch the playlist on YouTube.
Video Overview
Currently do not have a video overview of this lesson. However, we do have demonstration videos below.
VIDEO COMING SOON
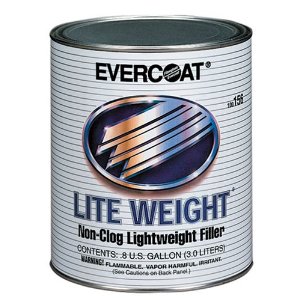 BODY FILLER Body filler is a two part product used to fill small imperfections on vehicle body parts. When the two parts are mixed together, heat occurs from the two products, which causes the body filler to change chemical properties and to harden. The most common name or best known name for body filler is Bondo. However, Bondo is just a brand name of body filler. I am not sure why Bondo became the most used term for body filler, but for the other brands, such as Evercoat; calling body filer Bondo is like calling Pepsi a Coke. You may also hear body filler called polyester filler, plastic filler, or mud. However, all of these terms are usually referring to body filler.
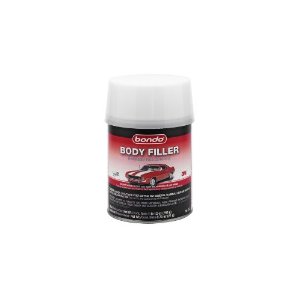 The Brand Bondo Was Bought Out By 3M
I am not sure when body filler was invented or if Bondo was the first body filler invented. Although, I do know there has been improvements to body fillers through the years. Before body fillers, lead was used to fill the small imperfections after repairing the metal. The thicker metals used then also made it easier to metal finish the body panels without the need for filler. The lead used required more skill to apply. Using lead also required a torch to soften the lead enough to smooth on the lead filler with wooden paddles. Body parts today are much thinner and care should be taken with the amount of heat used. Lead also produces many health hazards that we aware of today as well.
Since the beginning of body filler, it has been used for many other application. It has been used in woodworking and to fill cracks on payment.
Using Body Fillers
To use body filler, first repair the dent or damaged area. Evercoat, 3M, and other companies that make body fillers recommend that body filler should not be thicker than 1/4 inch after sanded. Therefore, try to assure the imperfections are no more than 1/4 inch before applying body filler to the repair area. Once the dent has been repaired; the small imperfections will need to be filled with body filler, then shaped and smoothed to produce the same smooth shape that the part was in before the accident. This module does not cover dent repair, but explains how to properly prepare the surface and apply and sand body filler.
Prepping The Metal For Body Filler
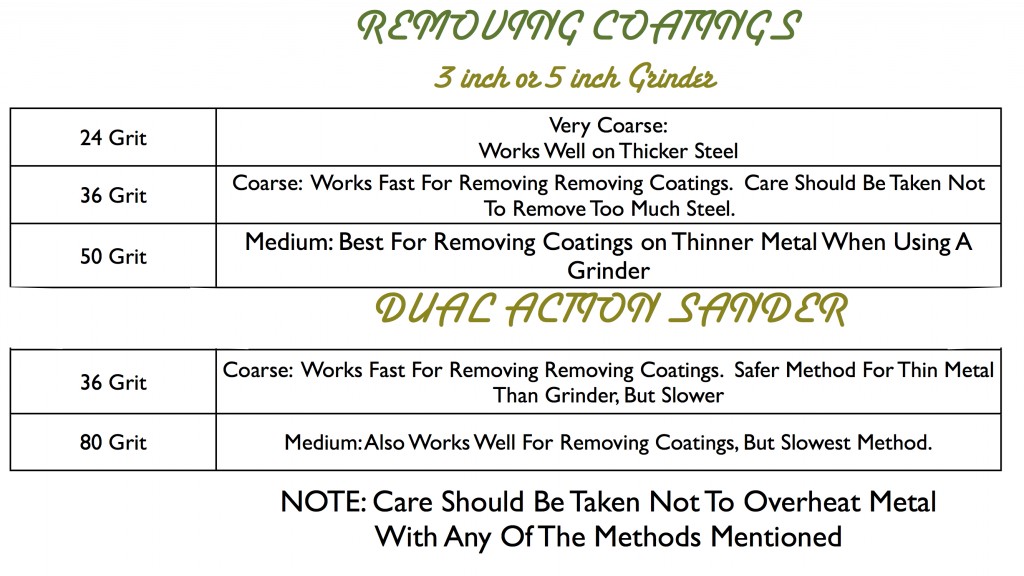
Before applying body filler, remove coatings at least four inches past the damaged area to bare metal to assure no filler will be applied over paint, as body filler should not be applied over paint. The paint can be ground off with a grinder using 24 to 50 grit or sanded off using 36 to 50 grit sandpaper on a dual action sander.
Four inches should provide enough space to spread the body filler without applying the filler on top of the paint. When grinding, care should be taken not to over grind or overheat the metal surface. This could thin or overheat the metal causing the panel to become weak or warped. Once you have the surface ground or sanded to metal, you are ready for filler. Do not touch the metal with your hands, as the oils on your hands could cause inadequate adhesion or even corrosion to form underneath the body filler.
Sandpaper Grits Used For Removing Coatings
Video Discussing The Different Grits For Removing Coatings
Bondo Over Paint – Can Body Filler Be Applied Over Paint?
This is a common question I have been asked many times. I do not recommend applying body filler over sanded paint, but this subject has been controversial through the years. I do not want to confuse you, but to educate you with more ways than just mine.
I was taught that body filler must be applied to bare metal. Therefore, all coatings must be ground or sanded to bare metal before applying body filler. However, I learned auto body repair during the lacquer/enamel days. Since then urethanes started being used on cars and some technicians started applying body filler over sanded paint. However, if applied over a sanded paint surface, it must be an OEM substrate. This means a factory paint job that has never been repainted. Now we have waterborne paint to mix into the equation.
The problem with this practice is the “technician see technician do”. Someone notices that body filler is being applied over sanded paint, then they assume this is a standard practice and they start doing the same thing. Before you know it everyone is doing this the same way, but many of them do not have all of the facts. The fact that the paint surface must be an “OEM finish” is the missing link, which leads to filler being applied over all painted finishes.
What Problems Could Occur?
So why is there a controversy about if body filler can be applied over sanded paint or not? What could go wrong? Well, I guess it’s like a houses foundation example. You know, the house is only as good as the foundation. Your filler work will only be as good as the coatings it is holding to. So adhesion problems is one of the problems that could occur.
What 3M Said
I have heard both opinions of this for years, but no concrete data. About one year ago I visited the 3M headquarters in St. Paul, Minnesota. While in their lab I asked this exact question. They said that body filler should not be applied over sanded paint. They said that this can cause repair mapping. It was explained to me that many technicians mistake this for sand scratch swelling or primer shrinking. When in fact, the chemicals in the filler can react with the layers of paint coatings causing them to swell or look a look like a shrinking problem.
What Are the Benefits?
So if some technicians have started applying body filler over sanded paint, what are the benefits? The first benefit is that this is much quicker. Less time removing coatings and feather edging. This will lead to more productivity.
Another benefit is that all of the factory zinc coatings and e-coat are not disturbed. These factory coatings are superior for corrosion protection. Regular body filler does not provide corrosion protection. However, newer premium body fillers now have zinc in them to overcome this problem. Therefore, premium fillers can be applied to bare steel and still be warrantied for metals that were zinc coated from the factory.
What Does Evercoat Claim
I did a little research and this is what is on the Evercoat website.
“Our fillers are designed to work over bare, properly prepared substrates such as: steel, aluminum, galvanized, stainless steel, fiberglass, and SMC. Some people prefer applying an epoxy primer over bare substrates to enhance corrosion protection. Our products don’t need to be applied over an epoxy for corrosion protection as long as the bare surface area is clean and no surface rust or contamination is present. However, some auto manufacturers do require body technicians to coat the bare metal surface with an epoxy before applying fillers. If you are performing warranty work, you should consult the manufacturer of the automobile for the recommended procedure. Fillers and putties will normally work OK over properly sanded (80-180 grit) cured OEM paint. However, with so many different types of aftermarket paint available (lacquer, enamel, urethane, water-based). We recommend that all paint be removed where filler is to be applied.”
So What Is My Opinion
There are many opinions on this, but not many clear facts. The I- CAR curriculum I teach and most other textbooks I have used have always taught to remove all of the coating several inches past the repair area to assure body filler will not be applied over paint. I am not claiming this is the only way, but the only way with absolute facts that it will work properly every time. Therefore, this is what I am going to continue to teach to stay aligned with the curriculum.
I also believe this is going to produce the best adhesion for body filler. Here is my thoughts on the topic. Applying body filler over paint may work many times with no problems. However, there is a possibility it could come back to haunt you later. It’s kind of like drinking and driving. You may have done it many times, but if done often enough, you’re likely to get caught.
One Last Option – Body Filler Over Primer
The only primer that body filler is recommended to be applied over is epoxy primer. I normally do not use this method. However, if you do a lot of restoration work, this may work great. If I had a car completely stripped down to metal or blasted, I would probably go ahead and shoot epoxy over the car to prevent the metal from corrosion. Especially if the car is not going to be completed for some time. However, collision repair that is repaired and filled the say day, this seems like an unnecessary step to me.
I have a video over this topic. Watch the video, then we’ll move along the body filler process.
Video – Can Body Filler Be Applied Over Sanded Paint
Mix the Body Filler and Hardener Together
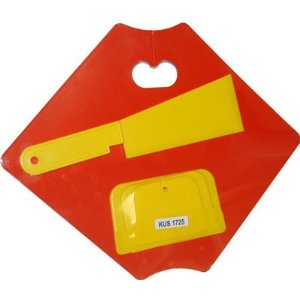
Use a nonporous surface and a plastic or metal spreader to mix your filler. Do not use cardboard to mix filler on, as cardboard will absorb some of the resins in the filler. You can use plastic, steel, or any other surface that is not porous. Next, open the can of body filler. If it is separated, it will need to be mixed. You can do this by using a paint stick. The cream hardener will also need to be kneaded. You can do this by squeezing the tube with your fingers, which mixes the hardener inside of the tube. Next, put the amount of filler needed on the mixing board. For every golf ball size of filler use about a dime size of hardener. Now you can mix the two parts together. Do not stir or whip when mixing. This will cause air bubbles, which will lead to severe pinholes. Mix the filler in one direction, by folding and spreading in one direction. Be certain the filler is mixed thoroughly until the filler is one uniform color. If you can see streaks in the filler, keep mixing.
Apply The Body Filler To Repair Area
Now you can use a plastic or metal spreader to apply the filler. You only have 5 to 10 minutes to apply the filler before it starts to harden. If it starts to harden on you, stop, as it will only make a mess when spreading. Apply the first coat on tight by pushing your spreader hard against the surface. This will push the filler tight into the ground scratches producing superior adhesion. It is better to apply several thin coats, rather then trying to fill it in one thick coat. Once the tight coat is applied, follow the tight coat with a fill coat by releasing some of the pressure when spreading the filler. Sometimes one application is enough, but don’t be afraid to apply a second or third coat if needed. However, as mentioned, don’t exceed 1/4 inch of combined layers of filler thickness (after sanded.) Be sure to sand between coats to identify low areas. If there is leftover filler on your mixing board after application it must be thrown away. Never try to put leftover filler back in the can, as this will ruin the entire can of filler.
How To Mix and Apply Body Filler
Skim Coat
A skim coat is a final coat of body filler applied to the entire repair surface. Not everyone uses this method, but it helps make that invisible repair. Throughout the body filler stages, you may have several layers of body filler feathering into other layers of body filler. Sometimes you can feel the different layers when feeling of it with your hand. Onc way to assure everything is level and ready for primer is to spread a skim coat on the entire repair area. This is a thin coat of body filler that is applied, much like a tight coat. Spread the filler over the entire repair area, but do not allow the body filler to spread onto the top of painted surfaces. Once dry, block sand the entire surface to produce a level surface for priming.
You can also do this with finish glaze, which we will discuss below. Another trick for applying your skim coat is to add a little liquid fiberglass resin with it. To do this add some body filler to your mixing board. Next pour a little resin, about the amount of cream hardener you normally use, of the liquid resin. Then use regular body filler cream hardener to mix the filler the way you normally would. This will make the skim coat thinner and spread easier and help the skim coat go on smooth. Allow to fully dry, wipe the top of the filler surface with some lacquer thinner on a rag to remove the tackiness created by the resin, then block sand. This is a trick that has been around for a long time. Experiment with it and see if you like this method or not. As mentioned, finish glaze works well for this step as well and has a few more benefits we’ll discuss below.
How To Apply Putty Glaze Using The 3M Filler Gun
Detecting Body Filler
So how do you know if there is body filler on a vehicle if is’s covered with paint? In the past, filler could be detected by using a magnet. However, the magnet test does not really let you know if there is too much filler or not. If the maximum thickness is only supposed to be 1/4 inch, how are you going to determine this? Well there is a new tool to detect the thickness of body filler. This tool may be useful if you are looking to buy a used car or when estimating a job to determine what you are getting in to. This tool will only work on metal surfaces. If the part is composites, it will not work. I have an article about this tool. To learn more visit
Block Sanding Body Filler
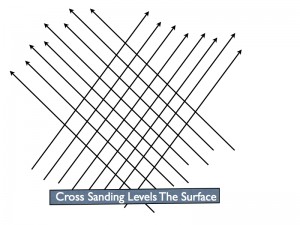 The best advice that I can give you when sanding body filler is to cross sand when block sanding and do not over sand the filler. Those are the most two common mistakes I see. Cross sanding will help level the body filler. Over sanding will cause the edges to be undercut, which will show up through the paint after painting.
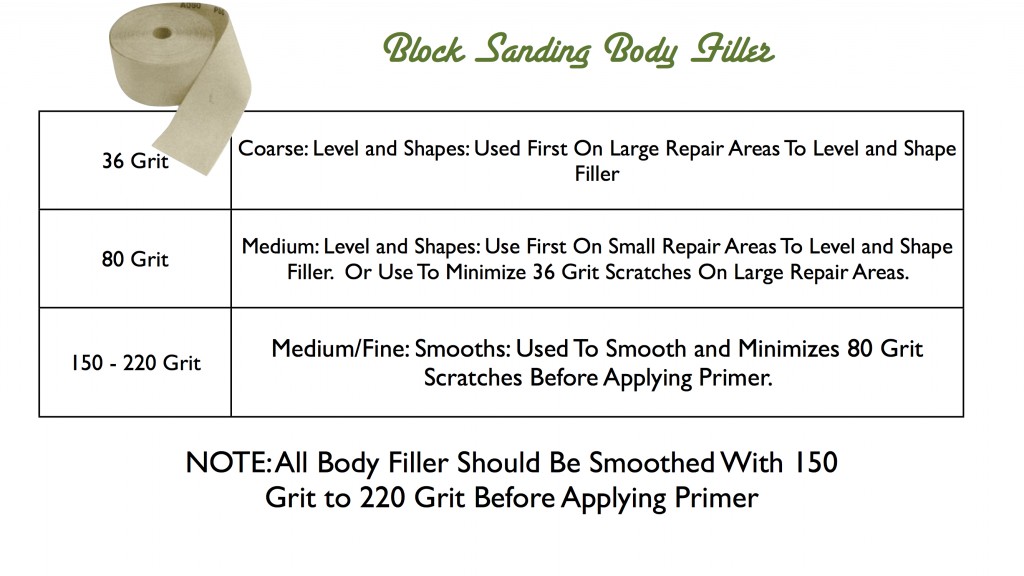
When sanding bigger repair areas start out by sanding with 36 grit sandpaper using a block and then switch to 80 grit sandpaper on a block to minimize the 36 grit scratches. Guide coat can be used at any time to help determine highs and lows. If there are pinholes or small imperfections, a coat of finish glaze can be applied and blocked with 150 grit. If it does not need finish glaze, finish the body filler by sanding with 150 grit. One more tip! The coarser the sandpaper, the better it levels. The smoother the sandpaper, the more it begins to polish and follow the contour. Therefore, be certain that the filler is level before switching to the smoother grits. Switching to a smooth grit too soon may result in a lumpy finish.
Body Filler Grit Chart
This is another common mistake I see. The objective of sanding body filler is to shape it, not to get it smooth. If the repair area does not feel completely level or if there are still lows, there is no need to be using 150 grit or finer on it. If you identify a low, go ahead and add more filler before trying to get the body filler smooth. Another thing I am not a fan of is using a DA (dual action) sander on body filler. Yes, it helps smooth the surface, but does not do a good job of leveling. A DA sander does a good job of feathering your paint edges after the body work has been completed. However, I am a believer that the DA should not touch your body filler.
If you want to use air tools, I’ll mention air files and 8 inch sanders that work well for sanding body filler. Just remember, the objective is to shape and level the filler, not to get it smooth as glass. This will be done in the final stages and with primer surfacer.
Blocks and Air Tools
Applying Filler and Sanding on Body Line
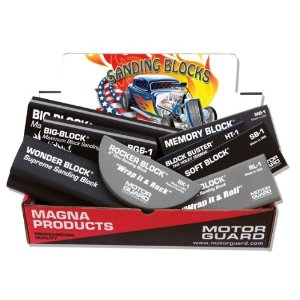
Use a sanding block that fits the repair area. Longer blocks work best on large repairs. If the repair is small a shorter block can be used. It’s best to use a longer block when possible to prevent sanding lows in the body filler.
An air file can also be used to speed up the process. However, it’s best to use hand blocks until you become comfortable with the process. Air tools are faster and work great, but can do more bad than good if not performed correctly. Even when I use an air file, I usually finish the repair area by hand blocking.
On large flat areas, an 8 inch orbital sander can be used. This is also known as a mud hog. This works great on roofs, hoods, deck lids and other large flat areas. This tool sands body filler fast, but as with an air file, it can do more bad than good if not performed correctly.
I recommend using hand blocks until you can finish a repair with ease every time before using air tools to sand body filler. The same rules apply when blocking by hand or using air tools. 1) sand in a cross patters. 2) do not over sand each step. You want to leave enough body filler on the surface to make a smooth transition from the body filler to the metal when finishing the filler with 150 grit sandpaper.
Sanding Tips
You can speed up the sanding process by sanding the body filler before completely cured. This is called sanding the body filler in the green state. You will have to do this as the right time. If you try to sand the filler to early, the filler will peel off. If you wait too long, the filler will be fully hardened. You can feel of the body filler with your hand. When it does not feel soft or smear, you can probably use this method. Using a block with 36 grit sandpaper, lightly sand the body filler knocking the highs areas and the excess body filler down. Be careful not to sand too much off, just enough to knock the highs down. Then wait for it to harden before you finish sanding. You can also use a cheese grater for this step. However, a cheese grater can leave some nasty grooves to sand out if you are not careful. I would only use a cheese grater on an extremely large repair area. This tip can save much time and sanding.
Block Sanding Body Lines
You don’t want to build up a lot of body filler on your body lines, but you must make certain to keep them sharp. When block sanding, sand parallel up to each side of the body line. It’s kind of like sharpening a knife…one side at a time. By sanding parallel to the body line the line will become sharp. Don’t worry about it being sharper than the original body line. We will take care of that in minute. Once you are done shaping the filler and you are using your 150 grit to prepare for primer, then go ahead and lightly sand over the body line to shape it to its original shape. I always leave this for last.
If you are having problems keeping the body line straight or if you have multiple body lines, use masking tape to mask each side when sanding. For example, mask the top edge of the body line and block sand the bottom. Then mask the bottom to block sand the top. This will help you keep your body line straight and sharp until the final stages of block sanding are performed.
Determining If Body Filler Is Level
Periodically you need to check your progress by checking for highs and lows. Do not let your eyes fools you. What may look straight may tell a different story when you feel of it with your hand. To check you progress, feel of the repair area with the flat palm of your hand. Your fingers will not detect highs and lows, you must use your whole hand. This may take a little practice to get the hang of it. Some people claim they can feel highs and lows better is they use a rag. Place a rag on the repair area and use it between the repair area and your hand when feeling the panels. This helps take the feel of different texture from your hand. I just prefer my hand, but this is something you may want to experiment with to see what works best for you.
Another way to visually monitor your progress is to use guide coat. This come is a spray can or dry powder form to cover the repair area with a contrasting color. As the guide coat sands off, you will see if there are any low areas, as the guide coat will still be applied in the low areas. If guide coat is still in a spot, don’t try to dig in and sand it out; it’s doing its job. Always keep the block level when block sanding. If there is still guide coat, means you are going to need to add additional filler to that area. I normally use guide coat when I switch grits of sandpaper. It helps me determine when all of the coarser scratches have been sanded out. Don’t be afraid to use guide coat or think you don’t need to. Even the professions use this method and it works great.
One last think I want to mention when check you work is a straight edge. Use a straight edge to see if there are any lows. If it is a big area, a yard stick may work. For smaller areas a ruler may work fine. This method is becoming harder to use on newer cars because there is so many curves. It does not seem like anything is perfectly straight, but on the right repair, this works great.
Finishing Glaze
Finishing glaze does not have to be used, but it does have many benefits and can make the job much easier. Glaze is a thinner filler that spreads smoother and works well as your final coat (skim coat as mentioned above.) Glaze should not be applied too thick as it is designed to fill pinholes and minor scratches and imperfections. In addition to spreading smoother, glaze can also be applied over sanded body filler, sanded paint, sanded primer, or metal. This makes it excellent to apply over the entire repair area, including the sanded paint. The disadvantage of finish glaze is the cost. Glaze is more expensive that body filler.
Finishing Glaze on Hail Damage
Another advantage of using finish glaze is when repairing small hail dents. Since glaze can be applied over sanded paint, it is not necessary to remove all of the paint to the metal. Simply sand the dent area with 180 grit, clean, apply glaze, and block out. This is quicker and you do not have to remove any of the factory e-coat, which is the superior corrosion resistant coating that is on vehicles from the factory.
We’ll cover this and several other hail damage methods in more detail below.
5 METHODS FOR REPAIRING HAIL DAMAGE
We get hit every year with hail season, which leaves many cars needing hail damage repairs. There are several ways to repair the hail damage and we are going to discuss a few them in this article. The last method I am going to discuss is probably the most common method used to repair hail damage when not using Paintless Dent Repair.
1. R&R (Remove and Replace)
Many of the parts that have been hit heavy with hail damage may be replaced instead of being repaired. Parts that may be replaced are bolt-on parts that can be easily removed such as: hoods, fenders, and trunk lids, etc. It is usually less expensive to replace the parts than the labor it would cost to repair the parts. Of course, there is the exception 1 or 2 random hail dents in a panel. However, a car that has severe hail damage requires a lot of R&R (remove and replace).
2. Hail Damage Repairs – Traditional Repair
Another way to repair hail damage is by using body filler. This requires you to grind the repair area to metal, feather edge your paint edges, apply body filler and block sand the body filler. Then you will need to prime, block and paint. When using this method, care must be taken not to overheat the metal when grinding. You may even want to use a Dual Action sander to remove the paint coatings to help reduce the heat. I would not use anything finer than 80 grit to prepare the metal for filler. This will assure proper adhesion.
3. Hail Damage Repairs – Old School (Some dents and thinner metal are not a candidate for this repair method)
This method uses heat to raise the metal. You can use an oxyacetylene torch and heat the metal around the small dent in a spiral motion. Work from the outside towards the center of the dent. This will raise the metal. Then slightly tap the high area with a body hammer to relax the metal. Last, using a body file cross file the metal level and determine if the dent is gone. If there is not a dimple with paint in it, then the dent has been repaired. As the metal cools, the high area will flatten back out to a level flat surface. Then you can feather edge the paint, prime, block, and paint. I have used this method to remove a lot of hail damage. It is quick, fast, and eliminates the filler and block sanding filler steps. However, I caution you…this is not a good method to use on newer vehicles. The metal is too thin and overheating and warping the metal or filing too much metal off when using the body file is a few of the problems you may have. However, if you are restoring an older car, this method works like a champ.
4. Paintless Dent Repair
PDR is heavily used for hail damage. This is the process of getting behind the dent with tools and messaging the dent out without the need to paint the outside of the paint surface. This method is used on many of the parts that are not replaced, such as roofs, quarter panels, bedsides, etc. However, the tools are expensive and requires much practice to master PDR.
5. Hail Damage Repairs – Finish Glaze (for smaller hail – large hail may need to be pulled)
This is one of the most common methods used for small hail damage when not using a PDR method and is a method easy to learn with little practice.
This last method for repairing hail damage is the method that I wanted to highlight in this article. There are other methods, such as PDR that I may go into detail in another article. However, if you are not performing PDR and the dents are small enough to fill with finish glaze, then this method works great. I added a video below that will demonstrate this method. The advantage of using this method is you do not have to remove the paint coating down to the metal. You simply need to rough the paint with 180 grit or courser for the glaze putty to adhere properly. It is best not to sand through the clear coat when sanding the surface. You also want to assure the paint surface is in good condition when using this method.
The obvious advantage is the time it saves from grinding and feather edging. However, another benefit is the factory e-coat (corrosion protection) is not removed from the part being repaired. This will eliminate the need for primers to provide corrosion protection, as the e-coat is already providing optimal protection. I will list the steps, then you can watch a video demonstrating this method.
Video Demonstrating How To Repair Hail Using Glaze Putty
Fiberglass Filler – What Is Fiberglass?
Raw fiberglass comes in a soft fabric like material. When saturated with liquid resin and hardener, it becomes hard and very strong. There are not too many fiberglass auto parts on modern day cars, as they have all started using other composites like SMC and carbon fiber. However, fiberglass was used on early model corvettes, truck hoods, and many other parts. There are still aftermarket parts that are manufactured from fiberglass and it is still used for boats and jet skis.
The Difference Between Fiberglass and Fiberglass Filler
Fiberglass filler comes in a can and is mixed with a cream hardener. It mixes much like regular body filler, but it is thicker and a little harder to mix. The filler has fiberglass mixed in it. It comes in short hair and long hair. This is the length of the fiberglass that is mixed in the filler. Both provide excellent waterproof properties as they do not absorb moisture. Both fiberglass fillers are stronger than regular body filler. The long hair filler provides the most strength out of the two. However, these fillers are very difficult to sand. The filler is also thick, which makes it hard to level and smooth like regular body filler.
Why Use Fiberglass Filler If It’s So Difficult To Sand?
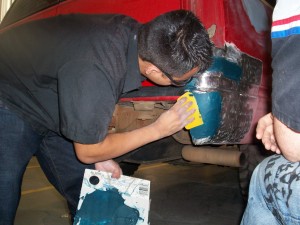
The reason we use fiberglass filler in auto body repair is not really for the added strength, but for the waterproof properties. It is recommended to apply a thin layer of fiberglass filler over any welding that is performed. Body filler absorbs moisture, which will lead to corrosion and rust. By using the fiberglass, we eliminate the moisture absorption problem. Since our main purpose is to seal the welded area, the short hair fiberglass is sufficient for the application. For more information watch this video:
What Can Fiberglass Filler Can Be Used On?
This filler can be used over bare metal or fiberglass. Fiberglass filler should not be used over painted surfaces or body filler.
Finishing The Repair
As I mentioned, fiberglass does not sand well. That is why I recommend only applying a small amount to the welded areas and rough sanding it using 36 grit. After this is done, you can apply body filler on the top of the sanded fiberglass filler and finish the repair as you normally would using body filler.
Warning: You should always wear proper protective equipment when sanding any filler. However, extreme caution should be taken when sanding fiberglass products. It not only itches and irritates your skin, but it is extremely unhealthy to breath the fiberglass particles. Be certain to wear an approved dust respiration, gloves, and eye protection, and you may even want to wear a disposable paint suit. If some of the fiberglass does get on your skin, take a cold shower. This will help keep your pores small and allow the fiberglass to wash off.
Tip: As with body filler, speed up the sanding process by sanding the fiberglass filler before it has fully cured. By sanding in the green state, the filler is much softer and sands much faster. This technique should only be used to level the filler. Do not sand too much during this stage, as you will undercut the filler.
If you are not a fan of fiberglass filler or if it irritates your skin, there is an alternative filler that can be used. This filler is called All Metal, which is an aluminum based filler, which has the same waterproofing properties.
Lead
Lead has been around for many years. It was used as one of the first fillers to fill imperfections on car parts. There are still a few custom shops around that use lead, but most shops have started using lead-free solder or body filler.
If you are a lead fanatic then you probably know the name Bill Hines. He has been working with lead and became know as the leadslinger and king of leading. Bill was born in 1922 and starting using lead in 1941. He has customizing cars since the 1040‘s and it is said that he still works 7 days per week. This means lead has been working well for many years and still being used today for the right applications.
Lead can be used a s a filler to fill imperfections and to seal welded seams. Lead is not used much anymore due to the health hazards of lead as it has been outdated with plastic body fillers.
A new lead-free version body solder has been developed if you are a lead enthusiast and want to produce the same quality results. The lead-free body solder is used much like the older leads. The metal still requires to be tinned, solder applied with heat and smoothed with wooden paddles, then shaped using a body file. You can also sand or grind this solder without the worry of breathing harmful lead particles. While this is a safer leading alternative, a proper mask should still be worn as when sanding any type of filler.
The Benefits of Lead
- Lead seals much better than body filler. Therefore, you can lead straight over welds, section location, pillars, or anywhere else exceptional sealing properties are required. Once the lead is shaped, you are ready for primer.
- Lead flexes well with the metal without cracking. However, body fillers have improved through the years and flexes as well, but lead is superior for flexing without cracking.
- If you are slightly low on an edge or body line, lead provides a better edge that body filler. In fact, body filler is not recommended for building edges or body lines.
The Disadvantages of Lead
- It take more skill to use lead. It requires more training and practice to perfect leading than body filler.
- Leading is a much slower process. As mentioned, you must prep the metal by tinning it, using heat to soften and apply the lead or solder, then smooth it out with wooden paddles. Then using a body filler to smooth the lead or solder smooth. If you are filling a large area, you may have to break the filling process into smaller sections.
- Lead does not work well on thinner metals. More care must be taken when working with thinner metals to prevent overheating or weakening the metal. Since heat and filing is required to use lead, it will not work well on thinner metals.
- Lead is harder than body filler which makes it harder to level or sand.
- Lead is often referred to as becoming a part of the metal. However, I do not agree with this statement. In order for this to happen, the metals must be a fused together. This requires both metals to melt together and become one piece. For instance, when welding, both metal pieces are melted and fused together. However, when brazing, only the brass is melted. Brazing is not considered a fusion weld. While both brazing and lead provide excellent sealing properties, they are not a fusion process. Therefore, lead does not become a part of the part.
This should give you an idea about how lead works and if this is something you want to explore for your project or learn. I will provide step-by-step directions of how to use lead-free solder below in the step-by-step section of this book below. You can also buy lead-free products and an additional training dvd at www.CollisionBlast.com/BodySolderKit
Resources

Photo With Becky Sue Huff: CP Tools SEMA 2011
Watch my interview with Becky at CollisionBlast.com/BeckySueHuff
 The videos below are to help reinforce what you have learned. Video is an excellent method to visually see how it all works. The first video is a presentation of this book. It will reinforce what you have learned. However, the additional videos are how-to videos that will show you how to perform certain techniques.
How To Videos
- www.CollisionBlast.com/ApplyBodyFiller
- www.CollisionBlast.com/BlockSandBodyFiller
- www.CollisionBlast.com/3MBodyFillerGun
- www.CollisionBlast.com/3MGlazeGun
- www.CollisionBlast.com/ApplyFiberGlassFiller
- www.CollisionBlast.com/WhyWearGlovesQ&A
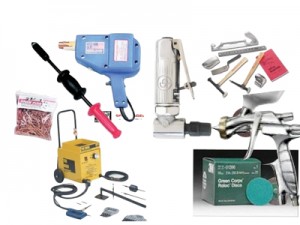
Learn more about the tools and materials used for dent repair. Below you will find some of the most common tools and supplies I recommend along with part numbers and prices used for straightening metal.
- www.CollisionBlast.com/AllMetalFiller
- www.CollisionBlast.com/BodyFiller
- www.CollisionBlast.com/BodyFiller3M
- www.CollisionBlast.com/FinishGlaze
- www.CollisionBlast.com/FiberGlassFiller
- www.CollisionBlast.com/MixingBoard
- www.CollisionBlast.com/SandingBlocks
- www.CollisionBlast.com/GuideCoat
- www.CollisionBlast.com/BodySolderKit
 It is always important to read the TDS for any products are supplies you use. This is the information that tells you exactly how to use the specific product you are using. Note that one TDS may not be equal from different brands. If other brands are used, ask your supplier to provide this for you. There may also also be directions on the can or package, but the TDS is more detailed.
- www.CollisionBlast.com/TDSAllMetal
- www.CollisionBlast.com/TDSBodyFiller
- www.CollisionBlast.com/TDSBodyFiller3M
- www.CollisionBlast.com/FinishGlaze3M
- www.CollisionBlast.com/TDSDynamicMixingSystem
- www.CollisionBlast.com/TDSFiberGlass
- www.CollisionBlast.com/TDSGuideCoat
 Every product that contains chemicals has a MSDS. This provides all of the hazards of the products, who you needs to contacted in case of an emergency, flammability, etc.
- www.CollisionBlast.com/MSDSAllMetal
- www.CollisionBlast.com/MSDSBodyFiller
- www.CollisionBlast.com/MSDSBodyFiller3M
- www.CollisionBlast.com/MSDSFinishGlaze
- www.CollisionBlast.com/MSDSFinishGlaze3M
- www.CollisionBlast.com/MSDSFiberGlassFiller
- www.CollisionBlast.com/MSDSGuideCoat

Read the text and watch the videos first, then use the step by step procedure below as a memory jogger. On a junk panels, remove all coatings, apply body filler and block sand for practice.
Note: If you are a student attending a collision repair program, follow the lab activity instructions provided by your instructor.
 One of the common problems when applying body filler is sanding too much off and undercutting the filler. This requires applying another coat of body filler and re-sanding. How can you eliminate this from happening to you?
NOTE: If you are a student attending a collision repair program or an employee at a repair facility, review the steps below and discuss them with your instructor or supervisor. After the discussion, determine if this outline fits with your schools curriculum or shop procedures. If this needs to be tweaked, write or type the steps to take at your specific school or repair facility. Once completed, add the steps to your notebook for future reference.
BODY FILLER
- If the repair has been welded, grind and clean repair area, mix and apply fiberglass filler to repair area.
- Sand the filler with 36 grit. There is no need to use a finer grit as body fill will be applied over the fiberglass. All you need to do is to level the fiberglass filler.
- Mix and apply body filler over the repair area. Cover and extend body filler over fiberglass. Do not extend the filler onto the paint surface.
- Block sand (cross sand) the filler with 36 grit sandpaper. (This step can be done before the filler is completely dry to reduce the amount of sanding required.)
- Repeat steps if there are still lows.
- Allow to fully cure (15 to 20 minutes) and spray with guide coat.
- Block sand (cross sand) with 80 grit sandpaper. Sand just enough to remove guide coat. If guide coat does not sand off in an area, this indicates a low and additional filler will be needed.
- Optional: Either apply guide coat and block sand with 150 grit; or, apply a coat of finish glaze over entire repair area. Remember, glaze can be applied over sanded paint too.
- Finish filler or glaze by blocking with150 grit.
Now the body work is complete and the repair is ready for featheredging, priming and painting.
Traditional Hail Damage Repair Steps (For small dents only. Bigger dents may need to be pulled)
- Properly clean repair area.
- Remove coatings to metal using a grinder with 50 grit or a DA sander using 36 to 80 grit.
- Feather edge paint edges.
- Blow repair area with compressed air to prepare for body filler.
- Mix and apply body filler to metal repair area. Do not apply body filler on paint.
- Block sand body filler with 80 grit followed by 150 grit sandpaper. (use guide coat when blocking to help find highs and lows).
- Now you’re ready for priming, blocking and paint.
Old School Hail Damage Repair Steps
(For restoration of older cars with thicker metal)
- Locate small dent
- Starting with about a 12″ radius around the dent, use a torch with a carbonizing flame (more gas – this produces a cooler flame) heat in a circular motion.
- Heat the metal until it starts to slightly move. Then work the heat in a spiral motion towards the center of the dent.
- Once to the center of the dent has raised, slightly tap the high with a body hammer to relax the metal.
- Next, use a body file to file the top layer of metal to determine if dent is gone. If the dent is you will see all metal in the repair area. If there is a spot with paint, the dent is still there.
- Once you have crossed filed the area and it is all metal, allow the metal to cool naturally. Do not use compressed air or water to speed up the process. As the metal cools, it will level back to a flat surface.
Now you are ready to feather edge, prime, block and paint.
Steps To Repair Hail Damage Using 3M Glaze
- Properly clean the areas being repaired
- Locate all the hail damage
- Using 180 on a DA, sand the hail dent areas to assure proper adhesion, but do not sand through the clear coat
- Blow repair areas off with compressed air
- Clean the surface using wax and grease remover
- Apply a thin coat of finish glaze to the surface.
- Block sand the glaze with 150 to 180 grit sandpaper
LEAD
- After metal has been straightened and ready for filling, grind the repair area 4 inches to bare metal past the damaged area.
- Blow metal with compressed air to assure the metal is clean.
- Using the tinning flux, apply a thin coat using an acid brush to the area where body solder will be applied.
- Heat the tinning flux using a acetylene or propane torch. The surface should start to provide a shinny surface. Care should be taken not to overheat the metal.
- Wipe the tinning flux with a towel or steel wool to spread the flux and remove all contaminates. This will provide a shinny surface, which indicates the surface is ready to accept the body solder to be applied.
- Using an oxyacetylene torch or propane torch, heat the solder and metal and apply the solder to the low area of the damaged area. Do not overheat the metal and remove the tinning flux. If this happens the surface will need to have tinning flux reapplied.
- Apply the solder until the solder is 1/8 inch higher that the surrounding surface.
- Once the solder is applied to the surface use wooden paddles to flatten and smooth the solder while the solder is still hot.
- Using a body file to file and level the body solder. File the solder at a 30 degree angle until the surface is level and the same shape as the original contour of the panel.
- This lead-free body solder can be block sanded for final shaping if desired.
- Wipe the repair area with a solution of 1 part alcohol, 1 part pneumonia, and 1 part water to remove any remaining tinning flux residues that be on the surface.
- Once the body solder is shaped correctly, the surface is ready to primer.
That is it, now you are ready for prime, block and paint. Works great!
 The best advice I can give you is to apply enough filler to allow you to sand it smooth without sanding too much off. Always use a cross sanding technique. Do not try to smooth your filler too soon as this will not level your filler, which will leave it lumpy.
Metal Repair Key Terms

- ABRASIVE: Substance used to wear away a surface by friction.
- ABRASIVE COATING: In closed coat paper, the adhesive is completely coated with abrasive, and in open coat paper, the adhesive is partially exposed, for the abrasive is not put on the paper close together.
- ACETYLENE: Gas used for oxyacetylene welding.
- ACID CORE: Solder in a tubular wire form in which the interior contains a flux. BODY FILES: A file used to level highs and identify lows. This is useful on older model cars with thicker metal. Care must be taken if using a body file on newer thinner metal.
- BODY HAMMER: A hammer used to straighten steel.
- BODY FILES: Variety of files used in accurately locating surface irregularities (high and low spots) on damaged areas after they have been “bumped” out. Also used in trimming down solder and plastic filled areas.
- BODY SOLDER: Alloy of tin and lead. Its properties may vary but the most common mixture consists of 30% tin and 70% lead or 30/70 solder as it is usually called.
- BRAZE WELDING: When bronze welding rod in a molten stage is deposited on metals that are heated to a cherry red; similar and dissimilar metals are bonded together.
- CARBON DIOXIDE: Gas that can be used for MIG welding.
- CARBURIZING FLAME: Used mostly for heating parts and for soldering. It burns more acetylene than oxygen through the torch. Its inner core is whitish in color and has a feather. Sometimes also called a reducing flame.
- COLLAPSED HINGE BUCKLE: Formed whenever a simple hinge buckle extends and crosses over a stamped-in reinforcing flange, head, or ridge on a flat or reverse-curved (concave) surface of an auto body panel. Will also form when box constructed members and a
- COLLAPSED ROLLED BUCKLE: Formed whenever a hinge buckle extends or crosses over into the crowned surface of a panel causing the metal to collapse and shrink severely and a general shortening up in the overall length of the panel to occur.
- CONDUCTOR: Material such as an electric wire through which electricity flows.
- CONTAMINANTS: Any polish, wax, tree sap, tar, oil, and the like that would damage the paint film or spoil the adhesion of a new paint film.
- CONTRACTION: Area that reduces in size.
- CONTROLLED HEAT: Heat from an acetylene torch that is usually controlled by the operator.
- COLD SHRINKING: This is a cold method of shrinking metal using a shrinking hammer.
- DA: Dual Action sander. Can be used for removing paint, feather edging, and final sanding. Does not work well for leveling body filler.
- DIRECT DAMAGE: Damage that occurs to the area that is in direct contact with the damaging force of impact…Point of impact.
- DISK SANDER: Power sanding tool used for grinding, sanding and polishing repaired metal areas. It is manufactured in either the 7-in. standard or the 7 and 9 in. heavy-duty model and is available with a round, flexible, molded rubber, backing pad 5.7 and 9-inch in diameter.
- DOLLY: A tool used to straighten metal. Different sizes and shapes to fit the particular contour of the damage being straightened.
- FEATHEREDGE SPLITTING: Cracks or stretch marks along the featheredge which occur while drying or shortly after the topcoat has been applied over a primer-surfacer.
- FEATHEREDGING: Sanding down a surface to a very fine edge; that is when one coat of material is made gradually thinner around the edge until it finally disappears.
- FEELING THE METAL: Used in detecting surface irregularities. The repair technician slides the palm of a hand back and forth over the work and is able to detect or feel any hollows or high spots that may be present.
- FENDER FLANGE: Outer rim or bend along the lower edge of a fender that gives shape and strength to the side of the fender.
- FERROUS METAL: Any metal composed of or containing iron.
- FIBERGLASS Very fine staple fibers of glass that are spun together; it is used as insulation and for repairs on automobile and truck bodies.
- FILING: Pushing or drawing a file back and forth over the surface of the work in order to detect high and low spots (surface irregularities) or to wear down a surface to an exact size and shape.
- FORGING: Repair operation used in restoring welded butt joints to as near as possible the same thickness and molecular structure as that possessed by the surrounding sheet metal.
- FUSION WELD: Operation in which two pieces of the same kind of metal are made into one is called fusion welding.
- GLAZING: Application of a filler by means of a putty knife, the material being filled into the depression but scraped off the higher areas.
- GUIDE COAT: Coat of a different color from the other coat is used to serve as a guide coat in rubbing or sanding to determine when a smooth surface has been reached.
- GUMMING: Condition where the sandpaper becomes clogged by the abraded surface coating. Compare Caking.
- GRINDER: An air tool used to grind metal or remove coatings.
- GUIDE COAT: Coat spray or dry powder that contrasts with the color you are sanding. This helps you identify highs and lows.
- HAIRLINING: Very fine lines or checks on the dried surface coating of a finished material.
- HEAT SHRINKING: The process of shrinking stretched metal back to it’s original shape.
- HSLA (HIGH STRENGTH LOW ALLOY): Type of steel with low alloy used in the fabricating of certain parts for motor vehicles.
- HSS (HIGH STRENGTH STEEL): Type of steel used that is very strong, but is thin and light.
- INDIRECT DAMAGE: Any damage that occurs as a result of direct damage.
- KNEED – To mix
- LOW-CROWN METAL: Portion of a body panel with just a very small amount of outward curve.
- METAL FINISHING: Operation in which hidden surface irregularities are detected and removed by means of filing and picking the straightened metal unit all low spots have been eliminated and a perfectly smooth and level surface is obtained.
- MIG (METAL INERT GAS WELDING): Continuous welding system that uses the electrical arc and gas to protect the weld.
- NEUTRAL FLAME: Oxyacetylene flame burning equal parts of acetylene and oxygen.
- NONELASTIC METAL AREAS: Areas in auto body panels that have been permanently deformed and that will not spring back to their original shape after stresses and strains have been released.
- NONFERROUS METALS: Metals that contain no iron.
- NORMALIZING: Removing of stresses and strains in metal. This is done by hammering, heating up the metal, or by a combination of both.
- O. E. M.: Original equipment manufacturer. Usually refers to replacement parts for a vehicle that were made by the same manufacturer as the car, rather than replacement parts made by a different manufacturer.
- ORBITAL SANDER: Type of sander that uses an orbit motion to accomplish the sanding of different materials.
- ORIGINAL FINISH: Paint the car manufacturer applies at the factory.
- OXIDIZING FLAME: Oxyacetylene flame that uses more oxygen than acetylene in its flame.
- OXYACETYLENE WELDING: Process where oxygen and acetylene are burned using a torch to produce a flame hot enough to melt metal.
- PICKS: Special tools used in the metal finishing operation for raising low spots located in the more central areas of inaccessible body panels.
- PIN SHRINK: Very small type of shrink used for delicate shrinking purposes.
- PINCH WELD FLANGE: Flange that is formed when the framework and outer panels are clamped and spot welded together as found on windshield and rear window openings.
- PLASMA TORCH: Arc torch used to cut metal.
- PLASTIC FILLER: Compound of resin and fiberglass used to fill dents on car bodies.
- PLUNGER: Male threaded part, that acts like a piston moving in and out of the ram body and onto which different lengths of extension tubing and attachments can be connected.
- POLYCHROMATIC: Term used by some paint manufacturers for color coats that contain aluminum powder in flake form.
- POLYESTER FILLER: Special kind of putty like filler used in filling slight imperfections and low spots on panels.
- POLYESTER RESIN: Bonding liquid that forms a good bond with fiberglass surfaces only.
- POLYOLEFIN: A plastic material used to make flexible bumper covers.
- POOR ADHESION: Material that has poor bond to the underlying surface.
- POWDERED FIBERGLASS: Processed fiberglass that has been crushed into a powder. It not only gives bulk but also strength to the filler.
- PULL RODS: Rods that are equipped with hooks on one end and handles on the other. The hooked ends are inserted into small holes drilled in areas of direct damage and used in roughly aligning the areas of direct damage before they are soldered or welded.
- PUNCHES: Special tools used in driving shafts and pins and in aligning holes in panels so that they can be bolted together. Different punches are used in the metal finishing operation for raising low spots located around the outer edges of inaccessible body panels.
- PUTTY GLAZING: Heavy bodied nitrocellulose or polyester material used to fill small flaws that are in the surface and are too large to be filled by primer surfacer.
- PUTTY KNIFE: Special knife used in applying glazing putty.
- QUENCHING: Cooling of a shrink spot or solder fill with a wet rag or sponge.
- RELIEVING: Process of removing and correcting stresses in a panel due to collision damage.
- RESPIRATOR: Filtering device worn over the mouth and nose to filter out particles and fumes and prevent them from reaching the lungs.
- ROLLED BUCKLE: Buckle created by a force that extends over the crowned surface of a panel.
- ROSIN: Natural gum or resin; residue of the distillation of crude turpentine.
- SANDBLASTER: Piece of equipment used to clean metal using sand and pressurized air.
- SANDER: Power driven tool used with abrasives to sand car bodies.
- SANDING BLOCK: Hard rubber or plastic flexible block used to provide consistent backing for hand sanding.
- SECTIONING: Process of joining two different sections of a part or vehicle by welding to make one part,
- SHAPE: Form to which a metal panel was stamped.
- SIMPLE HINGE BUCKLE: Formed when flat sheet metal is forced to bend either inward or outward by a damaging force or impact. It is similar to the bending of a hinge on a door and the change in the grain or molecular structure of the metal that occurs will vary greatly, depending on the sharpness of the bend.
- SIMPLE ROLLED BUCKLE: Outer ridges formed at either end of a hinge buckle that extends or crosses over into the crowned surface of auto body panel.
- SLAPPING FILE: A tool used to perform final leveling of steel. Works best on older cars with thicker steel.
- STUD WELDER GUN: A tool that welds a small pin to a metal surface to allow puling to remove dents.
- SLIDE HAMMER: Weight that slides along a bar until it hits a stop. The bar usually has attachments to pull dents out, and the impact that results when the weight hits the stop helps to pull the dent out.
- SMC (SHEET MOLDED COMPOUND): Fiber plastic type of material that is molded to a certain form and used as an outer panel on a vehicle.
- SOLDER: Mixture of lead and tin used to fill dents and joints on body panels.
- SPOON: Tool that is designed to perform the same work as a dolly, but is thin, wide, and fairly long and can be used in areas that have very little clearance.
- SPRING HAMMERING: Elimination of a high ridges generally formed at the outer edges of indirect damage by means of hammering them down with a surfacing spoon and bumping hammer.
- SPRINGBACK: Amount that a section of a vehicle will move back once the hydraulic pressure is removed.
- STRAIGHT LINE SANDER: Sander that uses a back and forth movement to sand a surface using sandpaper on its shoe.
- STRETCHED: Amount by which a metal surface has become larger or longer.
- SUBSTRATE: Surface to be painted whether an old finish or bare metal.
- TACK WELDS: Short welds placed at intervals along a break or the joining edges of two pieces of metal, keeping the metal in alignment while the bead is run.
- THERMOPLASTIC: Type of plastic that can be softened with the application of heat, can be reshaped, and can also be welded.
- THERMOPLASTIC POLYURETHANE: Plastic that can be softened by applying heat, reshaped and welded.
- THERMOSETTING: Type of plastic that is permanently set. It can’t be softened with heat or reshaped or welded. Minor damage can often be repaired with a structural adhesive.
- THERMOSTAT: Mechanism used to control heat.
- TINNING: Process of applying a thin coat of material to metal to improve adherence.
- TOOTH: Roughened surface that affects adhesion of the coating.
- UHSS (ULTRAHIGH STRENGTH STEEL): Very high strength steel which is used for parts such as door guard beams.
- UNLOCKING THE METAL: Unfolding and reshaping of the V channels, valleys and buckles as gently as possible, without further stretching, creasing or upsetting the metal.
- WELDING: Process of joining two pieces of metal to form a single piece of metal.
- WET SANDING: Procedure of sanding paint film with sandpaper and water.
- WORK HARDENING: Process of metal being made harder by rolling or hammering the material.
- WRINKLING: Term used when a paint film buckles at its surface causing a shriveled appearance….
Body Filler Quiz
Lesson 5 Quiz
Now test your knowledge. There is not a time limit set on this quiz so take your time. Find the correct answer if you do not know for sure. The objective of this quiz is to help you learn the information if you do not know the answer, not guessing. Good Luck!
CollisionBlast.com/Module4Quiz – Password (simple)
Copyright 2011 CollisionBlast.com
These lessons are now open to help collision repair students learn from home. I am lifting the Patron fee to access this content during this time, as many schools are closed. However, I do appreciate your support and hope my Patron continues to support this website and training.
If you would like to help and support this website, then I would greatly appreciate it. For more information visit. www.Patreon.com/CarAddictGarage


