These lessons are now open to help collision repair students learn from home. I am lifting the Patron fee to access this content during this time, as many schools are closed. However, I do appreciate your support and hope my Patrons continue to support this website and training.
If you would like to help and support this website, then I would greatly appreciate it. For more information visit. www.Patreon.com/CarAddictGarage
Click Button Below For Lesson
Lesson 3 – Developing a Repair Plan
Plan Your Work, Then Work Your Plan
“By failing to prepare, you are preparing to fail.” ~Benjamin Franklin
In this lesson, you will learn what a repair plan is for auto body and paint, how this will eliminate many of the problems that arise during the repair process. And how this will save you time and money in the long run.
This page is the full lesson, which includes text content, videos, and resources. I also broke it down to only the videos and resources. Just click the button below if you prefer to view only the videos or resources. Note: some browsers and mobile devices may not play videos below…but they should work on the videos page. If you are still having problems viewing videos, then you can watch the playlist on YouTube.
Video Overview
Below is a video I made for another video series, but it does a good job of explaining what a repair plan is and how to develop one.
Developing A Repair Plan
A vehicle that has been involved in an accident rolls in the shop. The damage is obvious, but where do you begin repairs? Do you head to the most obvious damage and start pulling damage? Do you repair or replace? What does the damage report tell you?
These are just a few of the question a collision repair technician must consider for each job that he or she receives. The technician is the expert and will need to know what to do. Lucky for you, you’re the student, and your instructor is the expert to help walk you through the steps. However, keep in mind to pay close attention to your instructor as he or she teaches you, as you will be the technician expected to know the answers once you enter the collision repair industry. The more involved you get any questions you ask while in school, the easier it will be for you when you get a job. If you’re a DIY at home…welcome to the University of Hard Knocks. You will have to read, watch videos, and learn from your mistakes. We’re all DIYers at times. I’m a DIYer when it comes to shooting and editing videos. My first videos were pretty bad, but I’m getting a little better.
Get Ready, Set….Not Yet!
We’re ready to jump in and get started, but there are a few more things to do first. I know, it seems like we’re never going to get started, I want to help you eliminate many of the mistakes that I have made in my career. These first few steps are a few of those things. So please follow each step without rushing through and pulling damage.
Understanding The Damage Report
Take a look at the damage report that has been written for the vehicle. A well-written estimate should paint a picture for you. It is also referred to as a blueprint for you to follow. Therefore, it is essential to learn how to read a damage report properly. An estimate is a communication tool between the estimator and the technician. If there is something you don’t understand or something does not look correct, get with the estimator or shop foreman (depending on the shop’s procedures) to discuss the issue. There could have been a mistake made when estimating or perhaps you discovered additional hidden damage that was not on the report. There could also be prior damage on the vehicle that is not intended to be repaired. The estimate will need to be reviewed to determine these things.
These are just a few reasons why you should be able to understand the estimate report before beginning repairs. Let’s dig a little deeper and look at the repair plan one step at a time.
Developing A Repair Plan (A:1 – HP-I)
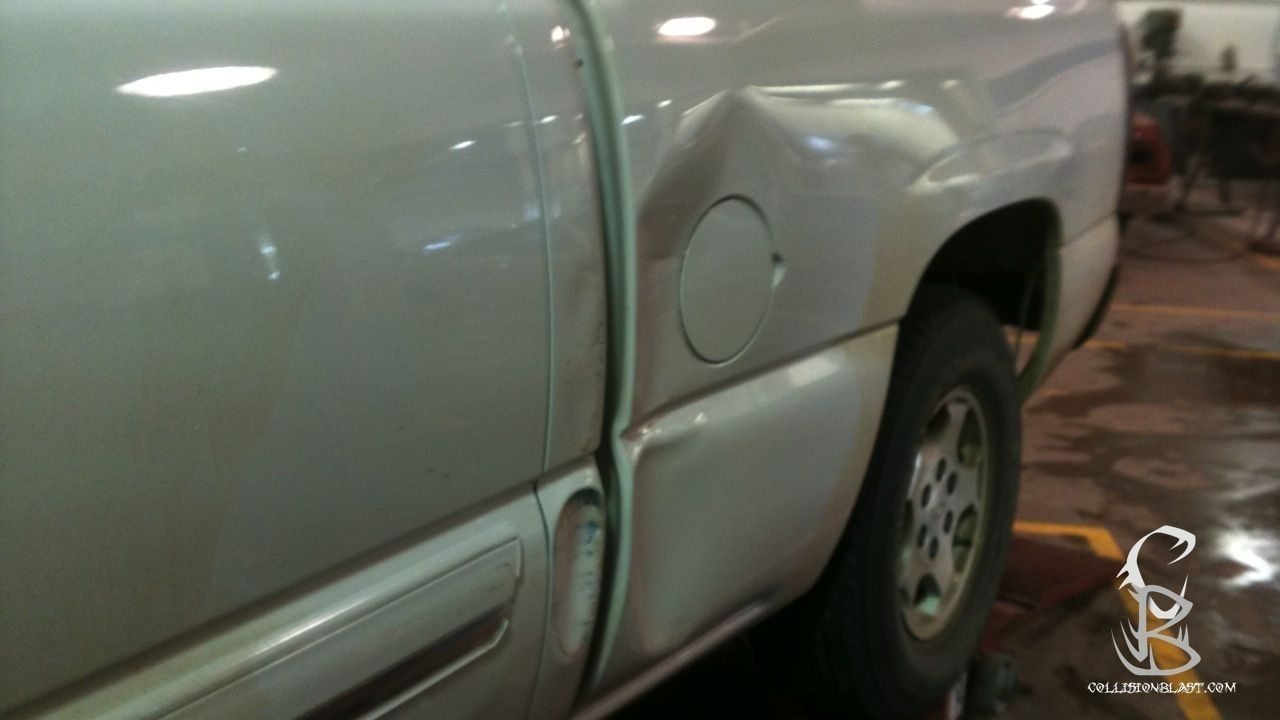
Now let’s discuss how to develop a repair plan. You will need to analyze how to repair the dent and the method you are going to use to repair the damage. We’ve determined that the panel is mild steel and repairing the damage would be a better choice than to replace the panel. Now we need to develop a repair plan and decide which repair method to use on the damaged area. This includes: removing parts, molding, and trim that may need to be removed to repair the damaged area, protecting adjacent panels that are not going to be removed, and the method we are going to use to repair the damage.
After the work has been planned; write down what repairs will be needed, what tools will be required to make the repairs, and what supplies will be necessary. To help you figure this out assess each panel that will need repaired or replaced on the vehicle and make a few notes on the form below. For example, if you are fixing the right fender, are there any moldings that will need to be removed? If so, record this on the form. Then determine the steps you will need to take to remove the molding to repair the fender, the repair methods you will use, and the tools that will be required to make repairs necessary.
Here is an example of a repair plan I use
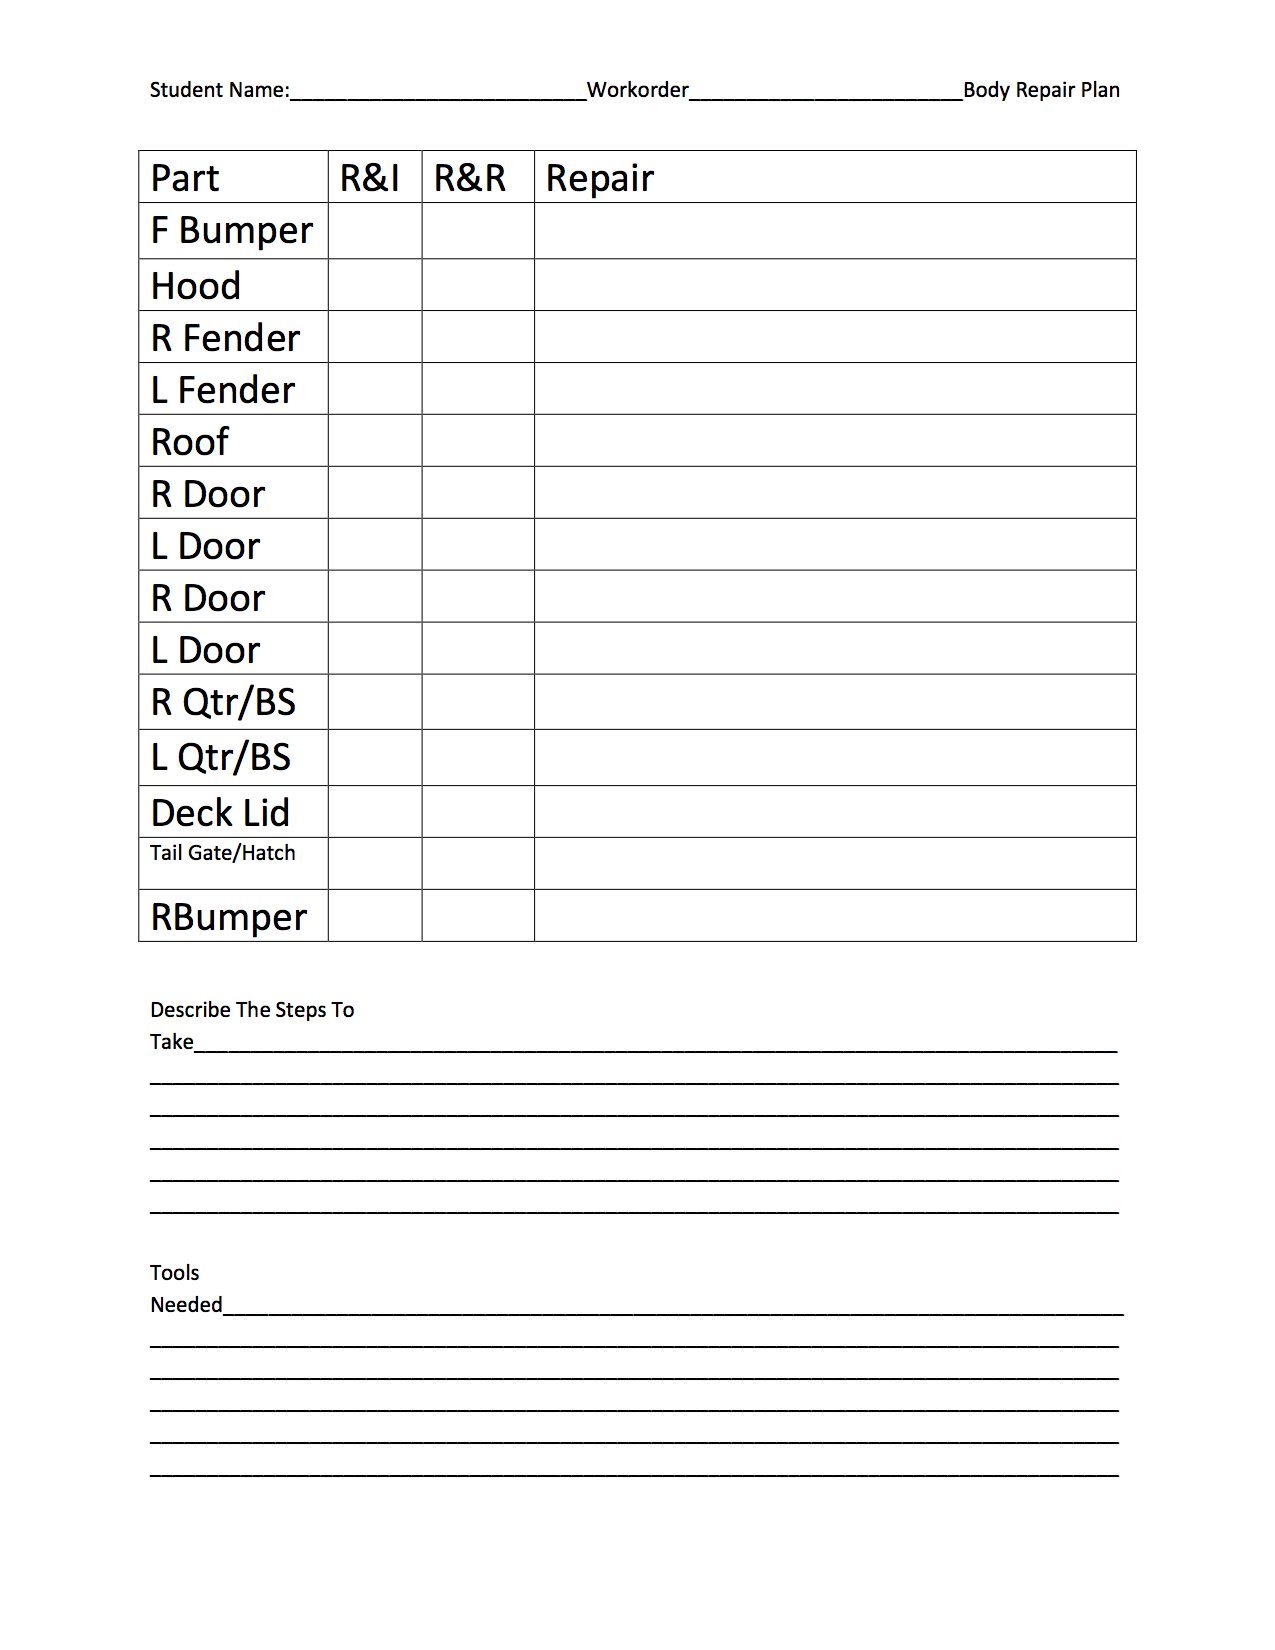
If you would like to print a pdf copy of this repair plan click here.
R&I – Remove and Install – This is when you may have to remove a part and install the same part back on to the car. For instance, you may need to R&I a door molding or door trim panel.
R&R – Remove and Replace – This is when a part is removed and replaced with another new or used part. For instance, removing a damaged fender and replacing with an undamaged fender.
Repair – This is when a part is being repaired. Keep in mind; a part may require R&I and Repair. For instance, you are removing a bumper cover to make the repair. Then the same part would be installed.
Once you have the repair plan developed, next determine what supplies will be needed to make the repairs. There are many different options to choose from when deciding the required supplies, but here is a supply list that may help you out.
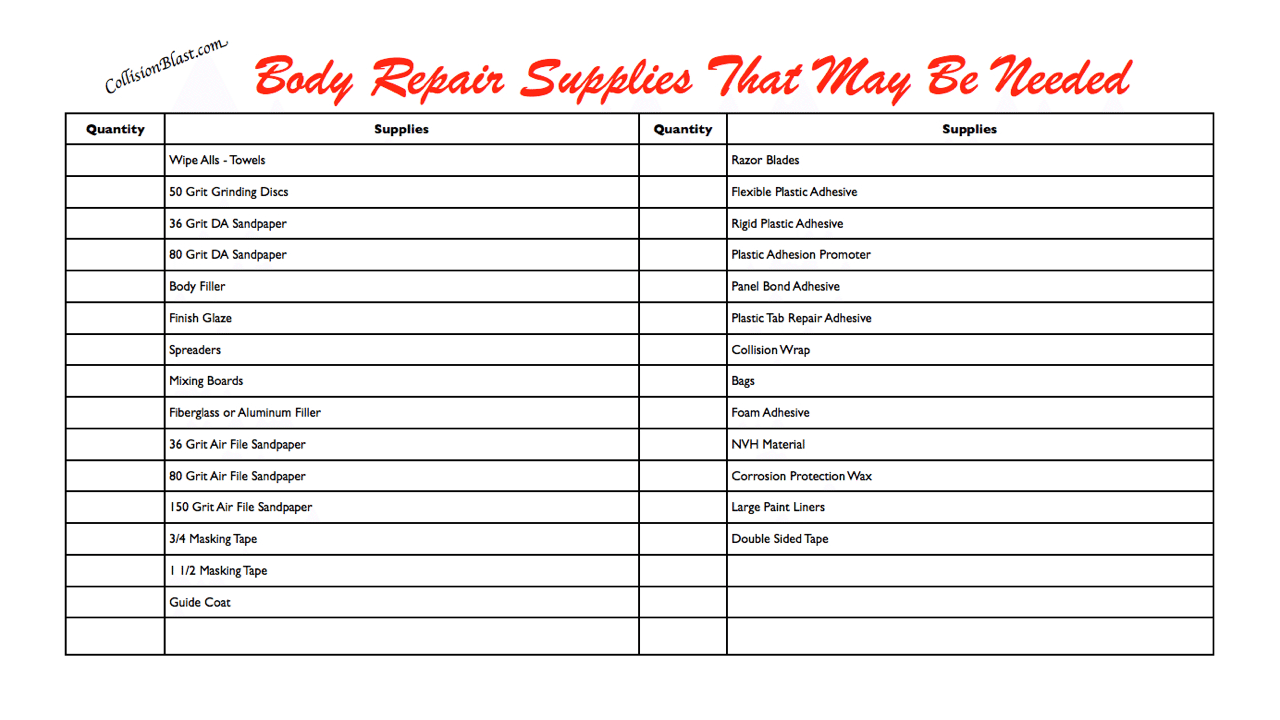
If you would like to print a pdf copy of this supply list click here.
Repair or Replace
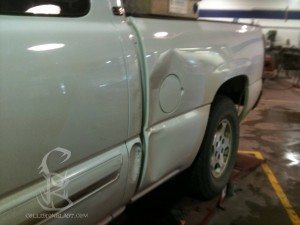
One of the things that will need to be determined when completing the repair plan is if the part should be repaired or replaced. There are several factors we must consider.
1. Can the part be repaired? This is the most obvious reason, as some parts are too damaged to repair. If the part is not repairable, the only other option is to replace it.
2. What is considered too damaged to repair? There is a general rule of thumb, but this is not set in stone. This is the kink vs. bend rule. If the part has a crease, this is a sharp bend of a small radius at a 90-degree angle over a short distance, the part is kinked and should replace. If the crease is less than described, you may repair it. However, as I mentioned, this is just a general rule of thumb.
3. Is the part available? This is undoubtedly going to help you determine if it should be repaired or replaced. As mentioned, some damage may be too severe to repair, but if you can find a replacement part, it may be worth putting in extra effort and time to fix the part, if it can be saved.
4. Will, it cost more to repair? This is also going to have a variation of answers. For example, if you’re a body shop which charges $50 per hour, it would be a better choice to replace an $80 front fender if it has a 3-hour dent. Replacement is $80, and the repair would cost $150…simple math, right? However, what if you are a DIY doing this in your garage? Well, the labor is free, so it may be worth your time to spend 3 to 5 hours on an $80 fender.
The Process
Now that you have an idea of a repair plan is, let take a closer look at the steps to take.
Paint and Body Work Is Like Going On Date

If you have ever been on a date you should be able to take the first steps necessary to performing auto body and paint work.
Preparing For The Date
Just like getting cleaned up for a date it is important to first clean the vehicle. This sounds very simple, but one of the most skipped steps I’ve seen. You probably would not skip this step going on a date so don’t skip cleaning the car. This will eliminate a lot of problems.
Wash The Vehicle (A7: HP-I)
It is essential to wash the vehicle before inspecting or beginning repair. A clean car will accomplish several things. First, this will allow you to see the damage better when inspecting the vehicle, which may prevent missed items that need to be repaired or replaced. Secondly, this will clean all waxes, greases, and other contamination off the vehicle. This is a common mistake made that can lead to many problems throughout the repair process.
Some technicians or instructors may prefer to disassemble the car before washing the vehicle. With the parts removed helps to remove dirt that may have been trapped underneath parts or trim. Other technicians or instructors may prefer to clean the vehicle before removing any components. This will help prevent water from intruding into any holes that may get interior parts wet. There are pros and cons to both methods. However, the important thing is to wash the car with soap and water before beginning repairs.
Make sure the car soap used to wash the car does not have any wax or silicone in it which will re-contaminate the surface.
Wax and Grease Remover (A:8 – H-I)
Washing alone may not be enough to remove all of the contaminants. Therefore, quality cleaners should be used to remove the contaminants completely.
Taking Photos Before and During The Process
It is a good idea to take photos of the vehicle before beginning repairs and during the repair process. Photos will provide you with documentation of pre-existing damage and that the repairs were correctly performed. However, the primary purpose I want to highlight for this lesson is to give you a reference.
Almost everyone has cell phones capable of taking photos. Photos also help you by giving you something to look at when the parts are ready to be reinstalled. If you are having problems remembering how or where something goes, the photo will help you by taking a glance at it. This is true for any job, but especially true for a restoration job that may be apart for an extended period. Besides, this will give you some photos of your project that you may want to use for a portfolio or post on a blog. However, if you are a student at a school, be sure to check with your instructor to see if this is permitted or not. The instructor may not allow, or the school policy may not allow photos, videos, or cell phones allowed in the training facility.
Remove It, Bag, It Have It (A:2 HP-I)
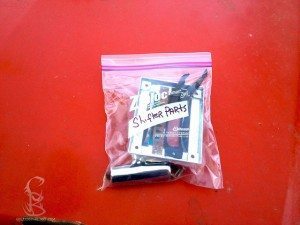
In the photo, we are removing a bed to replace a bedside. While removing the parts, we placed the hardware in bags and labeled them. This will eliminate the parts from being lost and be easy to reinstall.
Remove all the parts, moldings, etc., that will need to be removed to make the repairs. For example, if the dent is close to a body side molding, it is best to remove the molding to prevent damage to it during the repair process. Any small parts, bolts, or clips that are removed, place them in a bag and label the bag. For example, label bag, “parts for the right front fender.” This will save you much time in the long run.
Please do not forget to label the bags. I remember one time my students repaired a Ford Focus. It was a big job consisting of frame damage, replacing the roof, and mainly the entire right side of the vehicle. They did a great job of bagging all the parts; however, we did not get the job completed that school year. When I returned the next fall, a group of new students had to put the car back together. All the parts were organized and in bags, but nothing was labeled. That made the reassembly of the car difficult. It only takes a minute to bag and label hardware, but spending an hour looking for a lost screw will drive a person crazy…it does me anyway.
Properly Store Parts and Don’t Throw Parts Out
It is a good practice to keep the damaged parts stored until the vehicle has been repaired and out of the repair shop. You may be surprised at how many time you may need clips, screws that are attached to the part. You may also need it as a reference when comparing parts or if something does not fit properly. Once the car has been repaired, then the parts can be put in the parts ben ready to be hauled away.
Removing Interior Parts (A:3 H-I)
Interior parts may need to be removed before performing repairs. For example, the door trim panel will need to be removed when skinning a door or when replacing a door. Interior may also be damaged during the accident. The interior damage may be from the passengers or other objects striking interior parts during a collision.
Interior parts are attached with clips, screws, nuts, and bolts. The same rule of bagging and labeling needs to be followed as with exterior parts.
Removing Exterior Body Parts (A:4 H-I)
It may be necessary to remove exterior body panels before beginning repairs. The part may be damaged, or the part may need to be removed to gain access to the part needing to be repaired. For example, an undamaged door may need to be removed to gain access to a damaged hinge pillar or rocker panel. If these cases, times should be added to the estimate to remove and install the part in addition to the repair time.
Removing Mechanical and Electrical Components (A:5 H-G)
Electrical components may be damaged during an accident. Therefore, all electrical components should be carefully inspected for damage where there is damage to the vehicle. Remove and label all wires so reinstalling the part will be a simple task.
Another thing to consider when it comes to electrical components is if there will be any welding involved. The negative battery cable should always be disconnected before disconnecting electrical components or when any welding is needed. Any electrical components should also be removed if the weld location is within 12 inches of a component.
Any mechanical parts that were damaged during the accident will also need to be removed. These components may include suspension parts, motor parts, or any other mechanical parts damaged during a crash.
Automotive parts may be attached with clips, screws, bolts, rivets, or adhesive. Therefore, care must be taken when removing these parts.
Clips
Clips come in every shape and size imaginable. Clips can be challenging to remove with damaging them if care is not taken. Clips can be metal, but plastic clips are more common in modern vehicles.
To properly remove clips a special tool for removing clips needs to be used. By using a screwdriver to pry on the clips will usually result in breaking the clip.
If clips are broken during the removal process, new clips will need to be used when reinstalling the part.
Adhesives
More adhesives are being used to secure parts together. For example, a door skin or roof may use adhesive around the flanges. Quarter panels may also use a combination of welds and adhesives. Regardless of where adhesives are used on a vehicle, it can make removal difficult if not aware of the adhesive. Once you know where the adhesive is located, use a heat gun to heat the area where adhesives are applied. The heat will soften the adhesive making it easier to remove.
When installing the new part, the adhesive will need to be applied to secure the parts together.
Removing Coatings (A:9 – HP-I)
It may be necessary to remove undercoating, sealers, or other protective coatings to perform the repair. For example, if you are going to replace a quarter panel, seam sealers and other coatings will need to be removed to locate the spot welds.
Repairing Plastic and Body Parts Off The Vehicle (A:10 – HP-1)
It may be easier to make repairs to damaged parts while off the car. For example, front bumpers cover that requires a two-sided repair. To properly perform the two-sided repair, you will need to have adequate access to the back side of the bumper cover. The repair will require the bumper cover to be removed to repair and reinstalled after the repairs have been completed.
Protect Adjacent Panels (A:6 HG-I)
To protect the adjacent panels or any moldings that were not removed, apply a couple of layers of 1 ½ or 2-inch masking tape, aluminum tape, or auto body tape over them. For example, if you are working on the front section of the right front door, apply several layers of masking tape on the right front fender to prevent scratching while repairing or sanding. The tape may eliminate the need to paint additional body panels that were damaged during the repair process.
Using Welding Blanket and/or Spark Resistant Paper
If you are grinding near the glass, put a welding blanket over the glass or mask the glass with masking paper if nothing else. The sparks from the grinder can embed into the glass or leave small pits in the glass, which is something you want to avoid.
Protecting all the adjacent panels may seem like a lot of steps before beginning the actual repairs. However, if you will follow these steps, you will not damage adjacent parts or lose hardware. You will also know what repair methods to take, what tool will be needed, and what supplies will be needed to perform the repair correctly. These steps will save you a lot of time in the end.
Checklist
Below is an example of a checklist to help you assure that everything has properly been prepared before beginning the repairs.
RO#: ________________________ Customer Name: ______________ Vehicle:_______________________Student(s)____________________ _________________________________________________________
INSPECTION/EVALUATION
Date Initials
_____ ______ 1. Has the job been scheduled with other team members and instructor?
_____ ______ 2. Have you read the estimate and completed a repair plan?
_____ ______ 3. Do you have the estimated tools and supplies to start and complete the job listed on the repair plan?
_____ ______ 4. Have you determined an estimated completion date?
_____ ______ 5. Have you properly cleaned the car before beginning repairs?
_____ ______ 6. Have you taken photos of the damage for future reference if needed?
DISASSEMBLY PROCESS
Date Initials
_____ ______ 1. Have all wires been labeled properly?
_____ ______ 2. Have all parts been placed on parts rack or storage containers?
_____ ______ 3. Have you applied collision wrap over any open areas, such as door openings to prevent damage to interior?
_____ ______ 4. Is the vehicle completely disassembled? Have all the necessary parts been removed?
_____ ______ 5. Have all hardware (nuts, bolts, clips, etc,) been bagged labeled and stored in storage container?
_____ ______ 6. Have you checked new parts to confirm that you have the correct parts?
_____ ______ 7. Have you cleaned off adhesives from moldings?
_____ ______ 8. Do the battery and\or any lights need to be disconnected if needed? (Disconnecting, Welding, etc.)
_____ ______ 9. Have all adjacent parts, molding, glass, etc. been protected using masking tape, aluminum tape, spark resistance paper or a welding blanket to prevent damage during repairs?
The checklist was created for students performing work to a vehicle at a college, but the same should reflect the same steps to follow to prepare for any body repairs.
If you would like to print a pdf copy of this supply list click here.
Note: I currently do not have any additional resources or a quiz for this lesson. As you may have noticed, this entire website has been updating it’s looks and content. Please check back later for more updates in this lesson.
Copyright 2011 CollisionBlast.com
