This video series covers the ASE task expected to know for the B2 Paint and Refinish certification. The videos are designed to help you learn the tasks. They are not intended to guarantee you to pass the exam. There are test prep books if you are looking for additional information at ASE B2 Test Prep Guide
Good luck with your exam and I hope you find the videos useful.
[huge_it_videogallery id=”8″]
The information below is the older format. I am trying a newer format, but don’t want to delete the old format until I determine this is going to work well. Sorry for the mess as I updating this website and the content.
Paint and Refinishing – B.1 – B.3 Surface Preparation – Part 1
[youtube]https://www.youtube.com/watch?v=Wc-xoD39Bjk[/youtube]
- Inspect, remove, store, and replace exterior trim and components necessary for proper surface preparation.
- Soap and water wash entire vehicle; use appropriate cleaner to remove contaminants.
- Inspect and identify substrate, type of finish, surface condition, and film thickness; develop and document a plan for refinishing using a total productsystem.
Paint and Refinish – B.4 Strip paint to bare substrate (paint removal) n- Part 2
[youtube]https://www.youtube.com/watch?v=OX6zQI33qjw[/youtube]
Paint and Refinishing – B.5 Surface Preparation – Dry or Wet Sand Areas to be Refinished – Part 3
[youtube]https://www.youtube.com/watch?v=h_7arE7jAZA[/youtube]
Adhesion
There are two types of adhesion, chemical adhesion and mechanical adhesion. Chemical adhesion may occur after a coating has been applied and another coating can be applied without sanding. For example, if epoxy primer has a 72 hour window, then primer surfacer or a top coat can be applied over the epoxy without sanding during this time period. Or if base coat has a 24 hour window. then the clear coat can be applied over the base coat without sanding. However, if the coating is not sprayed within the recommended window time period, the coating will lose its chemical adhesion. Therefore, you must provide a mechanical adhesion for the coating to properly adhere or stick.
I just wanted to clarify the types of adhesion so there is no confusion between the two. In this task we are going to focus only on mechanical adhesion, which is produced by sanding.
Final Sanding
Whether you are prepping an old paint finish or primer surfacer, it must be final sanded to prepare is for primer sealer and paint. To do this you can use a wet sand method or a dry sanding method.
Dry Sanding
Most production shops have started using the dry sanding method using a DA sander and a soft interface pad. The interface pad helps provide less sanding marks and increases conformability, allowing the technician to follow contours and get in closer to most edges.
Generally 400 grit to 600 grit sandpaper is used for final sanding to prepare the old paint surface for primer sealer and paint. However, waterborne paint may require up to 800 grit sandpaper for final sanding. Read your technical data sheet for the product you are using for their specific recommendations.
A soft hand pad can also be used to dry sand the substrate by hand. However, hand sanding takes longer and requires more effort than using a DA sander.
Wet Sanding
Before the interface pad was introduced to the industry most shops preferred wet sanding and some shops still prefer this method. This is done by hand sanding or using a soft hand pad to final sand the surface.
The grit recommendations are the same (400 to 600 grit), but wet sanding uses a sandpaper designed for wet sanding. This method does work well, but will take more effort and time than the dry sanding method using a DA sander.
To use this method, water must be applied to the surface to help cut the substrate and to keep it clean. The best way I have found is to use a spray bottle and spray the surface often while sanding. A bucket with water and a sponge or a water hose with the water pressure set low will also work. However, if using a hose, it’s best not to have a metal end on the hose that can scratch the paint surface during the process.
Final Sanding
Regardless of the method used, the goal is the same. That is to provide a mechanical adhesion to the coating applied will adhere properly and not peel off. With this is mind, sand the substrate until the glossy surface has become dull from sanding. Check the surface often to make sure there are no glossy spots showing. If there are, this indicates that that spot was missed or not sanded good enough while sanding. These spots will need to be re-sanded.
Edges
Be sure to concentrate on the edges of the body parts. These are the spots commonly missed, but if paint is going to peel, it is more likely it will start peeling from an edge.
Hard To Get Area
Hard to get areas may be hard to get with a DA sander so these areas may need to be sanded by hand. One last step to assure these areas are sanded is to hand scuff them using a scotch-brite pad. Make sure the correct scuff pad is being used. 3M’s red scuff pad generally works well for areas that are going to painted. Their gray scuff pad works for most areas where clear coat only is going to be applied.
There are other products that may be used to final scuff the substrate such as a final scuffing paste.
Paint and Refinishing – B.6 Surface Preparation – Featheredging – Part 4
[youtube]https://www.youtube.com/watch?v=H5p-ZcX3p1U[/youtube]
ASE Task – Featheredge areas to be refinished. HP-I
What Is Featheredge
Featheredging is the process of layering each layer of coating making a level surface from the substrate to the top surface. It is kind of like stars compared to a ramp going to a building. The stair are steep and with a noticeable difference in height between each step. A ramp made for wheelchairs gradually goes from the ground to the top level with a much smoother transition. This is generally going to take a longer path to reduce the ramp being as steep as the stairs.
Feathering paint is the same process. We need to take the hard paint edge and layer each coating at least ¼ inch to produce the smooth transition. So a small chip or scratch is going to be a big area when featheredged.
Areas That Need Featheredged
If you remove the coatings to perform bodywork you will need to featheredge the paint edges. Also if there are any scratches from sanding, or if the car was scratched during an accident or keyed, the area will need to be featheredged to level and provide that smooth transition from the substrate (bottom of scratch) to the top surface (clear coat). This may require several layers of coating to feather. For example, you may have e-coat, primer, basecoat, and clearcoat. Each coating should be layered ¼ inch. Another problem that may require featheredging are rock chips. Rock chips follow the same concept of providing a smooth transition from the top surface to the bottom of the rock chip.
How To Featheredge
Featheredging is performed using a DA sander. 220 grit is the most common sandpaper used for this. When using a DA sander, do not use the interface pad. Remember in the video over final sanding, the interface pad follows the contours of the surface. If the interface pad it following the contour of the paint edge, then it’s going to make it difficult to layer the coatings. So a harder surface is going to work better. Therefore, use the DA sander and sandpaper is all that is needed. Featheredging can also be performed block sanding the surface with 220 grit. This is going to take more effort and time, but t can be done.
What Problems Can Improper Featheredging Cause
If the surface was not feathered enough you risk seeing rings in the surface after the part has been painted. You may even see multiple rings where the different layers were feathered. To eliminate this be sure to sand each layer at least ¼ inch. It is also a good idea to primer and block sand any areas that were featheredged. By properly featheredging, priming, and blocking, the area will not be noticeable after the vehicle has been painted and clear coated.
Example Questions
Technician A says feather edging may be used to sand rock chips.
Technician B says an interface pad should always be used while feather edging.
Who is right?
Technician A
Technician B
Both A and B
Neither A or B
2. Technician A says 220 grit may be used for feather edging.
Technician B says each coating should be feathered at least 1/4 inch.
Who is right?
Technician A
Technician B
Both A and B
Neither A or B
Paint and Refinishing – B.7 Surface Preparation – Metal Treatment – Part 5
[youtube]https://www.youtube.com/watch?v=p4IgIPLCSFM[/youtube]
Apply suitable metal treatment or primer in accordance with total product HP-I systems.
Every paint system is going to have their own recommendations when it comes to providing corrosion protection to bare metal. However, there are 4 basic methods that may be used.
Metal Conditioner and Conversion Coating – This is an older method, but may still be used by some shops. The metal conditioner is a phosphoric acid that cleans and etches bare metal to improve adhesion before priming. Metal conditioner has acid and must be neutralized after applied.
This product is generally mixed or diluted with water and sprayed onto the metal surface using a spray bottle. After this the metal conditioner is applied to the metal, water is then used to rinse the surface to neutralize the acid. Dry metal then apply the conversion coating.
Conversion Coating is a zinc phosphate coating that chemically bonds to the metal. The conversion coating is applied with a spray bottle like the conditioner. The surface should not dry on its own so you may have to keep applying it to the surface for around 5 minutes. Then the metal needs to be rinsed with water and dried.
Once dry, the metal forms a coating that provides corrosion protection and will have good adhesion for primer to adhere to.
This method is more time consuming than the other methods. It was used more with the old lacquer primers. Advanced primers has made it possible to eliminate this method.
Self Etch Primer
Self etching primer has an acid that etches to bare metal. Self etch should be applied directly over bare metal. It is usually not recommended to use metal condition and conversion coatings is self etch primer is going to be used. Self etching primer provides good adhesion and corrosion protection. The primer comes in both a 1 part and 2 part systems.
Epoxy Primer
Epoxy is a primer designed to be sprayed directly over bare metal. Epoxy provides good adhesion and corrosion protection. Epoxy only comes in a 2 part system.
Direct To Metal
There are some direct to metal primers, which may be applied directly over bare metal. For instance, a direct to metal primer surfacer. This can be used on a surface that needs to be block sanded. Direct to metal primers eliminates the need for metal conditioner, conversion coatings, self etch primer, or epoxy primer. However, don’t assume that all primer surfacers may be applied directly over bare metal. If it is not a direct to metal, one of the other methods must be applied before applying the primer surfacer.
It is best to use one product line (brand) and follow the recommended procedures found on the technical data sheet, as each paint line may vary.
1. Technician A says metal conditioner and conversion coating should always be applied before applying self etch or epoxy primer.
Technician B says all primer surfacers are designed to be applied directly over bare metal.
Who is right?
Technician A
Technician B
Both A and B
Neither A or B
2. Technician A says metal conditioner and conversion coating is the most common method used today for providing corrosion protection and adhesion.
Technician B says the specific technical data sheet should be read for each product used.
Who is right?
Technician A
Technician B
Both A and B
Neither A or B
Paint and Refinishing – B.8 Surface Preparation – Masking – Part 6
B8 – Mask and protect other areas that will not be refinished. HP-I
[youtube]https://www.youtube.com/watch?v=BGnDDr2x4UU[/youtube]
Adjacent parts must be masked off to prevent primer or paint overspray from getting on them. This is done a number of ways, which we will discuss.
JAMBS FIRST
While I am discussing masking jambs, you also want to do your jambs first, as it may be difficult to open the door without ruining the masking job.
JAMB MASKING TECHNIQUES
There are several different methods to achieve this. One method is to mask 1/4 inch back from the jamb edge. You can use 3/4 inch tape and 3 inch masking paper. However, straight masking with this method will leave a hard edge from the paint.
BACK MASKING
This is a reverse mask technique that makes a softer edge. Basically, you simply fold the tape over and allow the tape to be slightly pulled, creating a soft edge that is less noticeable.
APERTURE TAPE
This may also be know as foam or rope tape. This is a foam that makes a seal between the two jamb areas. This method works extremely well and is a fairly simple and quick method. Aperture tape come in a variety of widths for different gap opening sizes.
TRANSITION TAPE
If you want an absolutely invisible repair, then consider using the transitional tape. This tape is amazing. It has adhesive in the middle of the tape, which creates smooth edge. May or may not be recommended by paint manufacturer, but you can literally apply this tape on a body line and not be able to see the clear coat line.
Masking Before Priming – No Hard Edges
One of the common mistakes is making hard edges with the primer. This is done by masking a square around the damaged area. During the priming process, primer is sprayed against the tape edge causing a hard edge. This creates additional work trying to feather the primer edge smooth.
There have been times when the primer lines were sanded completely out when sanding, but were slightly visible after the paint job was complete. Save yourself time, energy and the possibility of this paint defect by not making this mistake.
There are times when you want to keep the repair area small, such as a repair that is blend within a panel or close to an adjacent panel that is not going to be a blend panel. But there are a few thing you can do to keep the repair area small.
- Adjust your primer gun to spray a smaller area and blend the primer into the paint surface. This will produce the best result if you have room on the panel to do this.
- If you do not have enough space to blend you primer, then the back masking method can be used. This still is going to leave an edge, but it will be a smoother edge.
Tips For Masking Windshields and Glass
There are several ways to mask a windshield, which we will discuss. This is a critical area and has caused a lot of problems due to the molding setting close to the paint surface. One of the problem this causes is when the clearcoat is applied. Clear coat requires heavy mills and can bridge over from the painted surface to the tape edge. This means that the clear makes a complete seal filling in the gap. After the clear is dry and the masking tape is removed, this will make a sharp jagged edge. Even worse, if the tape does not pull off straight, it may take a chunk of clear coat off the painted surface, which will result in respraying the panel.
Let’s start off discussing techniques to mask the glass. First, we want to avoid creases in the paper. Creases in the paper creates a place for dust and dry overspray to land. When the pressure from the spray gun hits it from the next coat, it may blow the dust out of the crease and into the paint job. This will require extra buffing, which is extra time spent on the job that could be eliminated.
To create a creaseless masking job, do not bend the masking paper when masking. Easier said than done, but let me go through the steps with you. First, use ¾ masking tape to outline the glass molding. Then using 18 inch masking paper with ¾ inch tape to cover the remaining portion of the glass. It is best to tear of sheets off the masking paper to cover the entire length of the glass with one sheet to eliminate seams that will need to be masked. Now start by placing the masking tape on the masking paper to the center section of the masking tape that is already attached to the car. From the center, pull each side of the masking paper straight back making a straight line. This will probably not follow the molding, but that is alright. If you follow the molding, the paper will create creases, which is what we want to eliminate. Now that the paper is straight across the glass area, use a razor blade to cut the paper around the molding. Care must be taken not to cut the glass or molding. This can be done by holding the paper up while making the cut. Once the masking paper has been cut to fit, use ¾ inch tape to mask around the remaining edges. Now the paper should be masked completely around the glass to the tape that we used to outline the glass molding with.
If you use this method you will have minimal creases in your masking paper. If you do have a crease, tape the crease solid using masking tape. If one layer does not completely cover the width of the glass use another piece of paper on the other end and repeat the process. Once all edges are completely taped, mask the seam of the two layers of masking paper. When completed, all edges, creases, and seams should be taped. This will complete a seal, which will eliminate overspray from entering the paper and getting on the glass or molding. This will also eliminate pockets and creases in the masking paper that can attract dry overspray and dust. This will provide a cleaner job and less dirt in the finished paint job. This will result in less sanding and buffing after the paint job is completed to remove dirt nibs.
How To Avoid The Clear Coat From Bridging on Molding That Fit Close To or Touch The Painted Surface Being Sprayed
Many times a molding fits tight against or even touches the painted surface. The problem with this is that the clear coat may fill in the gap or crack between the molding and paint surface. In other words, the clear coat bridges over from the painted surface to the masking tape. When the paint is dried and the masking tape is removed, the clear coat will have a rough edge from the clear coat. Even worse, it may even pull a chunk of clear coat from the painted surface. If this happens, the surface may have to be sanded, re-painted, and cleared.
There are several ways to avoid this. If the glass molding is soft and flexible enough a small diameter rope can be used to shove under the molding. This will lift the edge of the molding up, which will allow the paint coating to flow underneath the molding. Once the paint is dry, remove the rope, which will allow the molding edge to sit back on top of the newly painted surface.
There is also a special masking product, which has a hard plastic edge on one end and adhesive tape on the other end. First place the hard plastic edge underneath the edge of molding. Then fold the adhesive side over and stick to the glass. This will lift the edge of the molding up, which will allow paint coatings to flow underneath the moding. When the trim mask is removed, the edge of the molding will set back on top of the newly painted surface.
Sometimes the molding is too rigid and the molding is difficult to lift. In these cases, there is another method that can be used. When outline the molding with ¾ inch masking tape, leave about ⅛ inch of the molding exposed. Then mask the glass as you normally would using masking paper. Once completely masked, use ¼ inch fine line tape to go around the edge of the molding. This tape will cover the the molding edge and the masking tape that was used to outline the molding. It is important to apply the i/4 inch tape last so it will be easy to pull off. Immediately after applying the last coat of clear coat, pull the ¼ inch tape from the molding. Care needs to be taken not to let the tape hit the fresh clear coat finish. This will produce a smooth transition instead of creating a hard edge if removed after the clear has dries. This will also eliminate the risk of pulling a chunk of clear from the painted surface.
A Tip For Masking Hose Lines and Wiring
Another problem you may run into when masking is masking off hoses and wiring. I have seen them wrapped in masking tape, but the problem is unmasking. This can be a tedious time consuming job. However, there is a quick fix for these parts. Use aluminum foil to wrap around these parts. The foil will form around the part to protect the part from paint. The cool thing is that the foil is as easy to remove as it is to put on. This works great for parts such as: fuel lines, door wiring harness, inside door parts when paint the inside of a door, inside door handle, etc.
Tips For Covering Holes
To mask holes such as tail light access holes, windshield wiper holes, door handle access holes, place masking tape to the back side of the hole to seal the hole shut. Let’s say you have the car masked off and you realize a small windshield washer hole is not masked off. Before you start opening your door and hood ruining the masking job, try this little trick. If it is a small hole, use a foam earplug. You can squeeze the ear plug making it small to fit inside the hole, then as it expands, it will seal the hole shut. Of course, this will not work for large holes, but the larger holes are as often overlooked when masking. It’s the small holes that is often forgotten about until the car is already masked off. Well, that should not be a problem now!
Paint and Refinishing – B.9 Surface Preparation – Mixing Primer – Part 7
[youtube]https://www.youtube.com/watch?v=_X5NPOJxZmc[/youtube]
B9: Mix primer, primer-surfacer or primer-sealer. HP-I
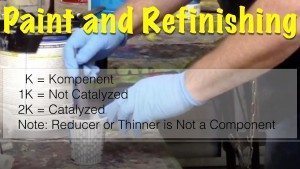
What does the K stand for in 1K and 2K?
We hear about 1K and 2K products. We will discuss what the difference is, but why is a K used? The K stands for komponent. Component is spelled with a K in the country this started in.
What Are 1K Primers?
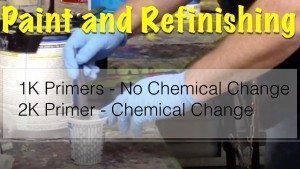
One part (1k) primers – There are one part primers, such as lacquer primer surfacer. Lacquer primer is less expensive than 2-part primers. This was used before many of the 2-part primers became available, but there are still some people who use lacquer primers today. However, this type of primer consists of more solvents, which means more of the product evaporate from the sprayed surface. This results in more shrinkage than than 2-part primers. Therefore, most shops have changed to 2-part primers.
However, there are some advanced 1K primers that work as well as the 2-part primers. These primers include UV primers and waterborne primers. The UV is a 1-part primer that is cured by the sunlight or a special lamp. Waterborne primer cures as the reducer evaporates much like lacquer. Both of these primers work well, but may be more expensive than lacquer or 2-part primers.
What Are 2K primers?
2-Part (2k) primers – 2-part primers are consist of the primer and a catalyst. When mixed together a chemical change occurs rather than depending solely evaporation to dry and has less shrinkage than 1-part lacquer primers. 2-part primers may or may not require a reducer added when mixing together, but the reducer does not considered a component.
Mixing Primer
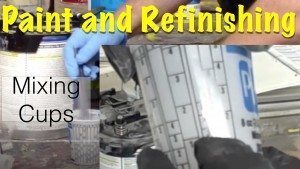
Pour the recommended products together. For example, a 2-part may recommend 4 parts primer to 1 part catalyst (4:1). Using a measuring cup pour the correct amounts into the cup and mix together using a paint stir stick. Mix thoroughly to assure the products are properly mixed together. An alternative and more accurate method to using a mixing cup is to use a paint scale to measure the products. Some computerized systems will allow you to enter the amount of sprayable primer needed and the computer will do the calculations for you.
Induction Time
Some 2-part primers may require an induction time. This is a recommended time period the two products must be mixed together before using. This is usually recommended for some epoxy primers. After they epoxy primer has been mixed with the catalyst, it needs to set 15 minuted or the recommended time before spraying. If an induction time is needed, it will be it on the technical data sheet.
Pot Life
All paint products have a pot life. This is the time period you have to spray the product before it starts to harden in your spray gun. If the product is a super fast drying product, the pot life may only be minutes. Read the technical data sheet for the product you are spraying and plan accordingly to have the product sprayed during the recommended pot life time.
Paint and Refinishing – B.10 Surface Preparation – Undercoating
B10 Identify a complimentary color or shade of undercoat to improve coverage.    HP-G
[youtube]https://www.youtube.com/watch?v=Xs0HpJb9Vlg[/youtube]
What is Paint
Before we discuss undercoat, let’s talk about paint. Paint consists of three things; pigments, which is the color, solvents to make the pigments a liquid form so it can be sprayed, and binders, which acts like a glue to hold it all together. There are also additives like alu
inum flakes to make metallic colors or mica to make pearlescent colors. Each color differs with the amount of pigment it has. So some paints are going to cover better than others. The less pigment in a color results in a more translucent color.
Color Matching Starts with the Undercoat

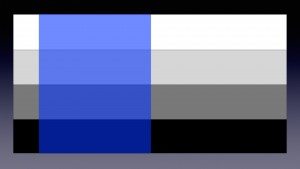
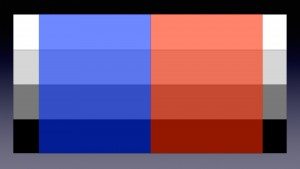
Getting a correct color match begins with the undercoat due to many colors are translucent. This basically means that you can see through the colors. Therefore, the color is going to be different shades depending of the shade of the undercoat. For example, a darker undercoat is going to produce a darker finished color and a lighter undercoat is going to produce a lighter finished color.
Hiding
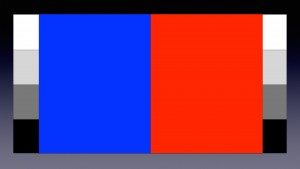
Traditionally undercoating was designed to help achieve color hiding faster. For example, one coat of high pigment undercoating will reduce the number of coats of base coat needed to achieve full hiding. However, with many of the more translucent colors, the undercoat actually plays a part in the overall color match so determining the correct shade of undercoat is crucial.
What Can Be Used For Undercoat
Depending on the product system being used a primer sealer, primer surfacer, or even base coat can be used to provide the correct gray shade undercoat.
Primer Sealer
Primer sealer is a primer that is not sanded after applied. Once the surface has been prepped, masked, and ready to spray, then one to two coats of primer sealer can be applied to the surface. The number of coats may vary depending on the brand of material you’re using. Once applied allow the primer sealer to flash off, usually ten to thirty minutes, then apply base coat on top of the primer sealer.
It’s important to read the technical data sheet before using any paint materials to determine what their recommendations are for number of coats, flash time, spray gun settings, etc. These may vary depending on the specific product being used.
Primer Surfacer
Some paint companies also make primer surfacer with the correct gray scale or that can be mixed together to get the correct shade. Some primer surfacers can be tinted with color to produce the correct gray scale. However, primer surfacer must be sanded. If this method is used there must not be an sanded through areas, as this will provide an inconsistent undercoat shade. If this method is being used the surface is sprayed with primer surfacer, block sanded, final sanded, then it can be masked off. Once masked off base coat can be applied straight over the primer surfacer.
Not all primer surfacers can be tinted. So it’s important to read the technical data sheet for the material you’re using to determine if tinting is recommended. Also for the number of coats, flash time, spray gun set-up, etc.
Base Coat
Base coat can also be mixed to achieve the correct gray scale. Once the surface has been prepped, masked, and ready to spray, apply the correct gray scale base coat. Allow to flash, then apply base coat top coat. This can be helpful with some brands of waterborne paint. I have a PPG video below to help explain this process better.
How to Determine Which Shade of Undercoat to Use
When looking up a paint code the manufacture should recommend the undercoating. Generally a light color will require a light undercoat and a darker color will require a darker undercoating. However, this may vary to different paint companies and the specific products used. It’s important to read the technical data sheet to determine what is recommended for the specific products being used.
Video – PPG Explains Using Base Coat For Translucent Colors
[youtube]https://www.youtube.com/watch?v=6uOtbIiwRZ4[/youtube]
Paint and Refinishing – B.11 Primer Surfacer – Part 10
Video Comong Soon
B:11 Apply primer onto surface of repaired area. HP-I
Primer surfacer is designed to be applied over the repair area. Anytime body repair was performed, primer surfacer needs to be applied to fill small imperfections. Keep in mind that if you have any bare metal you may need to apply epoxy, self etching primer or a direct to metal primer surfacer to provide corrosion protection.
Once the body repair has been completed, it’s been feather edged, cleaned, and the metal treated for corrosion protection, then apply the recommended coats of primer surfacer. It is not necessary to apply primer surfacer over the entire panel. Only the repair area will need primed. Read the technical data sheet for the specific primer you are using as the recommendations vary with different paint manufactures. The technical data sheet will say how many coats, how long the primer needs to flash between coats, how long the primer needs to dry before sanding, what size of gun to use, and more.
Many problems can occur from applying too much primer at one time and not waiting the flash times between coats. Another thing to keep in mind is that primer surfacer must be sanded, which is another good reason not to apply primer surfacer over the entire panel. This will require more effort and time due to sanding and waste more primer.
Once the recommended coats of primer surfacer have been applied, wait the recommended dry time, then it will be ready to block sand.
Paint and Refinishing – B.12 Surface Preparation
B:12 Apply two-component finishing filler to minor surface imperfections. HP-I
Paint and Refinishing – B.13 Surface Preparation
B:13 Block sand area to which primer-surfacer has been applied. HP-I
Paint and Refinishing – B.14 Surface Preparation
B:14 Dry sand area to which finishing filler has been applied. HP-I
Paint and Refinishing – B.15 Surface Preparation
B:15 Remove dust from area to be refinished, including cracks or moldings of adjacent areas.HP-I
Paint and Refinishing – B.16 Surface Preparation
B:16 Clean area to be refinished using a final cleaning solution. HP-I
Paint and Refinishing – B.17 Surface Preparation
B:17 Remove, with a tack rag, any dust or lint particles from the area to be refinished. HP-I
Paint and Refinishing – B.18 Surface Preparation
B:18 Apply suitable sealer to the area being refinished. HP-I
Paint and Refinishing – B.19 Surface Preparation
B:19 Scuff sand to remove nibs or imperfections from a sealer. HP-I
Paint and Refinishing – B.19 Surface Preparation
B:20 Apply stone chip resistant coating. HP-G
Paint and Refinishing – B.20 Surface Preparation
B:21 Restore caulking and seam sealers to repaired areas. HP-G
[…] ASE Review […]