These lessons are now open to help collision repair students learn from home. I am lifting the Patron fee to access this content during this time, as many schools are closed. However, I do appreciate your support and hope my Patrons continue to support this website and training.
If you would like to help and support this website, then I would greatly appreciate it. For more information visit. www.Patreon.com/CarAddictGarage
Click Button Below For Lesson
I hope you enjoy this training module. Let me know if you have any questions, or suggestions you may have to make this training module a better learning experience for you. Donnie
Lesson 9 – Spray Gun Adjustments, Maintenance, and Spraying Techniques
Adjust The Spray Gun To Fit You
Philosophy is like trying to open a safe with a combination lock: each little adjustment of the dials seems to achieve nothing, only when everything is in place does the door open. ~Ludwig Wittgenstein
Copyright © 2012 Donnie Smith All rights reserved.
This lesson will teach you the basics for adjusting and maintaining a spray gun. You will learn tips and techniques to adjust and use a spray gun so you can achieve a professional quality paint finish.
This page is the full lesson, which includes text content, videos and resources. I also broke it down to only the videos and resources. Just click the button below if you prefer to view only the videos or resources. Note: some browsers and mobile devices may not play videos below…but they should work on the videos page. If you are still having problems viewing videos, then you can watch the playlist on YouTube.
Video Overview
I don’t currently have a video overview for this lesson. I will add it as soon as I get it.
Practice Makes Perfect
Practice makes perfect, but only if you practice using the correct techniques. Otherwise, you may pick up bad habits, which may prevent you from ever reaching the spraying ability you desire. By following the tips in this lesson, you will be on your way to practicing with techniques that will help you produce paint jobs with optimal results.
As a painter, your paint job finish (the end result) will depend on your spray gun. Of course, after the car has been properly prepped. Prep is perhaps the most important step. However, when purchasing a spray gun, I would make the best buy possible. There are some less expensive guns that do a good job, but there are some guns that will make it difficult to produce a professional paint job. Regardless if you spend $150 or $800 on a spray gun, it is an expensive investment and you need to treat your spray guns with respect by keeping them cleaned and well maintained. A dirty spray gun that is clogged will not produce a professional paint job regardless of the cost. Therefore, it is essential keep it properly cleaned.
The Parts Of A Spray Gun
First, lets examine the basic parts of a spray gun, then we will cover how to properly clean a spray gun.
It is important to understand the different parts of a spray gun, how they work, and how the adjustments effect the overall results when spraying a car. By understanding the basics to a spray gun, you will also be able to troubleshoot spraying issues. I guarantee you, if you spray cars, you’re going to run into a problem with the gun at some point.
The first problematic area is going to be the air cap. If one of the air passages become plugged, the spray pattern is not going to spray evenly. This can result in uneven mill thickness, stripes, and dry edges. If the pattern is heavy on one side or if the spray gun is spraying a half moon shape, turn the air cap 180 degrees and see if that changes the pattern. For example, if it was heavy on top, but it becomes heavy on bottom when the air cap is turned. If the pattern does change as the cap turns, you know the problem is in your air cap. Now you would know to clean the air cap and make sure all air passages are open. If the spray pattern does not change when you as you turn the air cap, the problem is probably going to be the fluid tip.
There are more parts to a gun than an air cap and fluid tip, but those parts are where most of the problems are.
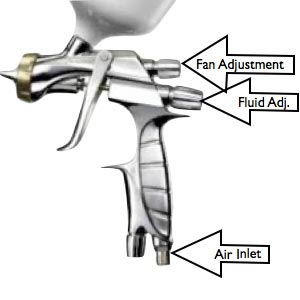
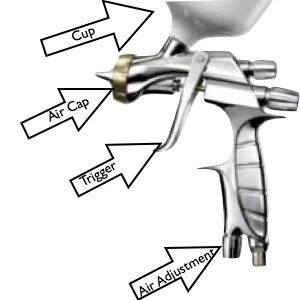
Other parts include: fluid needle, fluid adjustment, gun trigger, fan pattern adjustment, air adjustment, and the gun body.
For a Better Understanding of Gun Part Location and Function Watch the Video Below
No Lunch Breaks – Clean Immediately
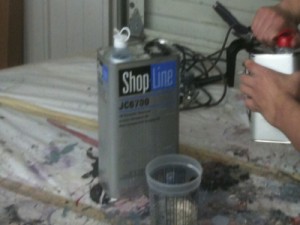
Many of your products consist of two or more parts. For example, primer may have catalyst. Any time the material is catalyzed, it is going to have a shorter pot life. The pot life time and all the other specific information about the product that you’re using is listed on the product technical data sheet. The reason that I mention this is because leaving a catalyzed product in your spray gun too long can ruin your gun. Therefore, always look at the technical data sheet and be aware of how long you have to use the product. If you exceed that time, you may have a gun full of a hardened product. That is something that you never want to happen. The pot life can vary from as little as 10 minutes to hours. So don’t go to lunch or take a break before cleaning your gun. Always clean it immediately after each use.
You Made It This Far
One of the common problems that I have seen as an instructor is students trying to paint with a gun that is not spraying correctly. An improperly cleaned paint gun can cause a number of problems, which could have been prevented if the spray gun would have been properly cleaned the prior use. You’ve spent hours repairing and prepping this car, don’t let a dirty spray gun ruin it for you.
How To Clean
There are several different methods for cleaning guns. I have videos demonstrating how to perform each method. Follow one of the methods below to stay complaint with the 6H rule. According to this rule, you are not allowed to spray thinner into the air while cleaning your spray gun.
Hand Cleaning
Always keep safety first. Wear gloves, eye protection, and a paint respirator to protect yourself from the chemicals. To clean a paint gun by hand, you are going to need cleanup lacquer thinner, a little squirt bottle (like the ketchup and mustard bottles at a restaurant) or a spray bottle, and a gun cleaning kit. First, pour the remaining material out (catalyzed products cannot be saved, as they will harden in the paint container or paint cup) so pour remaining product into your waste container. I have used a five gallon thinner pail for waste storage before. You want to make sure that it has a lid that you can seal it with. You must also contact someone like Safety Clean to dispose of waste. Just like with oil, it’s illegal to pour it out on the ground. All right, we have the remaining primer or paint poured into the container, now get your bottle and squirt thinner in the cup, put the paint cup lid on, and swish it around. Pull the trigger (without air pressure) and allow the thinner to stream into the waste container. Repeat this step several times until the stream is clear. Then take the air cap off of the paint gun and brush the gun tip and the air cap. Now use a clean wipe-all with a little thinner on it to wipe the gun inside and out. Next, dry the gun with a clean towel and store it for the next use. If you will do this every time, it will save you time and money in the end, as well as produce awesome quality paint jobs.
Watch This Video For A Demonstration of How To Clean A Spray Gun With Only 2 Ounces of Thinner
Gun Washers
Gun washers do basically the same thing, but help you reuse and recycle the thinner. Some systems even have a bake system that recycles your thinner, which may eliminate the need to have your waste hauled.
Spray Guns
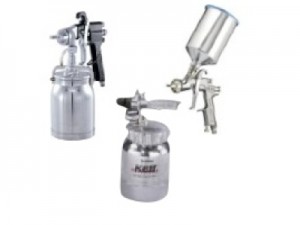
There are basically 3 types of spray guns that I am familiar with. They are the siphon feed, gravity feed, and pressure feed. Each gun sprays a little differently and is designed for different types of applications. Well, actually, the siphon feed was outdated by the gravity feed spray gun, which makes the gravity spray gun the most common spray used in body shops. However, they are all designed to do the same thing. They are designed to take the coating being applied and transfer it from the paint cup onto the surface being sprayed. The correct gun setting, fluid needle and nozzle size, and even the quality of the gun can make a big difference of how well the coating looks once applied. (Smooth, rough, orange peel, dry, etc.) Therefore, always read the procedure pages or technical sheets (same thing) to determine what size of fluid nozzle and needle and air cap is recommended for the type of coating that you are going to be spraying. You also need to read the recommended air pressure, how many coats, etc. The quality of the gun can make a difference as well; this is one item that I would not try to go real cheap. Trust me, there are some junk guns out there.
Air Pressure
Air pressure is an important adjustment to setting your gun to spray correctly. Too much air pressure will over atomize your material and too little will not atomize it enough. So what is atomization? Well, that is the process of taking the coating that is the paint cup and breaking it up into smaller parts (drops) and applying it to the surface being sprayed. That is basically what a paint gun is designed to do.
If you could imagine a high gust of wind hitting water, or perhaps pouring a glass of water out going down the road at 90 MPH, how would the water react? It would go everywhere, right? Now, stop the car and pour the water out….it would pour with just a small stream. Well, a spray gun is the same way. We need to find the best setting to have the air break up (atomize) the material to provide a nice, smooth texture to produce a top-notch paint job.
Too much air pressure will cause the drops to be too small and will result in the material going everywhere. This can result in wasted material by causing too much over spray, then when the over spray finally lands on the surface, it will cause a dry film on the top surface that looks dull, dry, or fuzzy. High pressure may also cause your gun pattern to shoot a figure 8 pattern, which can cause stripes and uneven coverage.
Too little air pressure will cause the drops to be too big and result in drops that may not be able to flow into each other. This will cause a heavy orange peel effect.
Watch Video Below To Learn More About Setting Gun Pressure
No Absolutes

As I mentioned, the technical data sheet will tell you what air pressure is recommended. However, unlike mixing ratios this is not an absolute. There are several factors that may require you to fine-tune your air pressure.
Adjust Air Pressure Where????
One thing that I think is confusing to many people is where to set the pressure. Many procedures state to set the air pressure at the air cap. Well, not too many guns have air gauges on the air cap. If you use the air cap setting from the recommendation and use this psi to set the regulator on the gun, you’re going to be spraying very big drops, as the pressure will be too low. Again, if you set the pressure to the recommended setting at the wall, your pressure is going to be too low. So to set it at the air cap, you will need a gauge on the air cap. You need to look for the setting that says at the gun. This means what pressure should be used going into the spray gun. Many painters, including myself, use a regulator at the end of the gun. This allows you to adjust the air pressure at the gun by adjusting the regulator. This is the simplest way in my opinion, but some painters do not like using regulators and prefer to use the wall regulator. If you do that, you will need to consider that for every foot of air hose, there will be a pressure drop. If you set it at 20 psi at the wall, you will not have 20 psi at the gun.
Fan Adjustments
This is the adjustment that adjusts your fan pattern. It can adjust it from a small diameter circle to a wide fan pattern. The specific job that you are performing will determine the setting that you use. For example, if you are priming a small area, you want a small pattern to avoid getting primer all over everything. However, if you are painting a complete paint job, you want a wide pattern to cover evenly and fast.
Watch This Video Demonstrating How to Adjust the Fan Pattern
Wide Open
Some painters may prefer to open the fan up as far as it will go, but I have found problems doing that. I am not saying that they are not right, as you will have to find your own technique. Painting is like welding, you need to start off with some recommendations and then fine tune it to your unique style. I find that the fan pattern wide open can cause a dry effect to occur. It is hard to keep the wet edge and provide the gloss that I am wanting. A full open fan pattern may also waste more paint as more material is going to be sprayed on the masking paper and in the air when properly overlapping.
Too Small
A fan pattern that is too small will definitely cause problems as well. If you take the same amount of material and shoot a small 3 inch pattern, you’re obviously going to have way too much material. This will result in runs, streaks, and a number of other problems. That is why decreasing your pattern to prime a small area will also require you to decrease your fluid adjustment to prevent this from happening.
Fluid Adjustment
This adjusts the amount of fluid that is sprayed out of the gun. It basically sets your gun trigger to a fixed setting. In other words, it will only allow the trigger to pull back to the adjusted amount. The further back you pull the trigger, the further the fluid needle moves back in the paint gun, which allows more fluid to pass through the fluid tip. This adjustment is going to vary on the job at hand as well. If you’re priming a small spot, you probably want a smaller fan pattern and less fluid. Therefore, decrease the fan pattern and decrease the fluid adjustment. The adjust for the fluid is directly behind the needle. Simply screw it in to the right (clockwise) to decrease fluid and screw out to the left (counter clockwise) to increase fluid. Just like a water fountain.
When I am setting a gun to spray a full panel or complete, I back the fluid adjustment back all the way and press the trigger (before paint is in the gun) back all the way. Then I screw the adjustment in until I start to feel it move the trigger. Then I screw the adjustment in an additional two turns. This will give me a good starting point. Then I will fine tune the adjustments in the paint booth.
Fine Tuning
Every Gun Will Vary On Settings
Now we are in the booth and we’ve opened our fan all the way, the fluid adjustment is open all the way, and we can set the gun to the recommended air pressure, let’s say 22 psi at the gun. This can be achieved by pressing the trigger halfway. This will only allow the air to come out. When the regulator reaches 22 psi, you can release the trigger. Now on your masking spray test stand, spray the paint onto the masking paper to see how it looks and feels to you. I normally adjust the fan pattern smaller just a little. Now check your air pressure again, as your fan pattern adjustment will change your air pressure. After it is readjusted, set the fluid adjustment. When you spray, are you getting good coverage? If you are, the gun is probably set correctly. If it’s dry or not covering well, increase the fluid. If it’s too wet or runs instantly appear, your gun is probably set with too much fluid. Make the adjustments and you’re ready to start spraying. Each paint is going to be different, so you will need to learn how to fine-tune the gun to your unique style. It will come with a little practice. Don’t try to make your style fit the gun. Adjust the gun to fit your style.
Spraying Techniques Video
Be A Robot
Painting is all about consistency. If you can do it exactly the same way every time, you’ll have it mastered in no time. Like the robots that spray. They have been programmed to do the same thing every time. Nice, even passes with the same speed and distance at all times. The angle is always perpendicular to the panel being sprayed. The first things a new painter needs to work on are speed and distance.
Gun Travel Speed
Gun speed is one of the biggest problems that I have noticed with students. It seems like most students have a tendency to spray the bigger areas at a faster speed, then slow way down on small areas like the fender area behind the front wheel or pillars. However, we need to practice on the exact same speed on all parts of the car.
Too Fast
If you spray too fast, you will have problems with coverage and a dry appearance. If the recommendation asks for two coats, two coats too fast is not going to be adequate. It requires that you build the mil thickness required. This may also result in seeing through the paint. (poor hiding) If your clearcoat does not have enough mil thickness, it may delaminate and peel. So gun speed is a crucial part of painting. I know, you see some painters who paint extremely fast, but there is a reason, which we’ll cover next.
Distance
Once you get the speed down, you will need to work on distance. Speed alone or distance alone are not that difficult to master. It’s getting the speed and distance going well at the same time….that is the trick. Distance can cause some of the same problems that other gun techniques cause. If the gun is too far away, you’re going to have a dry look. This is due to the over spray having too long to dry before it hits the panel. To achieve a wetter spray pattern, you will need to move the gun closer. However, too close and you are going to have runs. If you adjust one technique, you must adjust the other. If you move the gun closer to the panel, you must move faster. If you are further away, as when reaching to the middle of a roof panel for example, you have to slow down. I know, this is not rocket science….it’s just common sense. Whatever, this is easier said than done. This is the biggest challenge I have as a teacher when teaching a student to spray. For instance, the student may get closer to the panel, but they forget about speed….guess what happens? That’s right, sags or runs.
To become a professional painter is going to take practice and the ability to develop your individual technique. What works for me may not work for you. However, there are a few guidelines to follow to help you along your training path. To start, try to spray 8 to 10 inches away from the panel. HVLP spray guns work best in the 6 inch range, but 8 to 10 inches is a good place to start from when learning how to paint. Many seasoned painters shoot closer and move faster, but the closer you are to the panel with the paint gun, the less control that you have. Even a small pause or hesitation will result in a sag or run. By using the 8 to 10 inches rule, you will have control and room for error without ruining the paint job. Once you have this mastered, start working on your technique.
Gun Angle
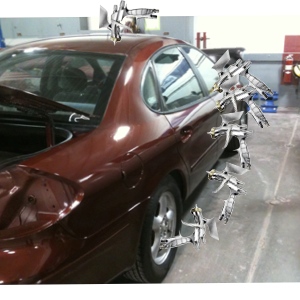
Gun Angle Must Change With The Contour Of The Car. Notice All of the Gun Angles Needed
The factory uses an electrical charge for some of their spraying processes. This works awesome as the charge pulls the paint around corners and in crevices, much like a magnet attracts metal objects. However, we do not have that luxury. Therefore, we must make the gun do it for us. This is another common mistake of not correctly covering edges and corners. For example, on many doors at the belt molding area (top by glass) there is a small flat edge. You must make at least one pass with your gun perpendicular to that area. Just holding completely horizontal or vertical will not work. You must follow the contour of the car. The bottom half of most cars will require you to slightly tilt your gun upwards to get the right gun angle. I know, it sounds like a lot of things to remember at once, but with a little practice, it will become second nature without even thinking about it. It’s kind of like driving a car. Remember when you learned how? Every detail was critical and made you nervous. Now I bet you jump in the car and drive to work or school without ever even thinking about what is required of you to properly operate the vehicle. It will come, it just takes practice.
With gun angle in mind, hard to get locations make it difficult. For example, when spraying below a rocker panel, the air regulator and air hose get in the way. Or trying to spray all of the different angles on a bumper cover. Once solution is using 3M PPS cups. These are a little more expensive than using the cup that comes with the gun, but makes getting these hard angels much easier. Clean up is simplified as well.
When using the PPS cups, the cups collapes instead of using a vent hole. Therefore, it you remove the air from the cup before spraying, you can spray with the gun upside down or any other position.
To See How This Works, Watch The Video Below
Overlap
This is the amount that each spray pattern overlaps the other. It is a lot like mowing. If you’re mowing back and forth at the end of one pass, you turn the mower around and align it to start the next pass. If you try to butt the two edges together, chances are that you will leave grass poking up where you missed it a little. To prevent that we slightly overlap the pass we just mowed to assure that we don’t miss any. Same thing with painting. If you don’t get the proper overlap, the edges may be light and/or dry and uneven. Proper overlap is different for the specific product that you are spraying, but the technical data sheet will state what it should be. For most of the solvent based products that we use today, a 50% overlap is required to achieve the correct mil thickness and coverage. You also want to remember to start your overlap at the edge of the panels. Half on the panel and half on the paper or air. This may seem like a little waste, but it helps you properly cover all edges with the desired results.
Watch this video demonstration of how to properly overlap
Arching
Arching is caused by locking your wrist and only moving at your elbow. This works much like sticking a thumbnail in a shoe string and using it to draw a circle. You get that arching effect going. If you remember to think like a robot and keep the gun straight and parallel to the panel, you will need to bend your wrist to keep that pattern. You may see what you believe to be painters arching the gun on the end of each pass, but they are actually triggering the trigger to only spray air when the gun is arched out. There are techniques when slight arching or fading the paint gun are needed, such as when blending paint, but this is still kept to a minimum, as too much arching will cause the metallic to lay down differently.
Gun Triggering
We just mentioned triggering, but this is just the process of letting off the trigger halfway. At half throttle, you will still have full air pressure, but no fluid will spray out. Then as you complete pressing the trigger, the fluid will begin to spray again.
Medium Coat or Full Wet Coat…What The Heck Is The Difference?
This is a question that I get often about spray application. The procedure technical data sheet will recommend medium wet-coat at times and full-wet coat other times. We’ve gone through all the trouble setting up the spray gun, can’t we just spray it the same way every time?
Medium Wet
Well, there is a difference, but it’s not that big of a deal once you understand the idea. First, let’s start with base coat. I’ve seen a lot of students trying to get base coat to a nice, glossy finish, and heavy mils when applying base coat. However, that is not the purpose of base coat. The required mils are very minimal. Basically, the base coat is the pigment, the color…..that’s it! All we want is enough pigment to hide what is underneath it. We call that hiding….we want to achieve hiding. Let’s think of it like this: we wrap Christmas and birthday presents to hide what is underneath, right? We can achieve this with a super thin piece of wrapping paper. In this case, one sheet achieves hiding. That is all that we need. There is not need to cut out cardboard pieces to hide the present…..that would not hide it any more than the paper would. Now the cardboard may protect it better, but that is not the objective. So base coat is a pigment used to hide. Therefore, we do not need to try to apply it extremely heavily. If you are spraying base coat with a wet and shiny look, then you are probably spraying too heavily. Base coat should be dull, at least after a minute or two. To get this result we are going to adjust our gun and travel speed to achieve this. That is why most base coats recommend a medium wet coat.
Full Wet
With a full wet coat we have a different objective. We want the glossy, heavy, and wet look. A full wet coat is almost to the point of sagging or running. Therefore, this can be more difficult to achieve. Let’s look at clear coat for example. It’s clear so hiding is not the objective. The objective is gloss and protection. Back to the present, if we decided to ship the present, I don’t think it would get there without having the thin wrapping paper torn to pieces. So we need something to protect the paper. We mentioned cardboard earlier, but let’s get a little more visual. Let’s say we cut 1/4 inch plexiglass to fit perfectly around the present. Then we used a strong clear adhesive to glue the ends and edges up. Now you would still see what the wrapping paper looked like and have the protection to keep it from tearing. That is basically what clear coat is used for. So with this thought in mind, a heaver and thicker coat is needed to achieve the required mil thickness and gloss level. There are several ways to achieve this. With clear coat it will recommend a bigger fluid needle and nozzle. This will apply a heavier coat, as the gun is designed to apply heavier coats. However, I have found that I like making a few minor adjustments to the same size gun to apply clear coat. For instance, both increasing your fluid adjustment and narrowing your fan pattern a little will achieve the same result. (full wet) You can also adjust your speed and distance to achieve a full wet coat. One word of caution when spraying full wet coats, well, actually a few things. Do not rush your flash times. You are already spraying the material on thick, so if you rush to your second or third coat too soon, you may create runs or trap solvents from the first coat before they have the opportunity to escape. If this happens, you will have solvent popping which looks like pin holes. This is caused by the solvent evaporating after the material has setup, which leaves a small crater in the paint finish.
It take practice to get to perfect spraying, but if you will properly adjust your spray gun, work on your speed, distance, overlap, and gun angles, you will be on your way to painting like a pro.
Choosing A Spray Gun: It’s Like Ordering A Hamburger
When it comes to paint guns , it’s kind of like trying to decide on what kind of hamburger you want. Tomatoes or no tomatoes, lettuce, pickles…. mustard or mayo….cheese, well what kind of cheese. By the time you order the hamburger, you hope that you made good decisions. Paint guns are the same way. There are many paint gun choices to make as well and if you don’t have some basic information you will not know if you made a good choice or not. This article will help you make a wise decision when purchasing a spray gun.
Let’s examine some of the choices that you will need to make.
First, let’s look at fluid nozzle and needle sizes. Here are a few things to ask yourself?
- What will the paint gun be used for. Primer surfacer, base coat, clear coat, etc.
- Will the spray gun be used for waterborne or solvent paints?
- Will the gun be dedicated to to only base coat, clear coat?
- How much can you spend on a paint gun?
- How often will I use the gun?
After you answer these five questions, you can start deciding on which gun will best work for your needs. Now let’s look at some general recommended gun sizes for the products that you will be using.
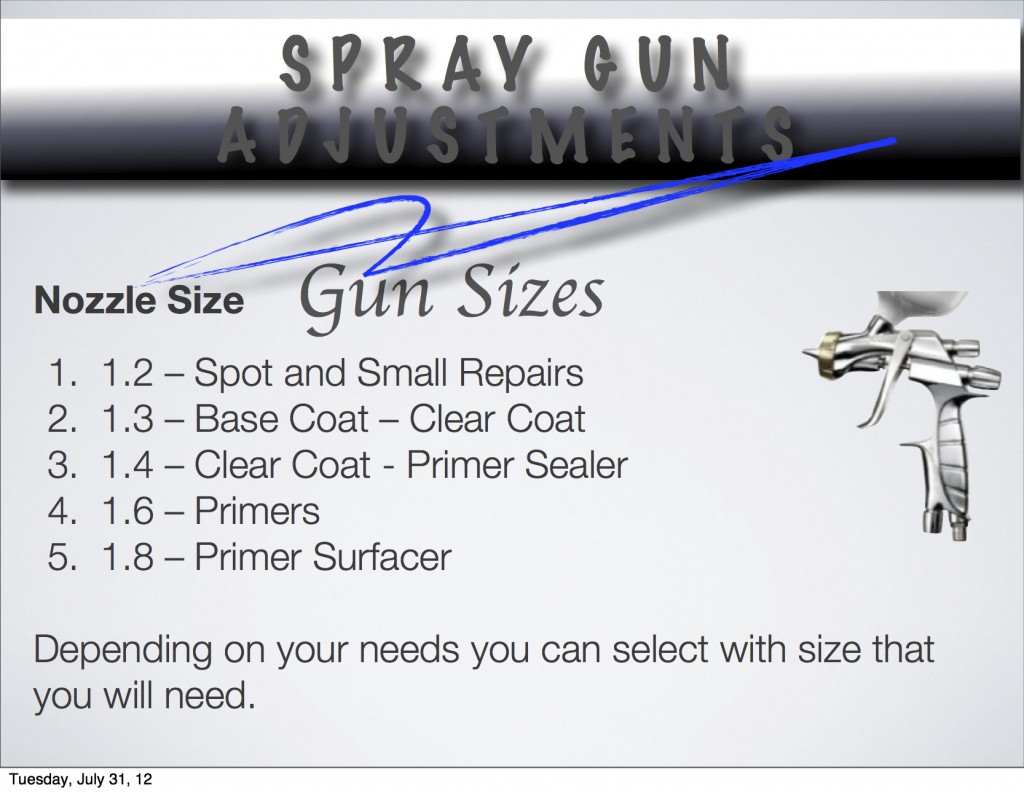
Nozzle Size
- 1.2 – Spot and Small Repairs
- 1.3 – Base Coat – Clear Coat
- 1.4 – Clear Coat
- 1.6 – Primers
- 1.8 – Primer Surfacer
Depending on your needs you can select with size that you will need.
Here are my suggestions.
- Primer Gun – 1.6 to 1.8 will work best.
- Dedicated Base Coat Gun – 1.3
- Dedicated Waterborne Base Coat Gun – 1.3
- Dedicated Clear Coat Gun – 1.3 or 1.4 (Depending on your preference)
- Multi-use gun – If you are looking for a gun to use for base coat and clear coat, I recommend a 1.3
Multi-Purpose
You will at least need primer gun and a base/clear gun. The 1.4 is specifically designed for clear coat, but I still prefer the 1.3 as I feel that I have more control of the gun.
Waterborne Paint
If you are using waterborne paint, I recommend having a dedicated spray gun, just for spraying waterborne. Switching back and forth from water to solvent may result in the paint gumming up and shoot a chunk of material into the finish that you are spraying. Another thing you must consider if the spray gun is coated for waterborne products. If not, the water will corrode and ruin the spray gun.
How Much Should You Spend On A Spray Gun?
I recommend that you buy the best gun possible. It takes to get a car ready to paint, a paint gun is not a good thing to cut corners on.
How Often Are You Going To Use A Spray Gun?
If you are going to use a spray gun often, then the investment will be well worth it. However, if this is a one time use or one time per year, then the investment on a high quality spray gun may not be worth it. You may need to shop around for a lower line of spray gun.
I hope that you found my suggestions useful. I also have tips on adjusting a spray gun, spraying techniques, and how to properly clean a spray gun.
This Video Discusses The Different Spray Gun Recommendations
Resources

Product Information
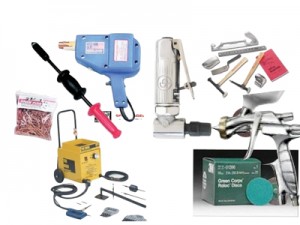
www.CollisionBlast.com/IwataExtreme
www.CollisionBlast.com/BuyIwata This is my base coat and clear gun of choice.
www.CollisionBlast.com/DeVilbiss Less expensive, but a good spray gun
www.CollisionBlast.com/SharpeFinex Less expensive, but sprays good.
www.CollisionBlast.com/GunCleaningKit This is a gun cleaning kit.

If you have a spray gun, practice with some of the techniques covered in this module. If you do not have any paint material or a place to spray it, practice with water. This will not help you see how the material covers, but you can practice your adjustments, speed, distance, overlap, etc.
Note: If you are a student attending a collision repair program, follow the lab activity instructions provided by your instructor.
After you have practiced the spraying techniques, what do you find is your biggest challenge to overcome is as a painter?
How To Adjust A Spray Gun When Spraying A Complete Panel or Complete Vehicle
1. Open Fluid Adjustment Fully Open– Before connecting the spray gun to the air hose, open the fluid adjustment by turning the fluid adjustment out (counter clockwise). Once backed off, turn the fluid adjustment in by turning (clockwise) while holding the trigger. When you first start to feel the trigger move stop.
- Remember, when you set one setting it may affect other settings. For example, smaller fan pattern is going to increase air pressure so you will need to keep an eye on all setting when fine tuning a spray gun. However, remember to spend some time to adjust your spray gun to fit your individual techniques and the materials you are spraying. Don’t try to make yourself adjust to the spray gun.
When Spraying A Small Area
5. Fine Tuning Fluid – This step will require a little time spent adjusting to get it right for the job you are doing. You want to spray enough to get the correct amount of mill coverage, but you do not want to get too much mills either, which is easy to do with a small pattern. When spraying the test pattern, if the pattern is too wet when sprayed degrease the fluid adjustment slightly and retest until you have achieved desired fluid.
6. Fine Tuning Fan – The smaller fan pattern may be used for priming a small spot. Therefore, the fan width will depend on the size of the damaged area. A well for an application such as this. Slightly adjust the fan adjustment until desired fan pattern is achieved.

Lesson 9 Quiz
Now test your knowledge. There is not a time limit set on this quiz so take your time. Find the correct answer if you do not know for sure. The objective of this quiz is to help you learn the information if you do not know the answer, not guessing. Good Luck!
Gun Adjustment Quiz – Password (simple)
Copyright 2011 CollisionBlast.com



 jay weddle says
September 18, 2013 at 12:24 amI was impressed with your e-book. You provided the true picture of what it takes to spray a quality finish. This is one of the most if not the most complete article I have found on the web. I wished that I had written and compiled the videos myself. You can write for me anytime. Hats off to you!!!
 admin says
December 1, 2013 at 11:39 pmI am glad you enjoyed the e-book tutorial and I appreciate your kind words.
 Lionel says
January 15, 2014 at 8:33 amHi, i reallly like your stuff, its really good.Im a first time spraypainter/panelbeater working in South Africa and i would love to get your tutorials.
 rod cripps says
November 4, 2014 at 5:48 amHi – I have a problem with two of my guns – they have started spraying intermittently – they spray for say 1-2 second, then the spray stops for 1/2 second, then sprays again, on and on. They are thoroughly clean, and the tips, nozzles, caps etc are undamaged, and sealing washer looks good and the right way around. I have tried a little oil on the pin seal, and tightening the seal gland.
Any ideas?
Thanks, Rod.
 Niranjan says
June 16, 2015 at 3:42 pmThank you so much for providing such an incredible amount of info, and that too so lucidly. I am a doctor and have many interests, one being airbrushing but the transition to ” regular ” spray painting was made so much more easier with your tutorial ! Thanx a ton!
 Iain says
October 31, 2015 at 7:47 pmHi,
Just a question about spray pattern settings. With your experience is it possible for a spray gun’s fan setting to wear down over time?
I’ve tried to keep the same settings for the bulk of my spray jobs, but I’ve noticed it quite a bit when testing prior to painting the surface. Temperature is around 20-25 degrees C, air pressure at wall is 90 psi, at gun 25-30 psi. Gun is fully clean.
 Russell Baker says
April 29, 2016 at 4:08 amI’m a huge fan. I’ve seen time and time again in blogland how so many can transform something really ugly into something completely different and beautiful with spray paint.