Align Panels
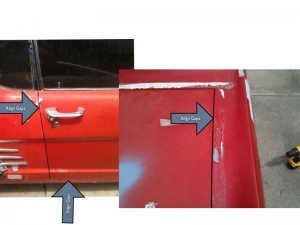
Align Door and Trunk Gaps To Quarter Panel
In this tutorial we are going to take the quarter paneloff of a 1966 Mustang. First, we need to align the adjacent panels to the quarter panel so the new quarter panel will fit properly when installed. If you don’t First align the door and the deck lid to the quarter panel you will have problems when trying to align the quarter panel. To align the door loosen up the hinge blots and adjust as needed to properly align the door to quarter panel gaps. Next loosen the bolts holding the deck lid in place to make necessary adjustments to align the deck lid to quarter panel.
If Damaged, Repair The Damage
If the quarter panel is damaged, obviously, it’s not going to fit or aligned properly. Therefore, you must rough out the damage in order to assure the body lines align and the new quarter panel will fit correctly. Once the damage is straightened and the gaps are aligned properly you can begin removing the quarter panel. To start removing the quarter panel you will need to use a drill to drill out the spot welds. We’re doing this project as a DIY project at our house as you may be. Therefore, we are using basic tools which will allow you to do this from home as well.
Finding The Spot Welds
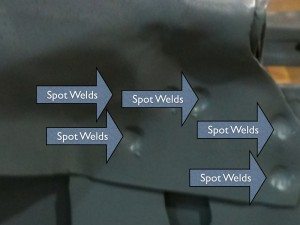
Spot welds are easy to identify. They are a small dimple in the metal. However, there may be locations where seam sealer or other coating are covering them up. If there is seam sealer of other coating, it must be cleaned of before locating the spot weld location. A wire brush, sanding, or scraping will help remove the coating from the area. Once cleaned, the spot welds can be located.
Properly Using A Drill When Drilling Metal
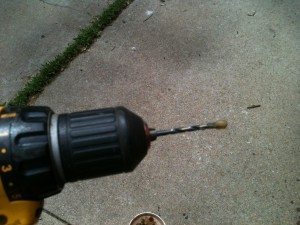
Use A Lubricant Gel or Spray To Help Bit From Over Heating
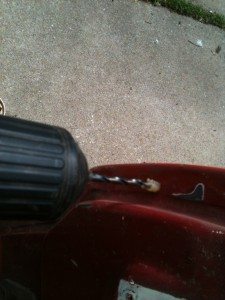
Any type of drill will work but in this tutorial we’re simply using a cordless drill. The trick to drilling metal, is using good quality drill bits, drilling at a slow RPM, and using a lubricant jell or spray. Not using high-quality drill bits, drilling with too high of a speed, or not using a lubricant will lead to burning and dulling the drill bit, which makes it difficult and time consuming to when drilling metal. There are other methods for removing spot welds, but most of them require an air compressor.
Drill Through Both Panels
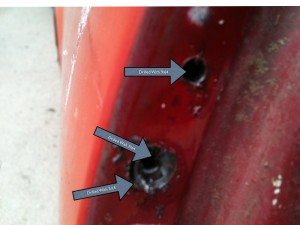
Using a 9/64 drill bit, drill through the center of the spot welds. If you have a problem with the drill walking on or moving around it may be wise to use a center punch and hammer to tap a small indention in the center of the spot weld location . Drill both panels with the smaller 9/64 drill bit.
Drill Through Outer Panel
After the small hole has been drilled a larger bit 5/16 can be used to drill out the spot weld. When using the bigger bit, you only want to drill through the outside panel.
Once all spot welds have been drill, use a seam buster to separate the panels. This is done by hammering the chisel edge of the seam busterbetween the panels.
Making A Rough Cut At Section Location
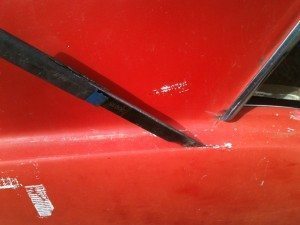
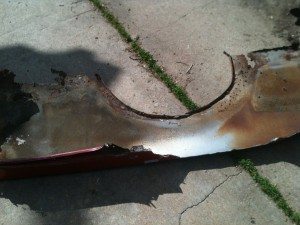
The Seam Buster also comes in useful when making rough cuts as we did on this Mustang project. Now that the quarter panel is off, you can start preparing the vehicle for the new quarter panel. However, we are going to have to do additional work before continuing this quarter panel replacement due to the rusted wheelhouse on the Mustang.
Step 1: Remove Rear Bumper Extensions – To remove extensions use a 1/2 socket to remove the right and left bolt holding the top of the extensions on. The top bolts can be accessed from inside the trunk area. The lower bolts will need to be access from underneath the car.
Step 2: Remove Rear Roll Pan – The roll pan will need to be removed to gain access to the spot welds on the back of the quarter panel. Using a phillips screwdriver unscrew the roll pan from the rear body panel.
Step 3: Punch An Indention in Center of Spot Welds – To prevent the drill bit from moving, use a center punch and hammer to make an indention in center of spot welds location.
Step 4: Drill Through Both Panels at Spot Welds Locations – Using a 9/64 drill bit, drill in the center of each spot weld location. Drill through both panels, but care should be taken not to drill though interior parts or anything that may be damaged on the other side. This may require removal of interior parts.
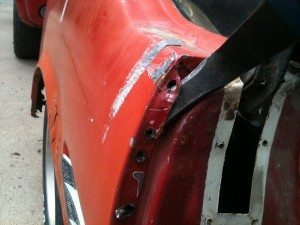
Step 5: Drill Through Outside Panel – Using a 5/16 drill bit, drill though the outside panel only. This will remove the spot weld.
Step 6: Separate Panels Using a Seam Buster – Once you have drilled out all the spot welds a Seam Buster can be used to separate the outer panel from the inner panel. Step
7: Make Rough Cuts Using Seam Buster – Using the Seam Buster, make a rough cut at section location. Be sure that you leave yourself extra metal so the final cut can be made later when installing the new quarter panel.
Step 8: Remove Quarter Panel– Now simply remove the old panel from the Mustang. Gloves should be worn to protect yourself from sharp edges from the rough cut and spot weld locations.
