by Toby Trujillo
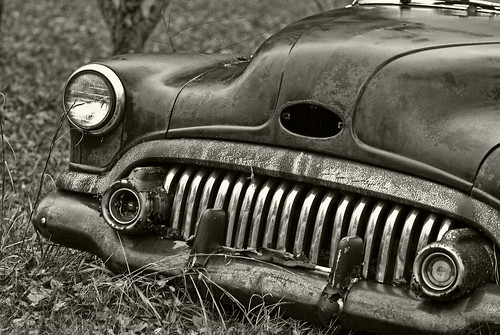
For nearly every old vehicle on the road, rust is a constant, relentless enemy. Whether you’re dealing with a daily driver or a classic barn find, chances are you’ll have to repair the damage caused by the “iron worm” at some point of your maintenance or restoration project. Rust forms when metal surfaces are exposed to oxygen and moisture. Even a small scratch in the paint that reaches down into the metal can result in oxidization.
Rust problems can quickly escalate into a very expensive problem, especially in states where use of sodium chloride, or rock salt, is common. Ten to 20 million tons of rock salt are used on an annual basis in the northern regions of the U.S., according to statistics collected by the Maryland Department of Natural Resources. Chemical reactions between road salt and bare metal can easily accelerate the rusting process, making it critical to remove rust before it sets in.
Photo by Flickr user jeffweese
How to Remove Rust
Before you start, you’ll need a few tools to help you along the rust removal process. You’ll need a good pair of rubber gloves, along with protective eyewear and a dust mask. You’ll also need some painters tape, masking paper, a dual-action sander with 80-grit to 150-grit sandpaper, some 400-grit sandpaper for wet sanding and a metal grinding wheel. Last but not least, you’ll need some metal primer as well as color spray in the hue that most closely matches your vehicle’s color.
1) Use the masking paper and painters tape to mask off nearby areas of vehicle surrounding the area you plan on repairing.
2) After your work area is carefully masked off, remove some of the more obvious layers of rust along with the paint surrounding the rust area with the dual-action sander. Start with some course 80-grit sandpaper and slowly work your way up to 150-grit. Continue sanding until you get a smooth surface.
3) Switch to the metal grinding wheel when you start encountering thick rust and pitted areas. Remember to go slow and work with a light touch to avoid gouging the metal. Don’t forget about safety — OSHA recommends you carefully inspect and test abrasive wheels for cracks or defects prior to use.
If you’re having trouble sanding away rust and corrosion, you may have to turn to a rust removing compound. Hot Rod Magazine tested several chemical compounds with generally good results, although you can expect a 24-hour waiting period as the largely organic and biodegradable compounds work their magic on deep-set rust.
4) Wipe the area down with mineral spirits or paint thinner, then apply several thin, even coats of primer. Allow the primer to dry for several minutes between coats. Afterwards, let it dry overnight.
5) Sand the surface down with 400-grit wet sandpaper. Wash the surface with a light soap and water mixture, and let it dry.
6) Spray the area with several thin coats of paint, allowing the area to dry for a few minutes in between coats. Use as many coats as you need to achieve a good finish. Allow the paint to dry for at least 24 hours before removing the masking paper and painters tape.
Photo by Roger McLassus via Wikimedia Commons
Remember, not all instances of rust can be removed. Rust steadily eats away at metal, eventually rendering it into ferric oxide flakes. If your car has a severe case of rust where it has eaten away the frame or any other structurally important metal component, it may be time to trade your rust bucket in for something newer. During a quick visit to DriveTime, you can find the vehicle of your choice to replace your old rust-riddled ride. When looking at cars at dealerships, ensure there are no chips or cracks in the paint as it may lead to rust in the future. However, rust problems on modern cars have all but disappeared with anti-rust treatments like zinc coating becoming the norm.
About The Author
Toby Trujillo
Toby worked his way through college as a repairman at his uncle’s apartment complex. An insurance broker by trade, he likes to relax in his woodshop on the weekends.


Leave a Reply
You must be logged in to post a comment.