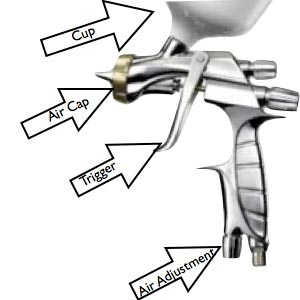
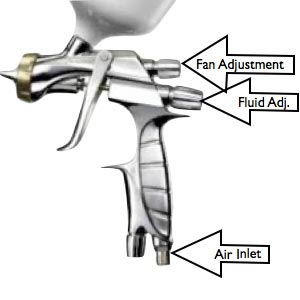
It is important to understand the different parts of a spray gun, how they work, and how the adjustments effect the overall results when spraying a car. By understanding the basics to a spray gun, you will also be able to troubleshoot spraying issues. I guarantee you, if you spray cars, you’re going to run into a problem with the gun at some point.
The first problematic area is going to be the air cap. If one of the air passages become plugged, the spray pattern is not going to spray evenly. This can result in uneven mill thickness, stripes, and dry edges. If the pattern is heavy on one side or if the spray gun is spraying a half moon shape, turn the air cap 180 degrees and see if that changes the pattern. For example, if it was heavy on top, it becomes heavy on bottom when the air cap is turned. If the pattern does change, you know the problem is in your air cap. Now you would know to clean the air cap and make sure all air passages are open. If this does not change the pattern, it is probably going to be the fluid tip.
There are more parts to a gun than an air cap and fluid nozzle, but those parts are where most of the problems are.
Other parts include: fluid needle, fluid adjustment, gun trigger, fan pattern adjustment, air adjustment, and the gun body.
For more information about the spray gun demonstrated in this video, visit www.CollisionBlast.com/SharpeFinex
For our archive of free auto body and paint training video visit http://CollisionBlast.com Subscribe now and you will instantly receive free access to hours of our training videos and stay updated with our new videos coming in the future.


Leave a Reply
You must be logged in to post a comment.