Click Button Below For Lesson
 Sure, we know that there are car window replacement parts, but how do we know which part is not working if our car window stops working? Your window is working fine one day, then the next day it does not roll up or down. Has this ever happened to you? I’m sure that it has, as it’s a common problem with power windows. The most common window to stop working is the driver’s side window as this window is used more than the others. In this tutorial you are going to learn the most common problem and how to replace it. Below you will also find video tutorials demonstrating how to replace the regulator.
Determining The Problem
First, of all, there is not one solution to every problem. If your car window stops working, it could be a number of things. However, there are a few simple things to look for when determining the problem. Is It Electrical or Mechanical?
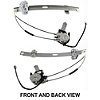
A quick way to determine if the problem is electrical or mechanical is to push the switch up and down and listen closely. If you can hear the motor making a noise, the problem is probably a mechanical problem. If this is the case, chances are it’s the window regulator. Most power windows use a cable or plastic strap to drive the window up and down. Over time the cable or strap becomes weak and breaks into. Also, as the regulator and the tracks become dirty over time, it requires more force to drive the window up and down. The driver’s side window is the most used window in a car, which results in that regulator to brake first many times.
What If It’s Electrical
This tutorial is going to focus on replacing the window regulator, but here are a few tips if you cannot hear the motor when the switch is pressed. If it’s electrical it’s probably going to be a problem with the switch, blown fuse, or the motor itself. The first and easiest thing to check first is the fuse. This is easy to change and only takes a minute. If that is the problem, it will be a quick fix. However, if that does not do the trick, you may want to have a someone take a look at it so they can trace the problem. For instance, the problem could be a loose or broken wire.
Usually, It’s The Window Regulator
Since the window regulator is the most common problem, we are going to focus the rest of this lesson on replacing a window regulator.
Here are the steps to follow when replacing a window regulator. Each make and model are going to be different, but these are some basic steps to take.
- Remove The Door Panel
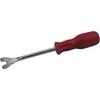
 To begin, you will need to remove the door panel. Look for screws holding the door panel on and remove them. Some of the screws may have inserts or covers that will need to be removed before gaining access to the screw. Once all screws are removed, use a trim removal tool to reach behind the door panel and pop the clips holding the door panel on. Do not just pull on the panel to pop the clips, as this will break or damage the clips. Unplug the power accessories and set the door panel aside.
2. Remove Vapor Barrier
 The vapor barrier is a piece of plastic or coated paper that is glued onto the door. Care must be taken not to rip or tear vapor barrieras this will need to be reinstalled during the reassembly process. The vapor barrier help keep wind and moister from entering the passenger compartment. If you want extra moisture, wind, plus heat insulation and sound deadening, you can use Dynamat instead of replacing the vapor barrier. This will provide superior moisture, wind, sound, and heat from entering the passenger compartment.
3. Remove Glass
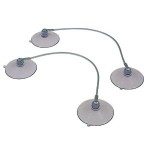
 Place a window holder to prevent the glass from slipping, which could cause it to scratch or break. Once the window is secure or someone else is holding it for you, remove the bolts that hold the window to the window regulator. There is usually 2 to three bolts. It may be necessary to push the window up or down to position the bolts to a location that you can access them. Sometimes you will need to use a socket with an extension to access the bolt through a hole in the door. Once bolts are removed, take the glass out by sliding it through the top. You may need to angle or twist the glass to remove it. If the car has a smaller glass or vent glass, it must be removed first. These windows usually have a few screws holding them in.
4. Remove Window Regulator
 Locate the bolts that hold the window regulator in place. If you have the new regulator, which you should look at it to see bolt locations. Once the bolts are removed, unplug the motor and remove the regulator.
5. Compare Parts
Compare the new window regulator to the old one to make certain you have the correct part. If you order the part using your make, model and year, it should be the correct part, but alway check to be certain.
6. Reverse Process
Now simply reverse the process. Install the regulator, window, vapor barrier, and door panel. One think that you may have to do when installing the window regulator is to plus the switch in to position the regulator while installing. With the cable not broken, it’s not going to slide up and down by pushing. Also, before installing the door panel, be sure to test it to make sure it is working correctly. If any slight adjustments are make do it at this time.
That’s it! It is really a simple process once you replace your first one.
Note: Some vehicles use rivets to hold the window to the regulator and the regulator to the door. If this is the case, use a center punch to knock the center of the rivet out, then use a drill to drill the head of the rivet off. Then use a rivet gun to reinstall the rivets.
OEM window replacement parts can be bought from your local dealership, but may be expensive. You can also buy aftermarket window parts, which are a lot less expensive.
Video Demonstrations of How To Replace Window Regulator
Note: These are A1 videos. While I do believe they do an excellent job of demonstration how to replace regulators, I am not affiliated with them. I added these videos here for you. I do have a few videos below that demonstrate how to replace side glass.
[huge_it_videogallery id=”14″]
Resources:
- www.CollisionBlast.com/WindowHolder
- www.CollisionBlast.com/WindowRegulator
- www.CollisionBlast.com/TrimRemovalTool
- www.CollisionBlast.com/DynamatDoorKit
The Glass Broke..Now What?
Replacing a side door glass is a simple process. I actually have a video where I replaced the side glass on my 2001 Nissan Frontier. For this vehicle, it only takes a flathead and phillips screwdriver, trim panel tool, 10 mm socket and rachet, and about 30 minutes of your time. This is actually an easier job than replacing the regulator, as you don’t have to remove the regulator. Watch the quick video to learn how.
Replace Side Glass 2004 Nissan Frontier
Toyota Camry Window Replacement
If Something Is Worth Doing, Then Do Your Best and Have a BLAST Doing It.