These lessons are now open to help collision repair students learn from home. I am lifting the Patron fee to access this content during this time, as many schools are closed. However, I do appreciate your support and hope my Patrons continue to support this website and training.
If you would like to help and support this website, then I would greatly appreciate it. For more information visit. www.Patreon.com/CarAddictGarage
Click Button Below For Lesson

I hope you enjoy this training module. Let me know if you have any questions, or suggestions you may have to make this training module a better learning experience for you. Donnie
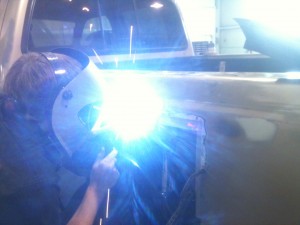
Lesson 6 – Welding
Good Penetration Is The Key
A dream doesn’t become reality through magic; it takes sweat, determination and hard work. ~Colin Powell
In this lesson, you will learn about basic automotive welding, the types of welds used, and the PPE needed to keep you safe.
This page is the full lesson, which includes text content, videos and resources. I also broke it down to only the videos and resources. Just click the button below if you prefer to view only the videos or resources. Note: some browsers and mobile devices may not play videos below…but they should work on the videos page. If you are still having problems viewing videos, then you can watch the playlist on YouTube.
Video Overview
This is a quick video going over the different parts of a welder
Welding
A vehicle consists of many parts that are attached in a variety of ways. One of the methods used is welding. Therefore, a technician must master welding to become a professional collision repair technician.
Most Common Welds from Factory
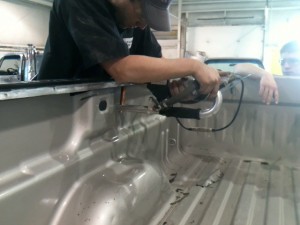 Most of the welds from the factory consist of spot welds, where a machine compresses the pieces of metal together and then a high voltage spot welds the two pieces together. In this process, there is no additional filler metal used to complete the weld process, which does not add any additional weight to the vehicle, as nuts and bolts would.
We do have spot welding machines that can re-produce a spot weld similar to the factory spot weld. however, there are some places that are difficult to reach and may need to be welded with a MIG welder. And these machines are expensive and not all shops have one. The majority of this lesson is going to be focused on using a MIG welder to replace factory spot welds and the other types of welds needed in collision repair.
Here is a video demonstrating how to remove spot welds and using a spot welder to weld the bedside back on.
Spot Weld Demonstration
Welding In the Auto Body Shops
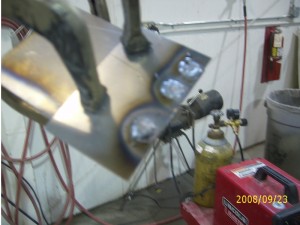
Collision repair shops have machines that will produce spot welds as well, but many of the areas that need to be repaired are hard to get to, which may require an alternative welding method. The welding method used in this situation is called a plug weld. This is done by punching an 8 mm hole in the top piece of metal, much like a hole in a piece of notebook paper, and placing it on top of the piece of metal to be welded. Once clamped in place, simply weld the hole with a MIG welder while getting good penetration into the bottom piece. Sound easy enough? Well, it is easy to learn, but hours need to be spent perfecting these welds before making actual welds on a car. Just like in baseball, you don’t stop throwing and catching as soon as you learn how. No, you keep on practicing to become better and better. Well, if you don’t practice catching, you may just miss the ball. However, if you don’t have the welding down, your welds may not hold up in an accident, which could lead to unnecessary injuries. Note: check the vehicle recommendation to determine the hole size recommended for plug welds. Some recommendations may require different sizes, but the most common is 8 mm – 5/16″.
Video Tutorial: How To Plug Weld
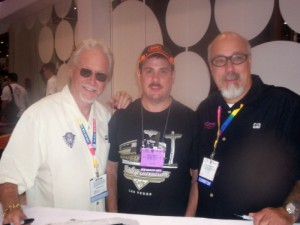 There are basically three types of welds used in auto body repair: plug welds as we’ve already mentioned, and we also have butt welds, which may or may not have a backing plate, and lap welds.
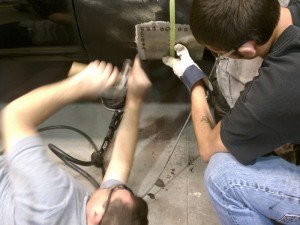 A butt weld is used when sectioning parts together. This is achieved by butting the two pieces of metal together so that they are flush and level. This will allow you to grind the weld when completed so the weld can be filled and smoothed out without the repair being visible. This is when you would use the fiberglass filler over the welded area.
Video Tutorial: How To Butt Weld
Quarter Panel Example
Let’s look at a situation where a butt weld would be used. We’re going to section in a quarter panel. You want to find a small area such as the dog leg or sail panel. Mark and cut the damaged quarter panel and remove all spot welds and adhesive to remove the quarter panel. Clean and dress the inner quarter to prepare it for the new quarter panel. Drill a hole in the new panel where you are going to plug weld it. Next, cut the new quarter panel about 1 inch past the section area cut on the vehicle. This will give you a little extra to make your final cut. Pre-fit the new panel and clamp in place. Now you can scribe a mark where the new panel meets the old panel with a scratch awl. Take the new quarter back off and make the final cuts where you scribed the marks. The new quarter panel should be a perfect fit and butt up to the section splice areas. At this point, the panel can be welded in place using a plug weld and a butt weld to join the splice area.
There are more detailed steps to replacing a quarter panel, but I just wanted to give you a quick idea of how welding can be applied to an actual auto repair.
Lap Weld
A lap weld is when one piece of metal laps over the other piece of metal. You may need to do this type of weld when replacing structural parts that recommend this weld type. These welds are normally in areas that do not require an invisible repair. Therefore, the fiberglass and body filler are not required. However, you may need to apply seam sealer to properly seal the area to prevent moisture and corrosion.
Video Tutorial: How To Lap Weld
Heat Management
One thing that differs in automotive welding is heat concerns. You must monitor your heat to prevent warping a panel or destroying its strength. Especially when welding high strength steel. Therefore, to prevent these problems, you should not weld continuous welds. Skip welds, stitch welds, and triggering techniques must be practiced to prevent overheating the weld locations.
Skip welding is welding a 1/2 inch and moving to another area to make the next weld. This allows each weld area to cool. Continue these small welds until all welds meet, making a solid weld. This does not make a pretty weld like you would see on thicker metal, but the weld is going to be ground off. It’s necessary to make sure you have proper penetration to both pieces of metal being welded.
The most important thing to do is to practice. Welding takes much practice. Get your welder out and some scrap metal about the thickness of body sheet metal. Then just practice, practice, practice.
There is one last thing that I would like to mention. When you are actually welding a panel or patch onto a car you may not be able to get back into the enclosed area that you are welding. You cannot use regular primer to protect the metal as it would burn off by the heat of welding. However, you can purchase a product called weld-thru primer that can be used. Simply spray inside of the area that you will be welding. The zinc-rich primer will not be destroyed by the heat and the metal will be protected and promote corrosion protection.
Safety
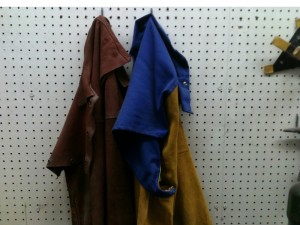
Safety is something you always need to consider when working on cars, but welding has a few additional things to be aware of.
Heat
Of course, welding produces heat, but every welder has burned himself or herself at one point or another. Therefore, clothing should be worn to protect yourself from the hot molten metal.
Personal Protective Equipment
PPE should be worn at all times when welding to protect you from being burned. Besides accidentally grabbing a piece of metal you just welded, there are other ways you can be burned.
Any time you are welding, you will have sparks and molten metal splatter falling. If a piece of molten metal falls on you, it will burn through a regular shirt like you didn’t even have a shirt on. Leather is the best way to protect yourself from being burned. Leather gloves, leather jacket, leather boots, etc., will eliminate an unnecessary burn.
Ultraviolet Rays
UV rays are another thing to consider and a reason to keep your skin protected. Oxy/Acetylene does not produce UV rays, but other types of welding, such as MIG, TIP, or arc welding do. Just like the sun, a welder can give you a massive sunburn too.
Eye Protection
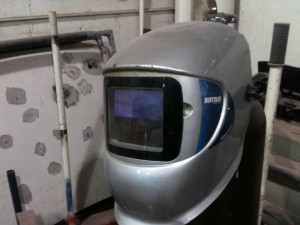
Eye protection should always be worn when working on cars, but the UV rays from the welder can damage your eyes, If you have ever had welders burn you know how baf=d this can hurt. It may not hurt your eyes immediately, but I have woken up at midnight before with some of the worst pain from welder’s burn. Not only can the light from the welder make your eyes burn, it can also result in medical issues as well.
A welding helmet with the proper shade lens should be worn when welding or when watching someone else weld. Dark shaded sun glasses will not work. You need a lens that will filter out the UV rays. Welding thin metals such as car bodies produces lower UV rays than arc or TIG welding, but the lowest lens you want to use for any type of welding is shade 9. When welding thicker metals, you will use more voltage, which will require a darker lens.
Lungs
You will also want to wear an approved respirator when welding to protect your lungs. Many of the metals used on cars have coatings that produce harmful fumes. Galvanized coatings are one of the coatings that produce harmful fumes when welding or cutting. Always wear the respirator to keep yourself safe.
Hair
You may not have thought of protecting your head, but if slag drops on your hair, it’s going to hurt. That is why you see welders wearing welder’s caps. This is a cap that will not catch on fire easily and allows the helmet to easily fit on top of the cap. There are much more safety concerns that I am not going to cover, but just remember to keep your skin, eyes, lungs, and head protected and safe by using the proper PPE
Oxy/Acetylene Welding
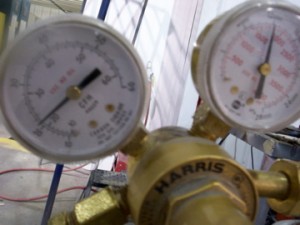
We use oxy/acetylene for brazing in the collision repair industry, but it is not really used for cutting much in the automotive industry, as it can create too much heat and can warp or ruin today’s metals. MIG welding has replaced oxy/acetylene for welding purposes.
There are still certain weld types that recommend brazing for the sealing properties brass provides, but MIG welders are also being used with brass, which is called MIG brazing.
Even though oxy/acetylene is not used much in the automotive industry, there may be times you need to do a rough cut, heat a bolt, or perform a little brazing. Therefore, I’m going to touch on the subject.
Bottle Pressure
Regardless of what type of bottle—oxygen, acetylene, argon, etc.—there are going to be two gauges to read the pressure. One gauge will tell you how much pressure is in the bottle. Of course, you cannot use the equipment with that much pressure, so you will have to regulate the pressure. The second gauge tells you what the regulated pressure is. You can think of it like an air compressor. The tank may have 150 psi, but you must reduce the pressure to 40 psi using a regulator to properly operate a tool.
Oxygen
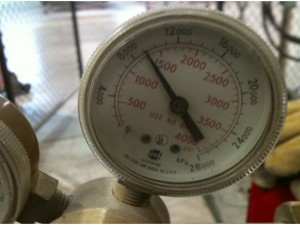
First of all, we’ll talk about an oxygen cylinder. It is a high-pressure bottle (up to 2200 psi), and oxygen is one of the elements needed to make fire. The three elements to make a fire are a fuel source, an ignition, and oxygen. So the oxygen is highly flammable. The more oxygen that you add to a fire the hotter it is going to get. A lot of care needs to be taken handling the oxygen bottle because it is highly concentrated and highly flammable. Dirty oily rags or wrenches that you may be using to change the cylinder bottle may cause an explosion. Therefore, you need to make sure that equipment used is clean and it doesn’t have any oil on it. Also note that you never want to use any type of lubricant or anything like that. This can be dangerous and may result in an explosion.
Acetylene
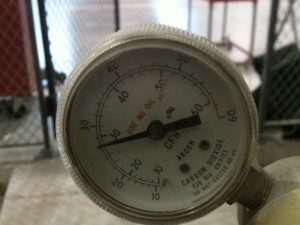
The other bottle, which is used a lot for the fuel source, is the acetylene bottle. It is a low-pressure bottle. It only has up to 250 pounds, but care must be taken handling this bottle as well.
Secure Bottle
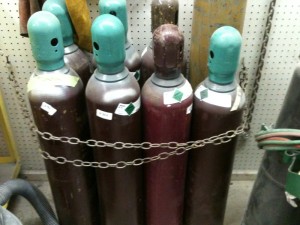 When storing bottles that are not in use, always have the lid screwed on to protect the valve and secure the bottles to prevent them from being knocked over.
What Oxy/Acetylene May Be Used for in a Body Shop
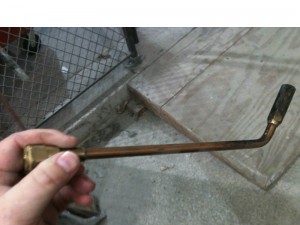
Oxy/acetylene may be used for brazing. You may do some rough cuts and things like that, but plasma torches have replaced the cutting and oxygen/acetylene is being phased out with new repair methods. As I mentioned, there are some recommendations of areas on a vehicle that need to be sealed really well, like sail panels. Recommendations are to braze the joint, since brass provides superior sealing properties over other type of welds. This helps keep moisture out and helps fight corrosion with its superior sealing properties. Brass is also more flexible and there are other benefits to brass.
Brass Is Not a Fusion Weld
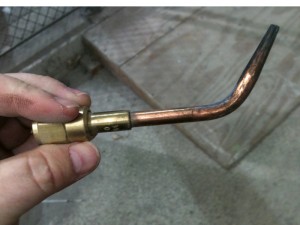
Brass is not a fusion process like when something is welded with oxygen/acetylene or the MIG welding. Fusion means that the two pieces are melted together making one piece. When brazing, it is like gluing or soldering something together, as it does not melt the metals together. One benefit of brass is that it uses lower heat to melt the brass. The amount of heat used is always something to consider because too much heat in the automotive industry can ruin the metals, such as high strength steel.
Benefits of Brass
The benefit of brass is the sealing properties it provides to prevent corrosion and the lower heat used to join the metals together.
MIG WELDING
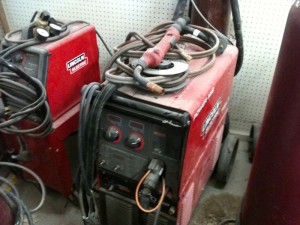 MIG welding may be referred to as GMAW, which stands for gas metal arc welding. MIG stands for metal inert gas, but may also be known as wire feed welding. A MIG welder is used to replace many of the factory spot welds with a plug weld.
Work Clamp
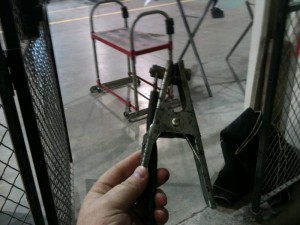
First of all, we’ll talk about a few things that you need to know when welding on a vehicle. You always want to keep the work clamp close to where you are welding on the vehicle. For example, you certainly wouldn’t want to have the work clamp on the back bumper and be welding on the front section! Try to keep the work clamp just as close to you as possible. Another thing you want to do when welding on a car is to disconnect the battery. Any time you have the welding on the car, you are making a circuit and you don’t want to have your battery connected, as this could damage electrical components on the car. Disconnect the battery by disconnecting the negative cable. Then isolate the negative battery cable by wrapping it with a rag or plastic to eliminate the cable accidentally grounding itself to the car.
Computer Components
 Another consideration when working on cars is the computer components. If they are within 12 inches of the area you are welding, you really need to remove those components to prevent damaging them when welding.
Cover Glass
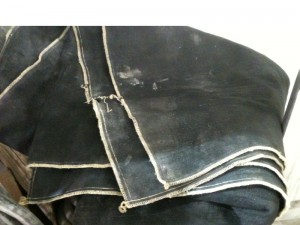
Before welding, cover glass or anything else that can become damaged during welding process with a welding blanket or spark resistant paper. Even grinding can pit the glass, so keep the glass covered with welding blankets or some type of protective sheeting until the repairs have been completed.
Welding Blanket
Spark Resistant Paper
Advantages
The advantage of MIG welding over oxy/acetylene welding is less of a heat zone. It does not heat the metal as much as an oxy/acetylene torch does.
Skill Level
MIG welding requires fewer skills than arc, oxy/acetylene, or TIG welding and is a fast and effective welding process.
Polarity
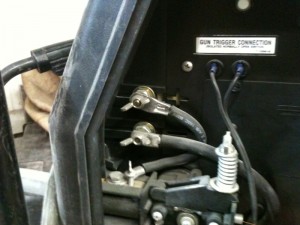
MIG welders have two different polarities. You have a reverse polarity, which is used in auto body work. This is where the electrode that the wire is coming out of is the positive and the work clamp is your negative. This setting uses welding wire and a shielding gas. The other type is straight polarity, which is used with flux core wire. This setting requires flux core wire, but no shielding gas is needed. Flux core wire is not recommended for thinner sheet metals and is not used in auto body repair. You need to be certain the welder is set on the correct polarity setting for the type of welding you will be performing.
Short Circuit Transfer
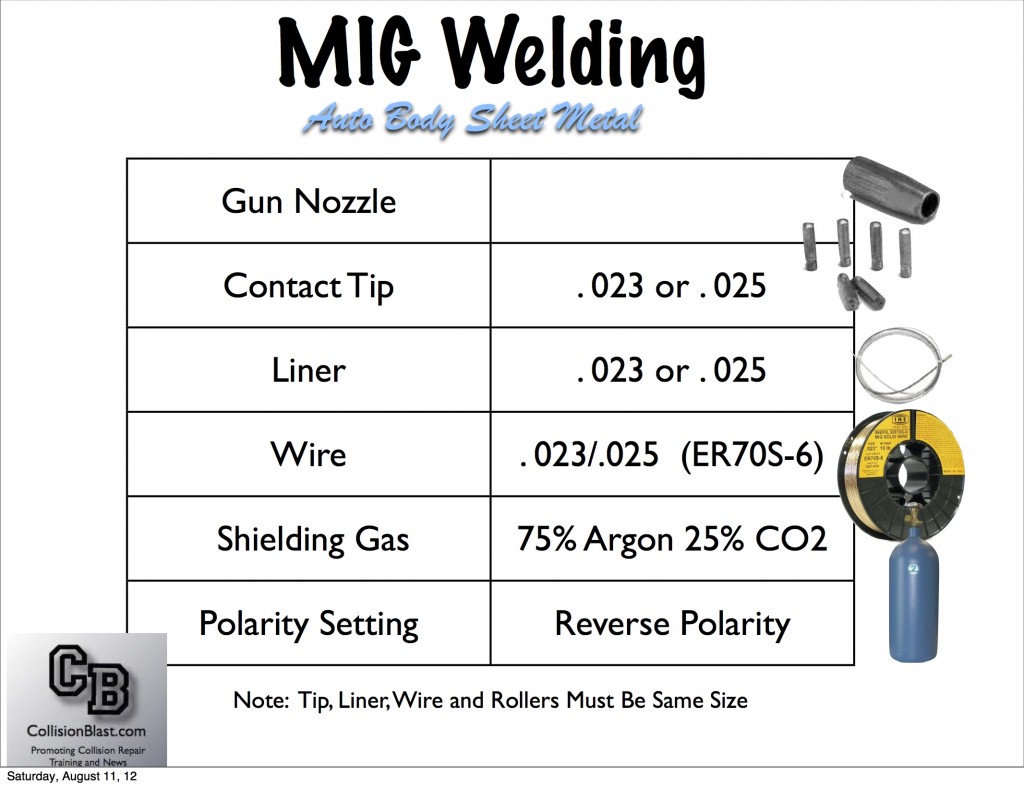
There are different types of welding that can be performed with a MIG welder, but we are going to focus on the short circuit transfer, as this works best on thinner sheet metals. When welding, the electrode (wire) coming out of the welding gun hits the metal being welded which makes a circuit. When the circuit is made it shorts out. This happens about 90 to 230 times per second when using .023 welding wire as used for welding thin metals. As mentioned the wire diameter recommended is .023 and the wire type recommended is ER70S-6. The ER stands for electrode wire; the 70 is the tensile strength, and it is to about 70,000; and the S stands for solid wire. The “6” is the chemical making of the wire that you are using.
Shielding Gas
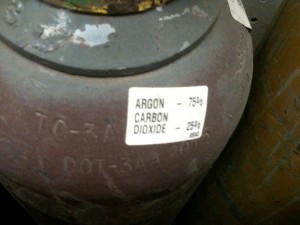
Whenever using solid wire you will need a shielding gas. You can use CO2 straight for some of the thicker metals, but in auto body a mixture of 75% argon and 25% CO2 is recommended and provides the smoothest weld for the thinner metals.
Shielding gas helps protect the weld, keeps the oxygen out and it helps to create a nice clean weld. Without the shielding gas the weld is going to have a lot of pinholes, called porosity, and is not going to have good penetration.
The shielding gas should be set anywhere from 20 to 30 psi at the regulator. 20 psi works well for indoors, such as a body shop or garage.
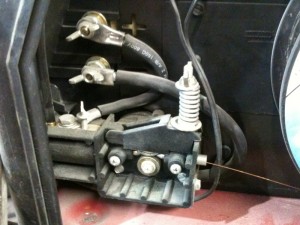
First, the wire feeds through the liner from the welding machine. Then the wire feeds through the gun, and through the tip, which is attached to the end of the gun. The liner is covered with a hose, which provides a path for the shielding gas to pass though. At the end of the gun, a nozzle covers the tip and directs the shielding gas to the surface being welded.
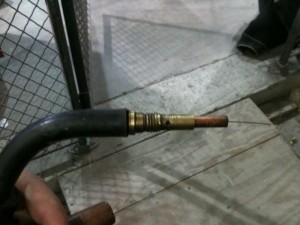
In the photo you see the electrode wire feeding through the contact tip.
This is a basic overview of a MIG welder; next we will discuss the different types of welds performed in auto body repair.
Chart Showing Recommend Supplies For Sheet Metal
Download This Chart in PDF For Print at www.CollisionBlast.com/MIGWeldingChart
Travel Speed
Travel speed is the speed with which you move the gun when welding. Travel speed is important, as this can affect the quality of weld produced. If the travel speed is too fast, you are not going to get proper penetration. To visually identify this problem, the weld will sit on top of the metal in a narrow bead. Again, the weld will not have proper penetration.
If the travel speed is too slow, you are going to burn holes in the metal, which is not hard to do when working with thin metals, such as metal used on cars and pickups.
Travel Angle
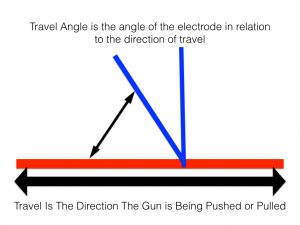
It is also important to have the correct travel angle. The travel angle is the angle that the gun is angled towards the direction of gun travel. The recommended travel angle is usually between 5 – 30 degrees depending on they type of weld being perfromed. Travel angle greater than 25 degrees may lead to more spatter, less penetration and general arc instability.
Work Angle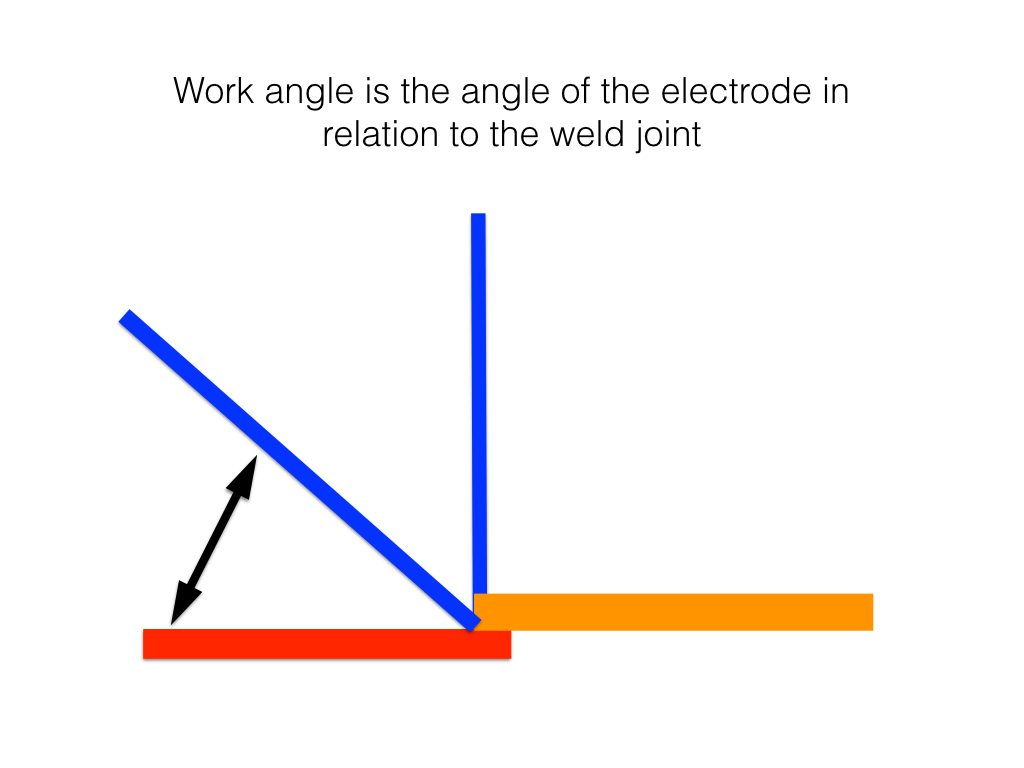
The work angle is the angle the gun is to the joint being welded. The recommended angle is usually between 45 to 90 degrees. Depending on the type of weld being performed.
Push and Pull Techniques
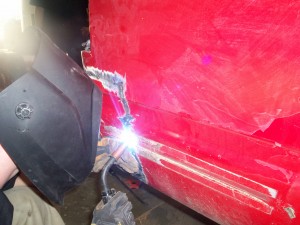
The gun can be pushed towards the weld location or pulled away from the weld location as welding. There is no right or wrong method when it comes to push or pull. The push method can produce better penetration; however, I prefer the pull method. I have also noticed most students prefer this method as well. I recommend trying both push and pull methods and determine which one works best for you.
Stick Out
Stick out is the distance between the contact tip and the metal being welded. When welding thin metal with .023 wires, as used for auto body repair, the recommended stick out is 1/4 inch to 1/2 inch. Stick out can also affect the penetration of the weld. The closer the contact tip is to the weld surface, the more penetration you will gain and the further away the contact tip is from the metal, the less penetration the weld will have.
This is what is referred to as chicken scratch, where the weld splatter is balled up all over the weld area.
Three Weld Positions
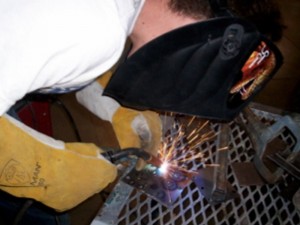
When welding on cars, you may find yourself in many different positions. For instance, you may have to weld in a flat, vertical, or overhead position. Flat welds are generally the easiest welds to produce. Therefore, try to position yourself or the piece being welded so that a flat weld can be performed flat. However, this cannot always be done, so other positions need to be practiced. The vertical or horizontal weld is the second easiest weld to perform, but there will be some gravity to deal with. The puddle will try to fall, which makes this a little harder. The overhead weld is the hardest position to weld. With this position, gravity is working all the way against you, as the puddle tends to drop straight down. This weld also creates more sparks and slag that can fall and burn you and clog your nozzle. Personal Protective Equipment should always be worn to prevent you from burns, but an overhead weld requires additional safety concerns.
To reduce the amount of slag and splatter clogging your nozzle, you may need to decrease your heat setting slightly.
Securing the Parts Being Welded
Before you start welding, you will need to secure the parts tightly together. This can be done using self-tapping screws, vice grips, c-clamps, tack welds, etc. It may even be necessary to hammer any gaps together to ensure that you are not trying to weld gap edges together.
Setting the Welding Machine
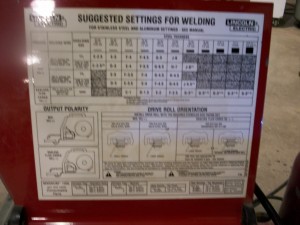 The setting will depend on the wire size you are welding and the thickness of the metal being welded. If you are unsure of the metal thickness, you can use a thickness gauge to determine the thickness of the metal. Once you know these factors, look at a chart for the welder you are using to determine the setting to use. For example, .023 wire, 20 gauge steel, and the shielding gas may recommend the heat to be set at D and the wire speed to be set at 3. Every brand of welding machine will have different indicators for setting heat and wire speed, but this will all be detailed on the chart. Once the settings are set to the recommended settings you are ready to start fine-tuning the welding machine to fit your specific welding technique. The recommended settings are a good starting place, but every person will need to fine-tune the machine when performing weld tests.
How To Fine-Tune a Welding Machine
There are three basic ways to fine-tune a welding machine to fit your specific welding techniques. The first and most popular is to adjust the welder by sound. If the sound is inconsistent and poppy your wire feed is probably too fast or heat setting too low. If the sound is hissing and there is no buzz at all, the wire feed is too slow or the heat is too high. The correct sound is a consistent buzz, much like bacon frying.
You can also look at the light the welder produces (of course, with a welding helmet on). If the light is inconsistent or looks like a strobe light, your wire speed is too fast or your heat is too low. As with sound, you want the light to be more constant.
The third way to adjust the welding machine is by feel. If you feel the gun pushing away from the surface being welding, this is a hint the wire speed is too fast. Therefore, many small adjustments are needed to fine-tune the welding machine.
Bird Nest
One problem you may have when welding is called a bird nest. This is when the wire becomes balled up and tangled inside the machine. This may be due to the wire accidentally being welded to the contact tip. As the rollers continue to move the wire through, it becomes balled up in the machine instead of coming out of the contact tip. The only way to correct this problem is to stop, unplug the welder, remove the wire from the liner, and run the new wire though the rollers and liner again. As mentioned, this may be caused by the wire welded to the tip, too much tension on the rollers, liner becoming clogged, wrong diameter contact tip, or other reasons.
Heat Management
A big concern we have in working on thin metals that is not really a concern with other types of welding is heat management. Thin metals will become warped when overheated. If metal becomes warped, it can be very difficult to repair. Therefore, every effort should be taken to prevent the metal from becoming warped. Not only is warping a concern, but many of the metals used on cars are high strength steel. If some of these types of metals are overheated, the metal will be severely weakened, which will result in safety issues.
Triggering
Triggering is a technique used to prevent overheating the metal. This is the process holding the trigger to create a weld nugget, then letting off the trigger to allow the metal to cool off. Once the metal has cooled, the trigger is pulled again, repeating the process.
Skip Welds
Skip welding is the process of making a 1/2 inch to 3/4 inch weld and then moving to an alternate area and making another 1/2 inch to 3/4 inch weld. This cycle is repeated until the entire weld has been completed and all of the welds meet together, much like a continuous weld.
No Pretty Welds
There is no such thing as a pretty continuous weld when welding thinner metals. By using the triggering and skip welding methods, you can achieve welds with good penetration and eliminate overheating the metal; however, the welds are going to be choppy looking than a long continuous weld as when welding thicker metals. That is all right, as most of the welds performed will need to be ground down anyway.
Penetration
Achieving proper penetration is the most important concern when welding. If there is not enough penetration, the weld is not going to hold together. Penetration is the process of fusing two pieces of metal together, which will make one piece.
Too much or too little penetration can weaken the weld, which can result in safety issues. Therefore, learning how to weld with the correct amount of penetration is the key to become a good auto body welder.
Poor Penetration
A few of the causes for poor penetration is not having the heat set high enough or traveling too fast. Both of these mistakes will result in poor penetration. The stick out can also produce poor penetration. If the gun is held too far away, the weld is going to be too cold, resulting in chicken scratch. This will also reduce the amount of shielding gas directed to the weld, which will create a porous weld.
How To Know If You Have Proper Penetration
When proper penetration is achieved, you should be able to see and feel ripples on the back side of the weld. However, if the backside looks like it has been welded due to penetration, then you have too much penetration. If you cannot feel any ripples at all on the backside, then there is not enough penetration.
Two Hands on the Wheel
When practicing welding, practice with both hands, just like driving a car or playing pool. If you walk up to the pool table and try to use the pool stick with one hand, you are not going to be as accurate. Welding is the same way. Use one hand to hold the gun and pull the trigger and the other hand to help position the gun. Practicing proper techniques like this will help you be more accurate and produce better welds.
Making the Pieces Fit
There is a lot to welding, but the key to making all of the pieces fit together and produce proper welds is to get the right amount of penetration without overheating the metal. You can read all about how to weld, but the last and biggest piece of the puzzle is practice. It takes a lot of practice to master welding.
Plug Weld
A plug weld is the process of using a MIG welder to reproduce a factory spot weld. When using a MIG welder to reproduce a spot weld, it is called a plug weld. When plug welding, one piece of metal is lapped over another piece of metal. The top piece of metal has a hole drilled or punched into it using a drill or hole punch. Using a MIG welder, the hole is welded solid, which will also weld the top piece of metal together. The gun is held at 90 degrees to the metal.
Corrosion Protection For Plug Welds
The same rules apply for corrosion protection with any other type of weld. Before securing the metal together, the metal needs to be sprayed with weld-thru primer to protect the metal. Once the backside of the metal has been sprayed with weld-thru primer, the two pieces of metal can be secured and welded together.
Some technicians experience difficulty when welding on weld-thru primer. While weld-thru primer can be welded, you can remove any exposed weld-thru primer by using a wire brush, spot blaster, or small belt sander. This will only remove the exposed weld-thru primer as the back sides of the repair have already been secured together. In fact, all remaining exposed weld-thru primer should be removed before using fillers, seam sealer, primers, etc., as these materials will not adhere well to the weld-thru primer.
What Size of Hole To Drill
There are some manufacturers that may recommend a certain hole diameter to drill or punch to prepare for welding. However, if there are no recommendations, drill or punch an 8 mm or 5/16 inch hole. There may also be times when more than two pieces of metal are being welded together, such as with a pinch weld. In this case, the top piece of metal will have a larger diameter hole and the middle piece of metal will have a smaller diameter hole, which will allow all three pieces of metal to be welded together.
The Number Of Plug Welds To Use
You may be wondering how many plug welds to use when welding a new panel on. Just weld the same number of plug welds as there were factory spot welds. Therefore, when preparing the new panel, drill or punch the same number of holes in the similar locations. If a bedside had 10 spot welds along the top rail, then drill 10 holes 8 mm diameter, apply weld-thru primer to the back sides of the repair area, secure the panel, remove the exposed weld-thru primer if you desire, and weld the holes.
Making The Weld
Once the panel is secure, use a MIG welder to fill the 8 mm hole, which will weld the two panels together. There are two ways to do this. You can start from the outside edge and spiral towards the center as you weld, filling in the hole. The second way is to start in the center spiral towards the outside while welding.
Once welded, there should not be any holes or gaps or exposed edges visible.
Dressing The Plug Weld
Once the plug welds have been performed, grind the plug weld smooth to produce a level repair area that can be filled and primed to provide an invisible weld location. With this in mind, try to limit how high, tall or bulky the weld is. The bulkier the weld, the more grinding required to clean the repair area to prepare for refinishing.
Gun Angle
This is the only weld type where the gun should be angled 90 degrees to the area being welded. This allows the proper amount of shielding gas and penetration to reach the weld surface.
Skip Welding
When plug welding, a skip technique should be used. This is the process of using alternate locations when welding. This is for heat management to eliminate overheating the metal in one location. If the first weld is made in the middle of the panel, move to the one end to make the next weld, followed by welding the opposite end. Alternate welds until all plug holes have been welded.
A car consists of mostly spot welds. Therefore, spot welds will be used more than any other weld when welding on cars. Butt and lap are used when sectioning and structural repairs.
Butt Weld
Butt welds are probably the second most common weld used in auto body repair. This weld is used when sectioning parts together. For example, when sectioning a quarter panel to roof area, a butt weld will provide a weld which can be ground smooth and finished out without the weld location visually noticeable after being painted.
Gap Between The Welds
When butt welding, a gap is required between the two pieces of metal being welded. This will provide proper penetration and allow the metal to expand and extract without binding up.
Butt Weld With a Backing Plate
A backing plate can also be used when performing a butt weld. This is a piece of metal behind the two pieces of metal being welded. This may be a recommended length as when making structural repair to making a sleeve to fit inside the pieces being sectioned. A backing plate may also include plug welds in addition to butt welding the two pieces of metal together. A gap about one to two times the metal thickness being welded is recommended for butt weld with backing plate to provide the needed penetration.
Gun Angles
Work angle on a butt weld should be 90 degrees. The travel angle should be between 5 to 15 degrees.
Weld-Thru Primer
Weld-thru primer should be applied to the back side of the weld location, as with all weld types. Once the new part or patch is secured and aligned, exposed weld-thru primer can be removed before welding.
Stitch Weld
Heat management is a concern when making a butt weld. Therefore, 1/2 inch to 3/4 inch should be the maximum length that should be welded at one time. Alternating to weld another area will allow each area to cool. If making a small butt weld, it may be necessary to stop and allow the welds to cool naturally between welds. Repeat the stitch welds until all welds are connecting.
Making The Weld
When performing a butt weld, the best way I have found is to move the gun in a circular motion, while melting both edges of the metal together. I have also welded one nugget at a time, triggering the trigger to allow the metal to cool while making the 1/2 inch to 3/4 inch weld. Triggering is another way of getting the metal hot enough to fuse the metal together, without overheating the metal.
Sealing The Weld Location
Since a butt weld usually is used on a visible location, a seam sealer will not be used to seal out moisture. Therefore, once the weld has been ground, a fiberglass or aluminum filler should be applied over the weld location to properly seal the weld. Once the fiberglass or aluminum filler has been applied and rough sanded, the repair can be finished with body filler. However, body filler alone will not seal the repair area and corrosion can attack the repair area.
Lap Weld
A lap weld is the process of lapping one piece of metal over another piece of metal and welding the two pieces together. This type of weld may be used on structural parts when a level invisible weld location is not required. Therefore, a lap weld generally does not work well when sectioning panels together.
Weld-Thru Primer For Lap Welds
As with the other weld types, weld-thru primer must be applied to the back side of the weld locations. Once the part has been aligned and secured, the remaining weld-thru primer can be removed.
Stitch Welding Lap Welds
Stitch welds are required for for heat management as with the other type of welds. However, depending on the recommended procedures, you may not have to weld the entire joint location. For example, there may be four 1 inch welds. They may or may not be spaced like the plug welds are spaced.
Performing The Weld
When performing a lap weld, it is important to consider both edges of the metal and to provide equal heat and penetration to them. This requires angling the gun to heat both pieces of metal equally. As with a butt weld, I have found the circular motion to work best. However, some people prefer a zigzag motion. A triggering technique can be used with this type of weld as with butt welding. Although burning through the metal on a lap weld is not as common as with a butt weld, heat management should still be observed as with other welds when working on cars.
Gun Angles
The gun work angle should be between 60 to 70 degrees when welding a lap weld. Travel angle should be between 5 to 25 degree.
Cleaning A Lap Weld
Many times when performing a lap weld, it is not needed to make an invisible repair. However, it is still important to provide adequate corrosion protection. To seal the weld area, a seam sealer can be used to seal out moisture from entering the weld and creating rust.
There is a lot to welding, but this should give you the basic ideas of what to do. Now one thing is left….that is to put it all to use. Use the tips given in the e-book and go practice.
There are a several videos below that will help you better understand each weld type. The videos will also give you a visual of how it works as well.
TIPS FOR REMOVING AND REPLACING A WELDED ON PANEL
When it comes to welded on body panels, we need to carefully think about what type of metals are going to be welded, the sectioning locations, and restoring corrosion protection.
Welding is one of the skills which require much practice to perfect. In fact, I hear welding skills is one of the most important skills for a technician to have from shop owners. With that said, passing a welding test one time does not necessarily mean you are ready to start welding on cars.
Other than the skills, there are many things to consider when welding on modern day cars. For example, UHSS and boron should not be repaired or welded. Trying to repair these types of metals may rip the metal and overheating the metal can change the properties of the steel and weaken the metal.
This lesson is going to focus on exterior panels that can be welded, methods to remove and replace the welded body panels, sectioning locations and restoring the corrosion protection.
Repair The Damage First
The first thing you need to do before cutting and replacing a quarter panel or any other Weldon panel is to straighten the damage. This will help realign what the part is welded to and provide correct gaps when the new panel is replace. Removing the part before straightening it is a common mistake and should be avoided.
This may be confusing at first, but it’s really simple when you think about it. If you have never replaced a weld on panel, such as a door skin or quarter panel, you may be quick to remove the door from the vehicle and start taking the glass, handle, and whatever else is needed to remove to replace the door skin. However, this can lead to many problems that can be prevented if you follow this simple step.
Repair Before Replace
I am going to refer to a door skin in this example, but the same rule applies to all Weldon panels. Repair the damaged door skin before continuing to the next step. I’ve had students ask, why repair the damage if it’s going to be replaced? Well, the reason you want to repair the damage first is to realign the door shell. This will allow proper gaps and assure the new skin will fit properly and the door and will align correctly when the door is reinstalled back onto the vehicle you are working on. This sounds simple enough and makes sense, but I have found this to be a common mistake when learning how to replace welded body panels.
When repairing a damaged weld-on panel it is not necessary pull the metal until it’s ready for body filler or try to metal finish it, you just need to rough pull the damage to assure the door closes correctly and the gaps look straight. After this step is performed you can take the door off and continue with your door skin removal and replacement procedures.
If you’re a technician, I’m sure this is a normal procedure for you. However, it you are a DIY or you have never replaced a weld on panel, I hope you find this tip helpful.
What Problem Could Occur By Making This Mistake?
Let’s say that you removed the door skin and you straighten the shell and flanges after the skin is removed. It looks good so you start replacing the new door skin. Look great when you’re done…that is until you put it back on the car to realize that the shell is a little tweaked and now the new skin is already installed. This may result in uneven gaps, the door edge in too far or sticking out too far making it impossible to align properly. This applies for a door skin, quarter panel, or any other panel that is welded on.
Repair, remove, test fit, and install part for welding. This will assure the car will look like it was never involved in an accident, which is your goal.
Remove The Parts and Hardware
Once the damaged part is pulled and realigned, now you can start the removal process. Remove any necessary items from the panel, such as glass, hardware, or anything else that will need to be removed to gain access to the factory spot welds. You will also want to disconnect the battery and remove any electrical component near (within 12 inches) the areas you will be welding. Once you have everything removed, you can start looking for the spot welds. Spot welds are easy to identify, as they appear to be a small dimple in the metal. However, some of them may be covered with excessive coatings or seam sealer. To remove these coatings or seam sealer, use a brush with plastic teeth that fits onto a drill to remove the coating. This type of tool will not remove metal when removing the coating. Once you can see all of the spot welds, you can begin to drill them out.
How To Properly Use a Drill
I know, this sound self explanatory, but this is another task where many mistakes are made. In this case, more is not better. What I mean is, the higher rpm you set the drill will make the job more difficult.
In order to drill through metal it is important to use low speed when drilling. If using a too high of a speed, you will heat your drill bit and dull the bit making it difficult to drill through metal. In addition to using a lower speed, you should use a cutting oil or paste to help keep the bit from overheating.
I don’t know the exact speed, as it depends on the hardness of the steel you’re drilling. Generally, the harder the steel, the slower speed you should use. Therefore, high strength steel should use a lower speed than when drilling mild steel. This speed can range anywhere from 30 to 200 sfm, which is much slower than wood.
Many drills have variable speeds, which makes it easy to slow the drill down. However, if you are using an air drill, you may need to turn your air pressure down to achieve the slower speeds.
Using A Drill To Remove Spot Welds
There are many different ways to drill out spot welds. However, just a drill a a couple of bits is all you need. The first thing you need to do before drilling the spot welds is to locate them. Most of them are visible, which will look like a small dimple in the metal. However, some of them may be covered with excessive coatings or seam sealers. In this case, you will need to cleaned the surface with a plastic coated or wire brush. You could also grind the material, but this may remove too much of the metal. Once the area is clean, you should be able to see the spot welds. With a hammer and punch, put the punch in the center of the spot weld and hit the punch with the hammer. This will create a small indention in the metal, which will prevent your drill bit from walking or moving around on you. Make sure to make the indention in the center of the spot weld, or you may not properly drill out the weld. Now that you have punched all of the spot welds, now you can use a 9/64 drill bit to drill through the panels welded together. Next, use a 5/16 drill bit and drill only through the front side of the panel. You do not want to drill all the way through both panels. Once you have drilled the top panel on all of the spot welds, the panel is now ready to come off. Using a seam buster (a chisel type tool) split the panels apart. You can also use an air hammer, but this tool causes additional damage. A seam bust does a much better job. Using a hammer, just hit on the seam buster to break to two panels apart.
Using A Spot Removal Tool
There are special tools to help you remove spot welds as well. A C Clamp style spot welder cutter does a great job of removing spot welds on flanges. However, if not by an edge this tool will not work. To use this tool, simply locate the spot weld, place the toll on the spot weld and pull the trigger. As the trigger is pulled it will also apply pressure at the same time. The tool eliminate the need for a smaller drill bit before using the tool.
They also make another hole saw type bit for drilling spot welds. This has a sharp pint in the center of the tool to help you align the bit as it drills out the spot weld. I have never had good luck with this tool, as it seems the bit dulls way to fast. Maybe it was just the bits that I used, but they have not worked well for me.
Using A Cutoff Wheel To Remove Spot Welds
Another method to remove spot welds is to use a cut off wheel. When using a cut off tool, be sure to use one of the thicker cutting wheel. The edges of the wheel will be used as a grinder to grind the weld location. This does a good job of grinding out the spot weld locations; however, this does damage the panel being cut off. If you are replacing the damaged panel, this will not matter, as the part will be thrown in the junk pile anyway. However, if you are taking a panel off to reuse for another car, this method is not recommended.
I have always preferred on of the drilling methods, but there have been many technicians that prefer to use the cut of wheel. You can try these different methods to determine which one works best for you.
To perform this method of removing the spot welds with a cut off wheel, first locate the spot welds as you normally would. You may have to remove coating to find or access the spot welds. Once located, use the edge of the wheel to grind directly on the spot weld location. This will grind the outer panel until the spot weld has been ground off or ground enough to pop the two panels apart with a seam buster. Once all spot weld have been ground, you can separate the two panel and remove the outer panel. Care must be taken not to grind into the inner metal surface when using this method.
Once the old panel is off, clean up the inner panel and prepare for the new part using the same techniques as used with the other methods.
Using a Plasma Torch to Remove Spot Welds
A plasma torch can also be used for removing spot welds, but if I not recommend this method. It is easy to damage both panels using a plasma torch. However, the plasma torch can be set to minimize the damage to the underlying panel.
To use a plasma torch locate the spot welds and cut around the spot weld location. You only want to cut the outer panel. Once all of the cuts have been removed, separate the panels using a seam buster or air hammer. Once the outer panel is removed, you will have a little extra clean up on the inner panel, as the weld nugget will still be attached and will need to be ground smooth.
I really don’t recommend this method, but I did want to mention it. This way if someone tells you it can be done this way, I wanted you to know that it can be done. And it may work great for some people, but does take more skills and can cause more damage than the other methods.
Whichever method you choose, once all spot welds are removed, you may find that there is adhesive holding the panel on in addition to the spot welds. In fact, most newer cars and trucks are held together with spot welds and adhesives.
Removing Adhesives
In additional to spot welds there are also a lot of adhesive holding panels together. To remove adhesive, use a heat gun or a heat inductor to heat the panel up. This will soften the adhesive, which will allow the panels to be pulled apart. If you can get into the back side of the panel, you can also use a scraper to help loosen the adhesive.
Removing The Panel
Once all of the spot welds have been drilled out or whatever method was used, separate the two panels using a seam buster. This is a flat chisel that can be used with a hammer to wedge between the parts to separate them. A air hammer with a chisel bit can also be used, but may create more damage to the panels, which will require additional time to repair damage before installing to part.
Cleaning Up The Flanges
Once the panel is removed, you will need to clean the flanges to prepare them for the new panel to be installed. Using a hammer and dolly, straighten any flanges that may have been damaged during the removal process or the accident. Once all flanges are straight, you a grinder to remove all of the weld nuggets or adhesive left behind. Care must be take on to grind on the metal as this could weaken the metal by grinding it too thin. Also remember not to hold the grinder in one spot too long, as this could overheat the metal.
Factory Seam or Section
There are two options when replacing a weld-on panel. Replace at factory seams and sectioning. Replacing at factory seams is when the entire panel is replaced where the car was joined at the factory. For instance, some unisides consist of the entire side of a vehicle. This is the outside A, B, C, and D pillars, the rocker panel, and some include the quarter panel. If the vehicles only damaged in the quarter panel, it would not make sense to replace the entire side. Therefore, you can section it, which will allow you to only replace the damaged area. This is not only quicker, it also disturbs less factory corrosion protection. The less factory corrosion protection you disturb the better. To section you will need to determine if the manufacturer allow this procedure and where the recommended sectioning locations should be made. By finding the recommended locations will prevent you from sectioning in crush zones, areas with insulated foam behind the panel, or any other area that may not be safe to make a section or not restore the vehicle back to its presidential condition. If no factory recommendations can be found, look for a small uniform area to make the section. The smaller the section are will require less welding and less chance of damaging the panel during the replacement process. Some manufacture do not recommend sectioning and some parts do not have a location that would provide a good section location to cut and weld. Therefore, always look at what the recommendations are before determine if the part should be replaced at factory seams or sectioned.
Preparing Flanges For Installation
Prepare all flanges and panels for installation. Drill or ounce a 8 mm (unless recommended different from manufacture) where the plug weld will be welded. On the flange or inner panel, grind to metal as well. Coat all metal areas with weld through primer to prevent corrosion.
Secure Part in Place
Install the part and secure using clamps and/or self tapping screws. Once the panel is secured into place, assure all gaps and weld locations look correct. Once satisfied, start plug welding the panel together. Remember to alternate weld locations for heat management. If you have a section location, start welding that section. Only weld a little area and skip to another area until the complete part has been welded on. Make sure the panel is not overheated. If it starts to get hot, take a break to let it cool before continuing repairs. Do not cool the panel with air or a wet rag. This will cause the metal to shrink and cause additional problems. Always allow the metal to cool naturally when welding.
Making A Section Cut and Weld
Most of your sectioned panels will be welded up using a butt weld. To prevent damaging or warping the body panels, first secure it well as described above. Then when welding the butt weld or butt weld with a backing plate, start from the center of the weld location. Weld about 1/2 inch weld then move outward making another 1/2 inch weld. This will prevent the panel from buckling in the center, which is difficult to impossible to repair if this happens. Once the panel has been welded every several inches of the weld location, continue to weld between the weld locations. Be certain to alternate weld locations to prevent overheating and warping the panels. Continue the process until the section seam has been completely welded solid. This may take a little time, but well worth the wait to eliminate warping the panels. Once completely welded, the weld can be ground smooth.
Plug Welds
Remaining weld location may include plug welds. This is the weld that replaces the factory spot weld when using a MIG welder. To determine the amount of plug welds and location, simply use the same amount of welds and locations of the factory spot welds.
To perform a plug weld, drill or punch a 5/16 inch or 8 MM hole on the flange of the new part in the desired location. Then place the weld the hole, which will weld the top panel to the panel underneath.
Replacing A Door Skin
First, let’s discuss the difference between replacing a door skin vs. replacing a door shell. A door shell is the entire door. It consists of the outer panel (skin) and the inner parts of the door, including the intrusion beam. However, the door shell does not include the door glass, interior trim panel, or any of the hardware. A door skin is the outer skin that is attached to the door.
How to determine to replace the door skin or door assembly
If the outer panel is too damaged to repair, but the intrusion beam and the door shell are in good shape, replacing the door skin is an option. If the intrusion beam is bent or if the entire door shell is bent, replacing the door shell may be a better option. Experience is the best tool for making this determination. Once you are experienced, you will have a good idea of what needs to be done.
Other Option
Another option is to locate a used door and replace the door instead of skinning the door.
Welded or Adhesives
Many weld-on panels are also also joined with adhesives, rather than welds. Many times door skins used adhesive, but there are a few locations where a plug weld are needed and if the door is sectioned around the window area, a but weld may need to be used. Since there is some welding needed to replace a door skin, I am including a door skin in this weld-on panel guide.
Repair The Damage
After determining to replace the door skin would be the best option, you will need to repair the damage. This may not make sense, but do not skip this step. By removing a majority of the damage you are realigning the inner structure of the door. You do not need to metal finish or prepare it for body filler, just pull the damage so the door opens and shuts properly. This will save you a headache of trying to get the door to align after it has been skinned. Once the door is aligned to the car, you can proceed to removing the door from the car.
Disconnect The Ground Cable
Disconnecting the ground cable will prevent shorting out any electrical components when removing the door. Some doors now have airbags behind them. If this is the case with your car, you may consider seeking professional help to assure the airbags have been disengaged according to the manufactures recommendations.
Removing Door Trim Panel
Remove the door panel for access to the hardware. This is usually a simple process, but a door panel trim tool will need to be used to pop the clips holding the door panel on. Other than that, screw drivers and a few other basic tools is all it usually take to remove the trim panel. Any electrical connections to the door panel will need to be unplugged from the switches that are attached to the door panel.
Remove Glass and Hardware
Remove the glass, outside handle and lock. I always take the glass out to prevent damaging it during the removal and installation process. The handle and lock will need to be removed and installed on the new door skin once installed.
Remove The Door
Now you can use a door stand to secure the door and unbolt the door from the hinges, or remove the door pins depending on the style of hinges. Once the bolts or hinges are removed, slide the door away from the car. The wiring will still be attached. On most newer cars, there is a plug that can be unplugged on the hinge pillar or the door shell. Slide the runner boot back to unplug the wiring harness. If the car does not have a plug, you will need to unplug each wire at the component. For example, the power window wires will run to the power window motor, the power locks will run to the lock motor, etc. If you do not have power competent, there it’s all good, just roll your door to the work area.
Determine If There Will Be A Section Location
If the door has a frame that surrounds the door glass, it may be easier to make a section cut at the belt line area. Make the section cut in a small uniform area of the door. This will reduce the weld size needed to weld when welding the door back together. Mark the cut location so you will not grind past this area when removing the door skin.
Remove the Door Skin
Now you can start removing the door skin. Lay the door on a work table. It is a good idea to lay a fire blanket down to protect the door from getting scratched during the process. Face the door skin facing up. Next use a grinder with 36 grit to 50 grit to grind the door skin flange edge. You want to grind the edge so you can separate it from the shell, but care must be taken not to grind into shell itself. If you over grind and grind through the skin and into the shell, you may have an improper fit when installing the new skin. One way to prevent this is to grind with the grinder angled up slightly. This will allow the grinder to grind more of the skin and not the shell. Once the skin has been ground, you should see three pieces of metal. The outer part of the door skin, the shell, and the skin lip that was folded around the shell. Once you have all of the edges ground, use a seam buster or air hammer to separate the skin. Some cars are coming from the manufacture with adhesives. If this is the case, you may also need a heat gun to heat the edges to soften the adhesive before removing.
There may also be some foam on the intrusion beam that will need to be pull apart. This can be separated using a putty knife as you pry the door skin off.
Remove the outer skin. The edge that was folded around the flange edge may sill be attached the door shell. It will be held onto the shell with adhesive or spot welds. You can remove this by twisting the metal and popping the spot welds loose.
Clean Up Door Frame
Any weld nuggets or adhesives will need to be removed from the flange. This can be done using a grinder. However, care must be taken not to remove metal from the door shell flange.
Straighten Door Frame
If there is any remaining damage to the door shell, repair the damage using a hammer and dolly. Usually the flange will be a little bent, which will straighten easy using the hammer-on-dolly method.
Cut The Section Location
Cut the section location if you are going to section the window frame so a butt weld can be performed.
Test Fit
Before adding any welds or adhesives, place the door skin onto the door shell and crimp the corner to keep the door skin in place. The test fit the door to assure everything fits correctly. If there is a problem, you want to know about it now, not after the skin has been welded or glued on.
If everything looks good remove the door skin and repair the skin for installation. Sand any coating off where the door skin comes in contact with the flange. Any area that will be welded, apply weld thru primer. All other metal flanges will need to have panel bond adhesive applied to the flange to protect it from corrosion. Then apply a bead to all adhesive locations and place the door skin onto the door frame.
You will have 30 to 45 minutes to align the door before the adhesive sets up. However, once the adhesive comes in contact, the part cannot be separated, as this will create air bubbles and may not properly adhere together.
Allow the adhesive to set up then weld any plug weld or section welds. Once welded, the door can be place back onto the car and aligned.
Replacing A Quarter Panel
When replacing a quarter panel, you must straighten the damage first to align all the adjacent parts before you start removing the quarter.
Once the quarter is straightened and aligned, remove any adjacent parts that may need to be removed. These parts may include: rear bumper, trunk lid, tail light, gas tank, wiring, quarter glass, moldings, etc.
Next raise the car and remove the tire and wheel. Be certain to place a jack stand securely. Be sure to double check the jack stand to assure the car is secure.
Protect any glass or anything else that can be damaged from grinding or welding with a welding blanket or spark resistant paper. You may also need to remove or protect interior parts.
Removing Quarter Panel
Quarter panels are joined in various areas om different cars. Some factory seams are located at the roof panel. Other seams may be lower down on the rear pillar. Regardless, where the factory seam is located, it is usually a better choice to select and cut a new location to make the section. To determine the sectioning location, look for an area on the rear pillar flat and small. In other words, don’t section where there are complex curves and a wide area. The wider that area means the more welding required. So look for a narrow and flat area. This will provide an easier sectioning procedure.
What has worked well for me to mark the section location is by placing 3/4 inch masking tape on the cut location? Then use the top edge of the tape as the line to make the cut. To make the cut, a cutoff wheel or a reciprocating saw works well.
To remove the spot welds, use one of the methods mentioned earlier. Remember, some locations may need coatings removed to locate and remove spot welds. Once all spot welds are removed and the section location is cut, use a seam buster to separate the panels. There may be foams or adhesive that may need to be heated by using a heat gun. There is usually foam adhesive located aroung the gas lid area of the quarter panel. Once adhesive is heated the quarter panel should come apart from the car.
Straightening and Preparing Flanges
If there was any damage to the flanges during the removal process, they should be repaired now. This may include: straightening flanges using hammer and dolly, welding any cut or ripped flanges, sanding flanges to metal where the part will be welded, and applying weld thru primer to bare metal. If you are using adhesive, refer to the directions of the product manufacture.
Once flanges on the car are repaired, the flanges on the quarter will need to be prepped as well. Remove the coating near weld location, use an 5/16 inch drill or punch to makes holes in the plug weld locations. Then apply weld thru primer on the bare metal areas. The section location should be cut at this time. However, make the cut an 1/2 to 1 longer than it should be. A final cut will be made after the test fit.
Test Fit
Now everything should be ready to install the new quarter panel. However, a test fit will need to be performed first to assure the panel fits correctly. To do this, secure the panel using clamps, vice grips, or self tapping screws. Make certain all gaps align properly.
Once the quarter panel is secured, the new quarter panel should be overlapping the section location. Using a scratch awl, scribe a line where the quarter is overlapping. This will provide a final cut to make for the section. Remove the quarter and make the final cut. Note: install the tire and wheel when performing test fit. This will load the suspension, which will allow the gaps to be aligned properly.
Plug Welds
Now the quarter panel should be ready to install and weld. Once secured, start welding the plug welds. Avoid welding in one area to long to prevent overheating the metal. To do this use an alternating plug weld method. (by skipping several plug weld locations and coming back to them once the metal is cooled in this area).
Section Weld
When butt welding the section location, start by making 1/2 to 3/4 inch weld in the center of the section location. As with the alternating plug welds, do not weld in one area to long. Make small welds starting in the center and moving towards the outsides. Continue welding small welds until the weld have joined each other making a continuous weld. However, take your time and do not overheat the metal.
Dress Weld Locations
The quarter panel is welded on, now you need to grind the weld locations smooth. After ground, apply a thin layer of fiberglass filler to the section location to help seal the weld location. The section location can be finished using body filler to prepare it for primer.
The other weld locations can be sanded, primed, and apply seam sealer to seal the parts to prevent moisture from entering. Apply and foam, dead sounding, and corrosion protection needed to the inside parts.
The car is now ready for prepping and painting and all the parts reinstalled.
Resources
Photo take at SEMA with Jessi Combs, Welder and Fabricator.

- •www.CollisionBlast.com/HowToChangeBottleandSetup
- •www.CollisionBlast.com/HowToPlugWeld
- •www.CollisionBlast.com/HowToButtWeld
- •www.CollisionBlast.com/HowToLapWeld
- •www.CollisionBlast.com/LearningToWeld
- •www.CollisionBlast.com/HowToUseWeldThruPrimer
- •www.CollisionBlast.com/TipsForReplacingABedside – Replacing A Bedside
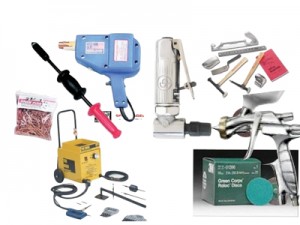
- Lincoln Mig Welding
- .023 Wire
- Shielding Gas – 75% Argon-25% CO2 – You may also be able to rent these from you local welding store.
- Weld Thru Primer

- .023
- Shielding Gas
- www.CollisionBlast.com/WeldThruPrimerTDS

 There are enough resources here to keep you busy quite some time. I included audio, video, product information and technical data, MSDS, and e-training though Miller and Lincoln. First read the module text, listen to audios, and watch the videos. Then visit the e-training and complete all of the intro and MIG welding process. They both have great training, which can give you a better understanding of the welding process. However, welding takes practice. If you have a welder or know someone who does, get some scrap metal and start welding. You can probably go to any body shop and ask them for junk body parts to practice on.
First learn how to set-up and adjust your welder. Remember, you want a constant buzz sound. Kind of like bacon frying. Next, grind metal and weld beads. Once you get good at running beads, practice the three different type of welds. When you become good at that start welding in different positions, as you may have to do on a car. Flat, vertical, horizontal, and the hardest, overhead. Again, this takes a lot of practice so take your time.
Note: If you are a student attending a collision repair program, follow the lab activity instructions provided by your instructor.
 Many car parts now have a galvanized coating from the factory. What extra precautions should you take when welding galvanized steel?
- There are many different types of welds, different positions, and different reasons for welding (patch, sectioning, frame, unibody, new panels, etc.) Therefore, it is hard to provide a step-by-step process. However, that will all come with time and practice. So I’ll say it again….just practice for now.
- NOTE: If you are a student attending a collision repair program or an employee at a repair facility discuss the welding procedures at your specific training or repair facility.
Welding Quiz
Lesson 1 Quiz
Now test your knowledge. There is not a time limit set on this quiz so take your time. Find the correct answer if you do not know for sure. The objective of this quiz is to help you learn the information if you do not know the answer, not guessing. Good Luck!
www.CollisionBlast.com/Module5Quiz – Password (simple)
Copyright 2011 CollisionBlast.com
