LESSON 1 – LESSON 2 – LESSON 3 – LESSON 4 – LESSON 5 – LESSON 6 – LESSON 7 – LESSON 8 – LESSON 9 – LESSON 10
Welcome to Auto Repair Estimating. These lessons are designed to provide you with the basics to Auto Estimating. I hope you enjoy the lesson. Donnie
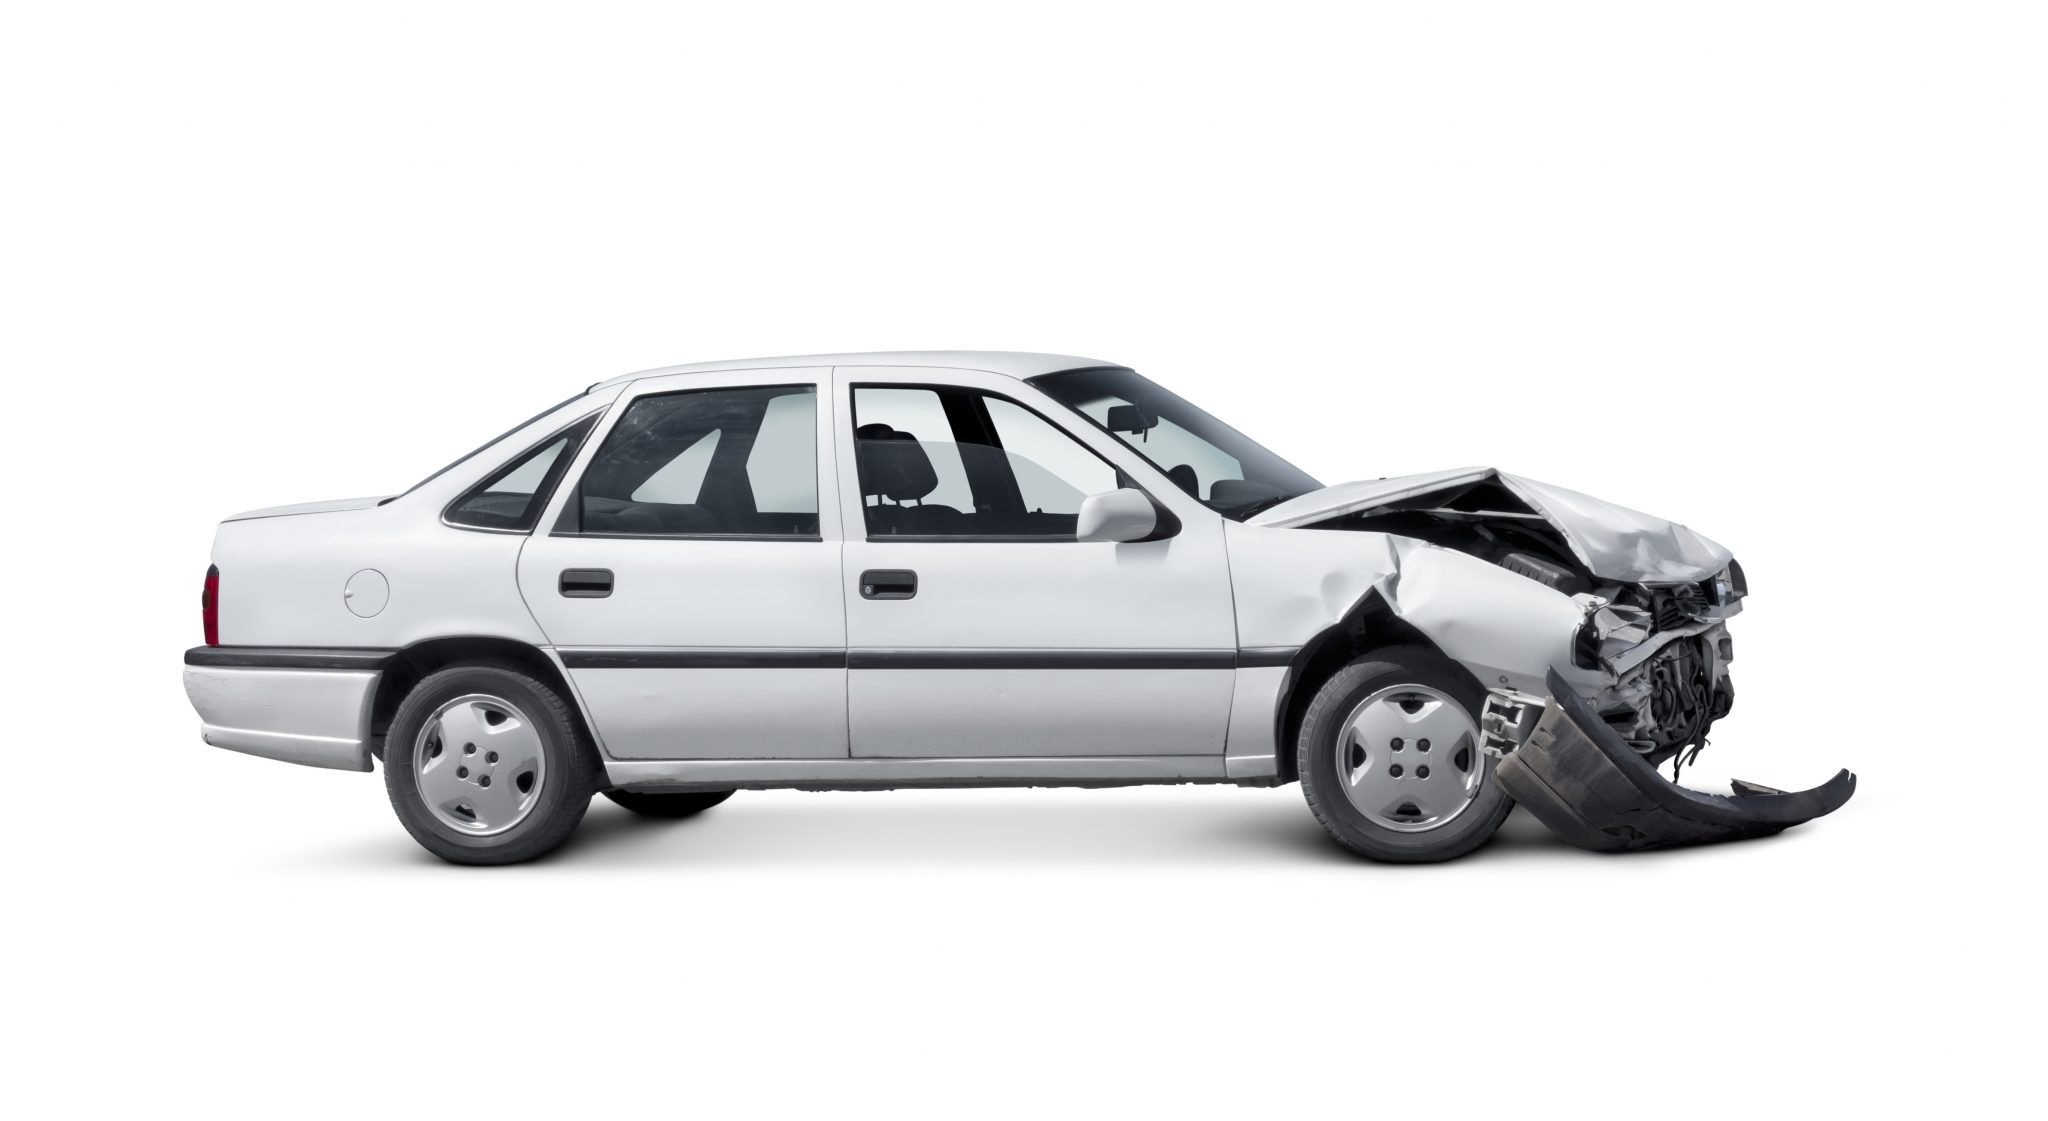
Lesson 3 – Vehicle Damage
There Is More Than One Type of Damage
“The basic question is not what is best, but who shall decide what is best”. ~Thomas Sowell
What This Chapter Covers:
This chapter is going to explain the different types of damage found on vehicles, how to inspect the damage, how to determine if the damage needs to be repaired or replaced, and types of materials auto parts are made from.
Why This Is Important:
As an estimator, it’s important to identify the different types of damage, identify what types of materials parts are made from, and determine if parts need to be repaired or replaced.
Topics Covered In This Chapter Include:
•Direct and Indirect Damage
•5 Zones of Damage
•Prior Damage
•Betterment
•Types of Frame Damage (sidesway, sag, mash, diamond, twist)
•Inspecting Structural and Nonstructural Damage
•Inspecting Mechanical, Suspension, and Electrical Damage
•Inspecting The Paint Finish
•Inspecting Interior, Restraint System, and Accessories
•Determining To Repair or Replace
•Types of Steel, Plastic, and Composites
•Fasteners
This chapter has been aligned with the following 2013 NATEF/ASE tasks:
•A:4 Determine the direction, point(s) of impact, and extent of direct, indirect, and inertia damage. HP-G
•A:6 Identify and record pre-existing damage. HP-I
•A:7 Identify and record prior repairs. HP-G
•A:8 Perform visual inspection of structural components and members. HP-G
•A:9 Identify structural damage using measuring tools and equipment. HP-I
•A:10 Perform visual inspection of non-structural components and members. HP-I
•A:11 Determine parts, components, material type(s) and procedures necessary for a proper repair. HP-I
•A:12 Identify type and condition of finish; determine if refinishing is required. HP-I
•A:13 Identify suspension, electrical, and mechanical component physical damage. HP-G
•A:14 Identify safety systems physical damage. HP-G
•A:15 Identify interior component damage. HP-I
•A:16 16. Identify damage to add-on accessories and modifications. HP-G
•A:17 Identify single (one time) use components. HP-G
•B:4 Identify safety systems; determine replacement items. HP-G
•C:4 Identify steel types; determine repairability. HP-G
•C:5 Identify aluminum/magnesium components; determine repairability. HP-G
•C:6 Identify plastic/composite components; determine repairability. HP-G
Types of Damage
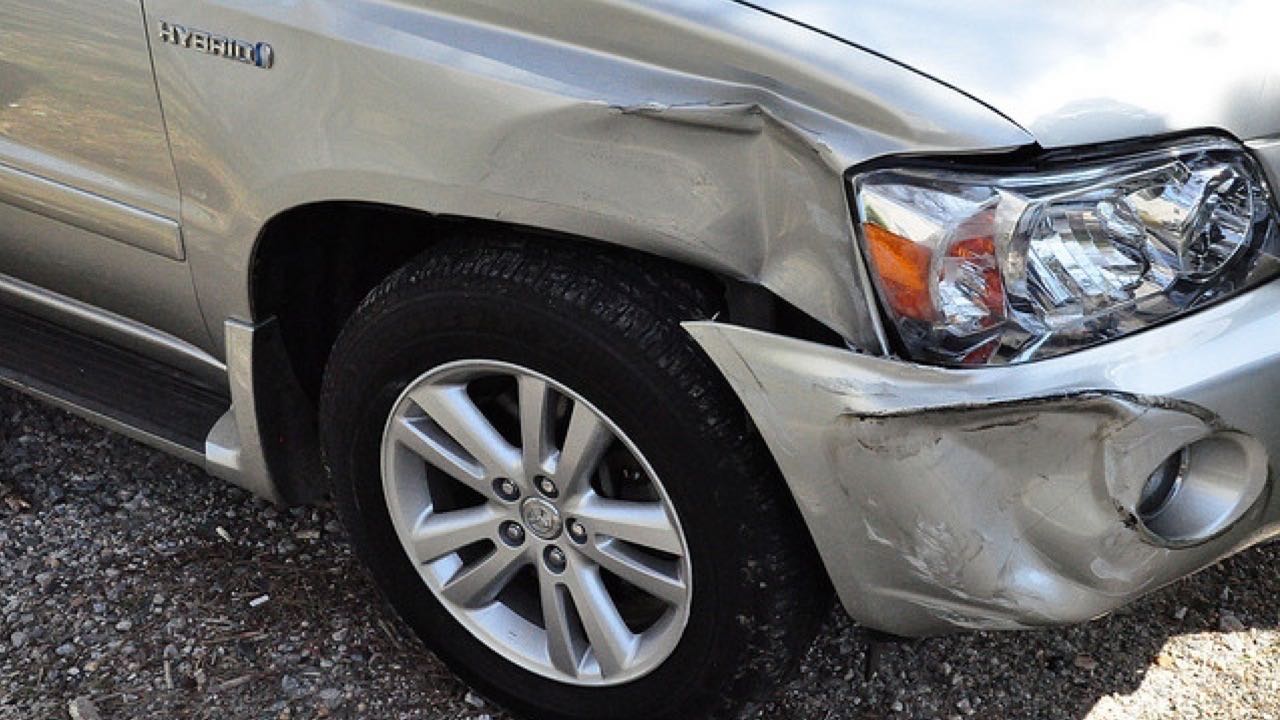 Flickr http://creativecommons.org/licenses/by-sa/2.0/legalcode
There are basically two types of damage, which can be broken down into five zones: direct damage and indirect damage.
Direct and Indirect Damage
Direct damage is the most obvious damage. Direct damage may also be called primary damage. This type of damage is the point of impact, which is very easy to identify. When repairing a vehicle, we have the first in, last out rule. The point of impact would be the “first in” location of the damage. This should be the last area to be repaired. Anytime you see direct damage, there is usually going to be indirect damage.
Indirect damage also called secondary damage, which is harder to identify. This is the damage that is caused by energy transferring during the collision. This may include buckles, popped spot welds, cracked seam sealer, and misaligned panel gaps. On unibody vehicles, indirect damage can occur throughout the entire vehicle, which will require a thorough inspection and may require measuring the vehicle. Following the first in, last out rule, indirect damage will be repaired first.
5 Zones Of Damage
Let’s break this down further and look at the five zones of damage on a vehicle.
•Zone 1 is direct damage—the point of impact. Direct damage may include body parts, structural parts, mechanical, and suspension components. For instance, the vehicle may have been hit in the front fender, which also took a hit to the front tire and wheel. This may result in damaged body parts, structural damage, and damaged suspension components.
•Zone 2 is indirect or secondary damage, which is caused from the force of the impact and direct damage. This is perhaps the hardest damage to identify. Thorough inspection of the entire car may be necessary to locate indirect damage.
•Zone 3 is mechanical, suspension, and electrical component damage. I am sure that you’ve heard the law “an object in motion tends to stay in motion.” Your mechanical components, such as your engine, transmission, and drive train, can be damaged in an accident. If the vehicle is traveling at 50 mph and comes to a sudden stop, the weight of the engine still wants to travel at 50 mph forward (inertia force). This can cause damage to motor mounts and other attachment points. If one of these components is in the path of the point of impact, then the component needs to be inspected to determine if it’s damaged.
•Zone 4 is the passenger compartment. The same Newton law applies to people in the vehicle. Passengers can damage seat belts, knee bolster panels, and other interior parts. This may also result in air bag deployment, which requires additional operations to repair the vehicle. This is why it is important to know who was in the vehicle during the accident and where they were sitting. This will help you to properly inspect the passenger compartment.
•Zone 5 represents exterior components and trim that are attached to the vehicle. These additional items can be damaged or cause damage during an accident. Another thing you may consider when inspecting the vehicle for damage are items in the vehicle. Were there heavy items in the trunk space or passenger compartment? A flying tool box can damage the vehicle. These are some things to keep in mind when writing auto repair estimates. Consider each zone when inspecting the damage of a vehicle.
•Preexisting Damage
•Preexisting damage, which is also called prior damage, may or may not affect vehicle repairs. Nonrelated prior damage may include damage on adjacent panels not involved in the accident, but a panel may have prior damage that was damaged during the accident. For example, a panel may have rust damage and then additional damage from the accident. This would be related prior damage because the prior damage is going to affect the repairs of the damaged part. So if you are repairing the vehicle according to preexisting damage, do you repair the damage without repairing the rust? Since the panel needs to be repaired properly, the rust will need to be repaired when repairing the damage caused by the accident.
Betterment
Repairing the rust and the damage caused by the accident may result in a deduction from the insurance company or additional pay from the vehicle owner, as the part will be in better condition than it was before the accident. This is called a betterment adjustment.
Tires are another example of betterment. If a tire was damaged during an accident, it may need to be replaced, but if the tire only had 50% life remaining, the new tire will be much better than the tire was before it was damaged. Therefore, an adjuster may only pay for 50% of the cost of the new tire.
Frame Damage
A frame can be damaged in three dimensions: length, width, and height. Let’s take a quick look at the different types of frame damage and determine which dimension it affects.
Sidesway
Sidesway is when the front or rear has been hit from the side or from an angle. The frame or unibody structure is pushed to the right or left. It is possible to have double sidesway if both the front and rear are pushed to the right or left. This type of damage may resemble the shape of a banana.
Sidesway is measured from the center plane of the vehicle. Therefore, this type of damaged is measured using width measurements.
Narrow body gaps on one side of the car and wide body gaps on the other side of the vehicle are a good visual indication of sideway damage.
Sag
Sag occurs when an area is pushed down lower than it should be, generally around the cowl area. This damage may be caused by the front of the car being lower due to braking before impact.
Sag is measured using the datum plane of the vehicle. Therefore, this type of damage is measured using height measurements.
Narrow body gaps at the top of the door to the fender and wide body gaps at the bottom of the fender to the door are good visual indications of sag damage.
Mash
Mash occurs when the impact pushes the front or rear vehicle inward. This type of damage is cause by the impact of the accident, which makes the vehicle frame or structure shorter than originally.
Mash is measured using the zero plane of the vehicle. Therefore, this type of damage is measured using length measurements.
Narrow gaps on the side of impact may be a visual indication of mash damage, but this type of damage may be hard to identify without measuring.
Diamond
Diamond damage is hard impact damage that causes the frame to be pushed out and has a slight diamond shape. This type of damage is usually found on body over frame vehicles.
Diamond damage is determined by cross-measuring to check for squareness. Therefore, this type of damage is measured by the point-to-point method, which is a type of length measurement.
Hood and deck lids that are misaligned due to the squareness of the frame being off are good visual indications of this type of damage.
Twist
Twist damage occurs when one corner of the vehicle is higher than it should be. This can be caused by the vehicle taking an impact, such as hitting the median or curb at high speeds.
Twist damage is measured using the vehicle datum plane. Therefore, this type of damage uses height measurements.
Twist does more damage to the underside of the vehicle, which may make visual inspection difficult. This type of damage may need to be measured to properly analyze the damage.
Center Plane
The center plane runs between the vehicle and provides width measurements.
Datum Plane
The datum plane is an imaginary line established by vehicle specifications to measure height.
Zero Plane
The zero plane is established by vehicle specifications to measure length.
Inspecting Non-Structural Damage
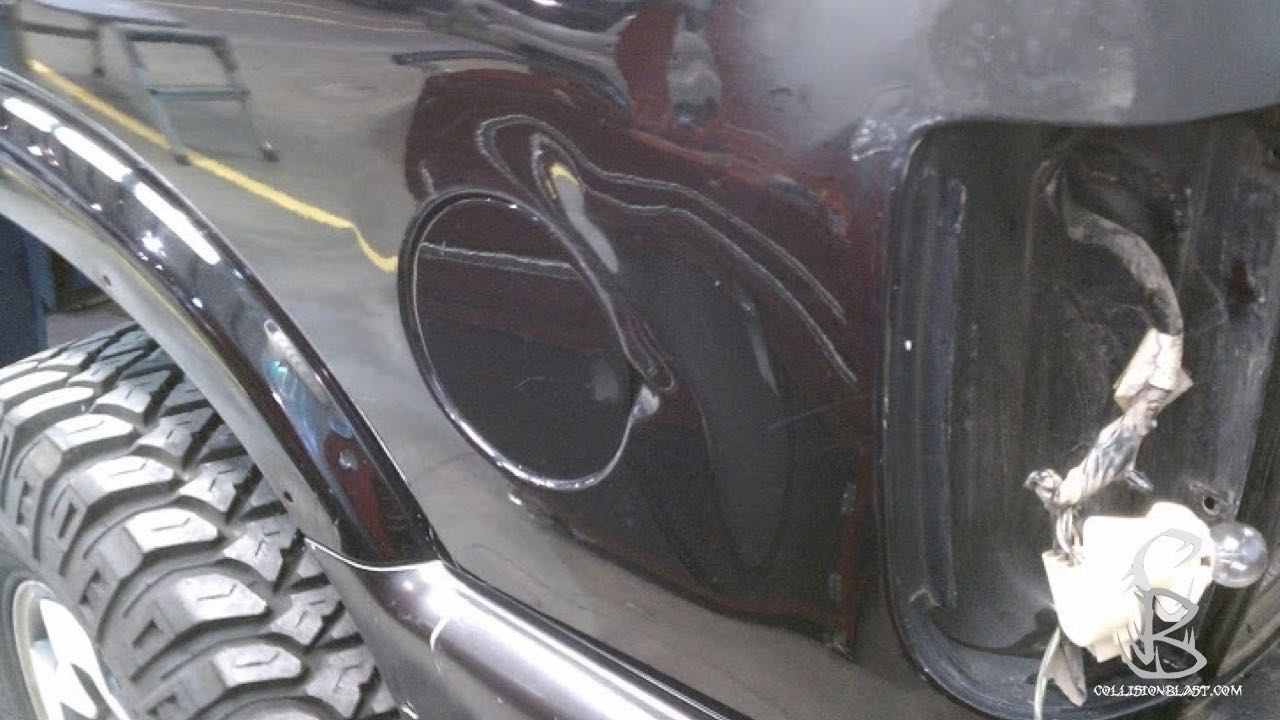
Photo of a dent needing repaired.
Inspecting nonstructural parts, which are the cosmetic parts of the vehicle, include front and rear bumper covers, fenders, hood, roof panel, door panels, quarter panels, bed sides, deck lids, tailgates, grille, molding, back and side glass, and emblems.
Inspect each of these part groups for damage. Damage may include direct damage from the impact of the accident and indirect damage. Determine what type of material the parts are made from. The types of materials will be covered later in this chapter, but this may help determine if the part may be repaired or need to be replaced.
Inspect the parts for rust or other preexisting damage that may interfere with repair or may require replacement.
Some nonstructural parts are severely damaged and require replacement. The labor required and cost of a part may be the deciding factor if the part should be repaired or replaced. For instance, a dent on a front fender that takes three hours to repair is more likely to be replaced than such a dent on a rear quarter panel because it takes more labor time to replace a quarter, and the cost of the quarter panel is usually considerably more than a front fender.
Inspect For Previous Repairs
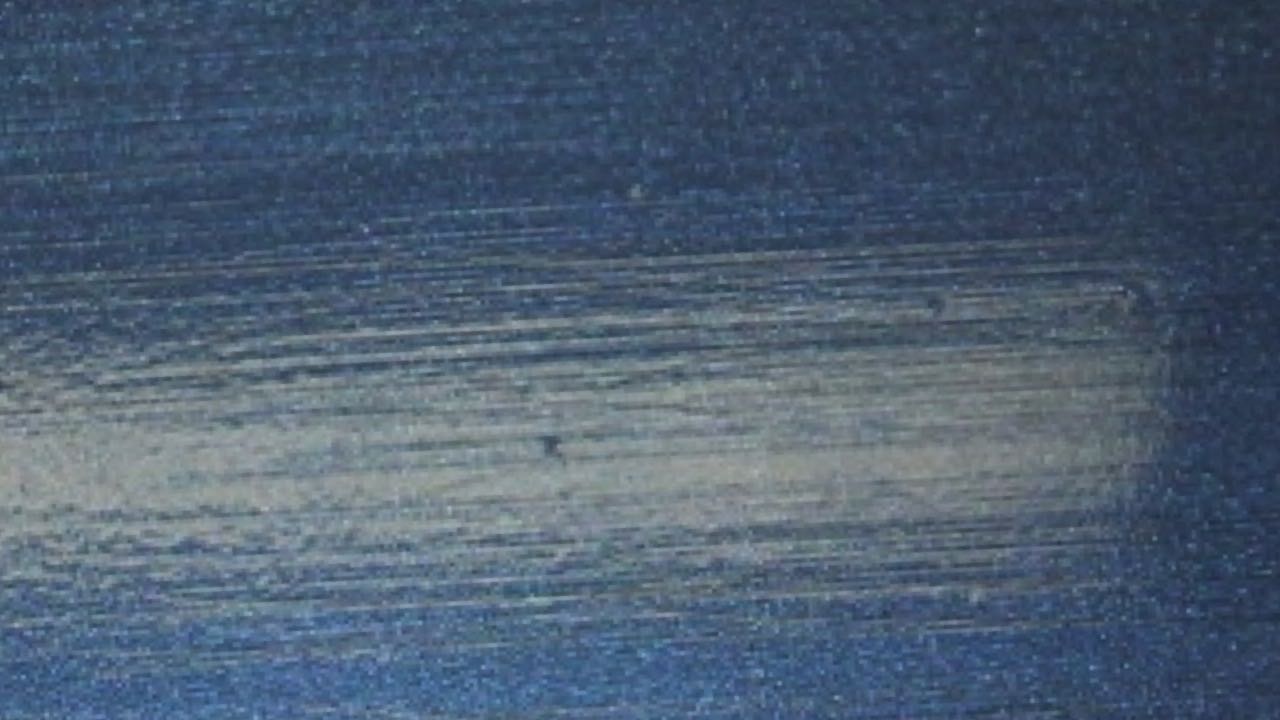
Photo of sand scratch swelling. A sign of previous body work.
Inspect the vehicle for previous repairs. This is not previous damage, but determine if the vehicle has been repaired in the past. Obvious signs may include hard or rough paint lines in jambs, mismatched paint, excessive orange peel, sand scratch swelling, or body filler.
There may not be a problem if body filler has been applied to the surface, but if the body filler is too thick, it may take additional labor time to remove the old body filler, straighten the metal, and reapply body filler to properly repair the damaged area.
One way to determine if there is body filler is to use a body filler gauge. This gauge will help you identify how thick the body filler is to determine if the damaged area will need additional work or not. A magnet can be used but does not provide a reading the estimator can record on the repair estimate.
Once the vehicle has been checked for previous repairs, the estimator can determine what repair path to take. The previous repairs and the damage to the panel may even result in the panel being replaced instead of being repaired.
Inspecting Structural Damage
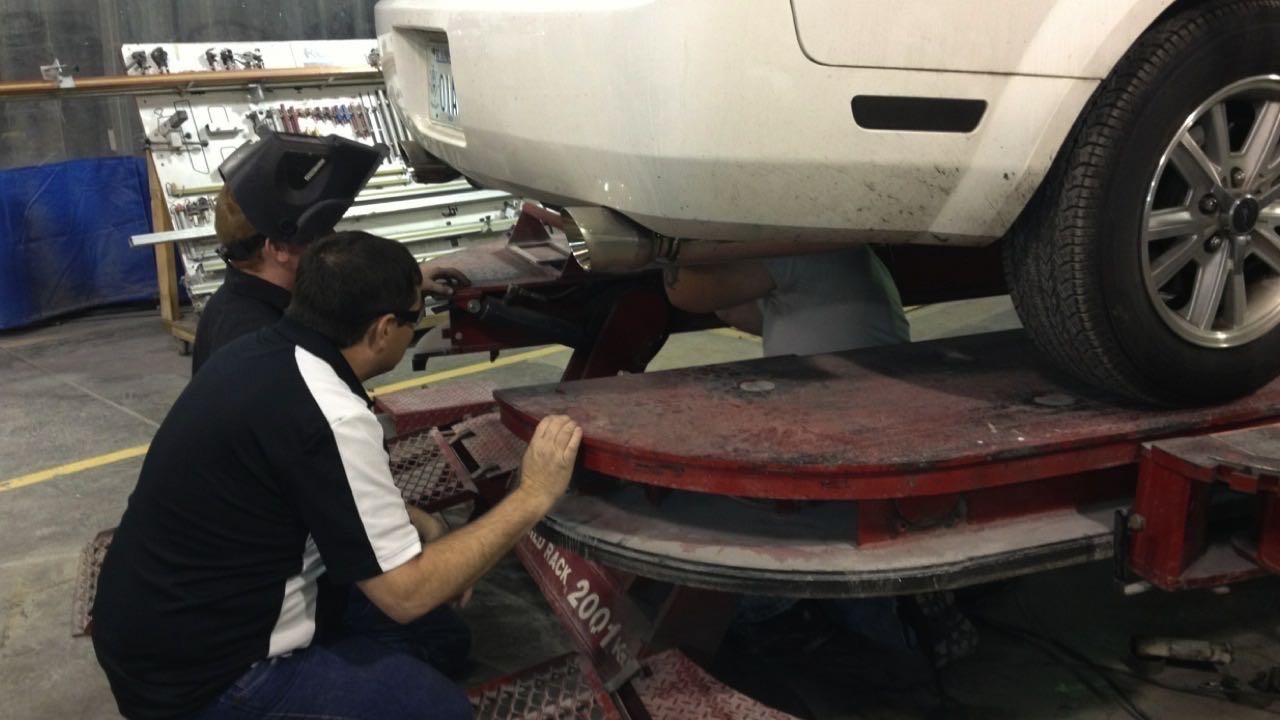 Inspecting underneath the vehicle for structural damage.
Perform a visual inspection of the structural parts to determine if there is any damage. Look for bent or misaligned parts. If a part is bent, it may be able to be straightened. If a part is kinked, generally, it will require replacement.
To determine if a part is kinked, look for a sharp bend. A kinked part may include rips or tears or be collapsed or deformed.
Direct damage will be easy to identify when inspecting structural parts, but indirect damage can travel through the entire vehicle on unibody designs. This makes it very difficult to determine the amount of damage without measuring the vehicle.
When inspecting for indirect damage, look for popped spot welds, cracks in seam sealer, misaligned body gaps, or buckles.
To perform a thorough inspection, measuring may be necessary. Comparison measurements from one side to the other can help identify possible damage.
A tape measure or tram gauge measures point to point. This type of measuring can measure length, width, and cross-measuring diagonally to measure squareness of the vehicle.
Self-centering gauges can be used to measure centerline and height.
Computer systems using laser or ultrasonic sonar can perform three-dimensional measuring (length, width, height) at the same time. This type of measurement will be the most accurate.
Inspecting Mechanical/Suspension/Electrical Damage
Some mechanical components that are damaged during an accident may be overlooked without close observation. However, keep in mind that some of these may require further diagnosis to determine if they are working properly.
Also keep in mind which electrical parts may need to be removed during the repair process. Even if the part is not damaged, it is recommended that if any electrical parts are within 12 inches of where welding is required, the component should be removed to prevent damaging it.
Inspecting The Paint Finish

Inspecting paint condition.
An estimator must identify the type and condition of the paint. Knowing the paint system will help determine the cost of materials to paint the part. Determine if the paint system is single stage, base coat, clear coat, or tri-coat.
Single stage paint is a paint that does not require clear coat. This will require less spraying time and less cost for materials than other paint systems.
Base Coat/Clear Coat is the base color (pigment) that requires a clear coat. This will require more spraying time and more material cost than single stage paint. Note that most new vehicles today require a clear coat.
A Tri-coat is a base coat (pigment), mid coat (tinted clear or pearl coat), and then clear coat. Tri-coat will take more spraying time and more material cost than base coat/clear coat.
Determining which paint system is present can greatly affect the total cost of the estimate.
How To Determine The Paint System
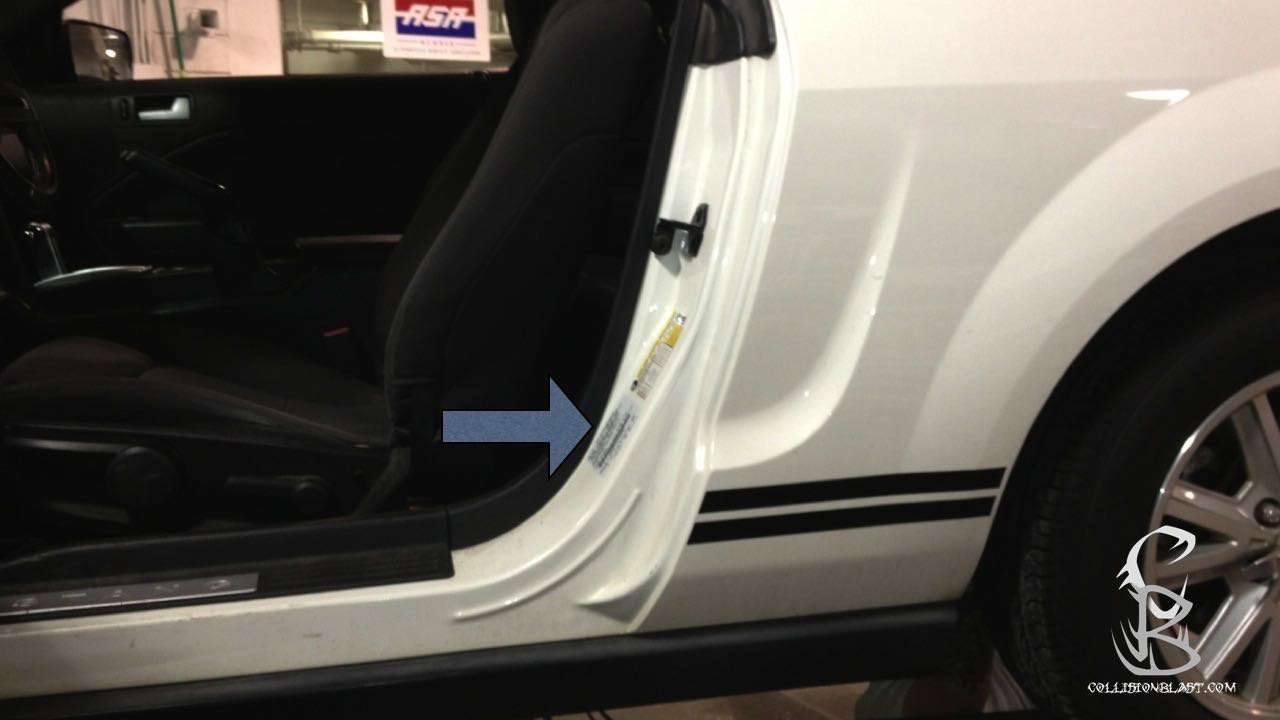
Ford’s paint code are usually on the drivers door or door jamb.
The best way to ensure you have the correct paint system for the vehicle is to use the paint code. You can reference the color code to a paint chip book to determine what system is used on the vehicle, but some computer estimating systems provide this information in their database. Simply reference the paint code with the database, and it will show what paint system is used.
Some pearl paint jobs are easy to visually identify, but many colors are used today, and many of them will be hard to visually determine if it’s tri-coat or not. Always check the paint code to make certain.
Inspecting The Condition Of The Paint Finish
An estimator must inspect the condition of the paint on any painted parts. Look for paint defects, such as peeling, checking, blistering, chipping, rust, cracking, or any other problems.
If the paint finish has one or more of these problems, the part may need to be stripped to metal or partially stripped. This is an additional cost for labor and materials that will need to be added to the estimate.
If there are no signs of paint failure or problems, then the paint mil thickness will need to be checked next using a paint mil gauge. If the paint mil thickness exceeds 12 to 14 mils, the part will need to be partially stripped to reduce the mil thickness. This is not included in the refinish operation and will also need to be added to the estimate.
Remember that inspecting the paint finish for defects or mil thickness does not only include the parts on the vehicle but also any used parts that may be purchased for the repair.
Inspecting Interior
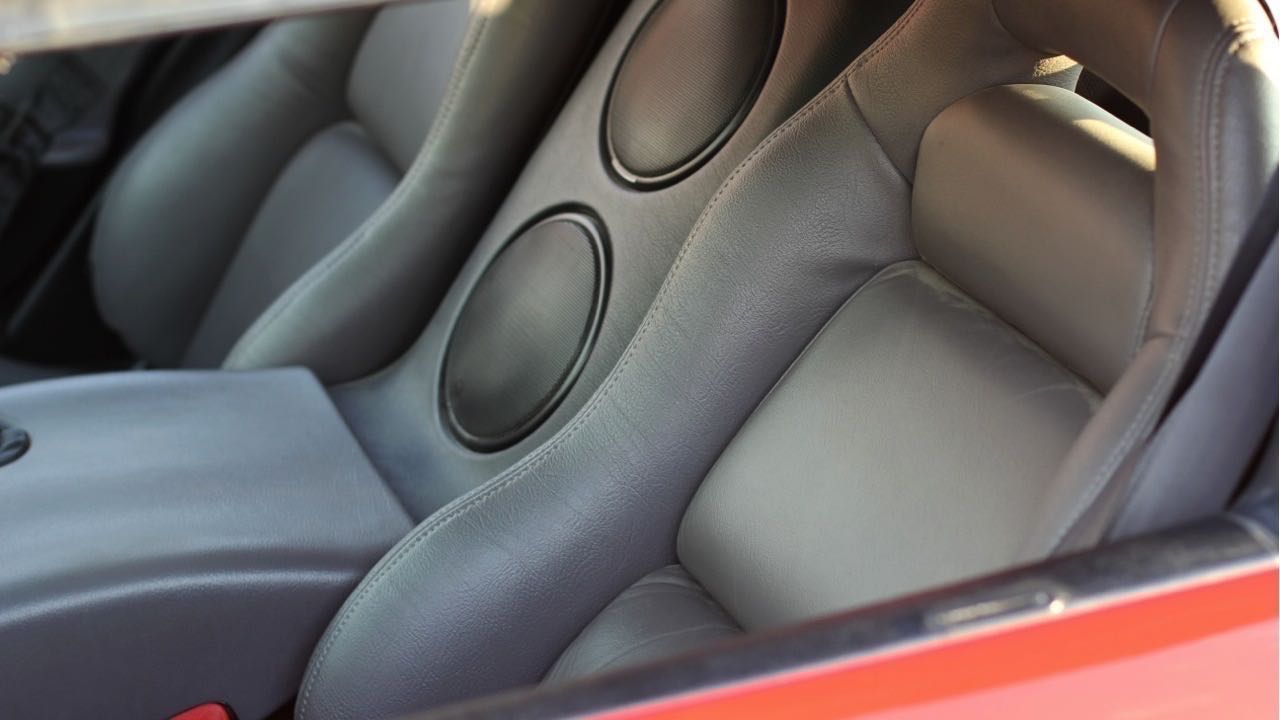
As mentioned before, determining who was in the vehicle at the time of the accident and where they were sitting will give clues regarding where to look for interior damage. Any objects that may have been in the vehicle and moved around during the accident due to inertia force could cause damage to interior parts.
Interior parts to inspect:
•Dashboard
•Instrument Cluster
•Stereo Controls
•Steering Wheel
•Glove Box Door
•Knee Bolster Panel
•Center Console
•Door Panels
•Seat and Seat Brackets
•Seat Belts
Check these parts to determine if any damage was caused to the part during the accident. Also look for blood or something that could have spilled and stained the interior during the accident.
Close inspection will be needed to determine if the damage and/or stains are from the accident or just normal wear and tear.
If the damage and stains are not related to the accident, insurance will not pay. This is an opportunity, however, for the estimator to sell additional work to the customer. Chances are the customer will be willing to pay the additional cost to have the interior cleaned and stains removed while their vehicle is in the repair shop if you ask them.
Inspecting Seat Belts
Any seat belt system that shows cuts, fraying, extreme or unusual wear, significant discoloration due to ultraviolet exposure, dusty/dirty conditions, abrasion to seat belt webbing, or damage to the buckle, latch plate, retractor, hardware, or any other obvious problem must be replaced immediately regardless of mileage.
Additional information and resources for inspecting seat belts can be found on the website. Visit the resource section of this book for information.
Inspect Air Bags
Inspect the vehicle for deployed air bags. If an air bag has been deployed, it must be replaced. You will need to look up the specific procedures for the make and model. Here are a few tips when inspecting the air bags.
Step 1: Research The Vehicle
Step 2: Identify Information Source
Step 3: Identify Deployed Components
Step 4: Scan The Vehicle
Some steering wheel columns are collapsable. Measurements will need to be taken to determine if the steering wheel is collapsed or not.
Also note that air bags must be ordered by color. It is not recommended to paint the cover to match the car’s interior.
Additional information and resources for inspecting air bags can be found on the website. Visit the resource section of this book for information.
Inspecting Accessories
Accessories that may have been added to the vehicle may include body kits, bumper covers, spoilers, scoops, louvers, bug shields, window visors, bed caps, bed liners, and many other items. These accessories should be inspected for damage. If damaged, a determination needs to be made if the part should be repaired or replaced.
Most accessories will not be listed in estimating guides or estimating systems. Repair or replace time will need to be determined at the estimator’s discretion. The estimator will also need to make an online search or call a supplier for the cost of the accessory.
Determining To Replace or Repair
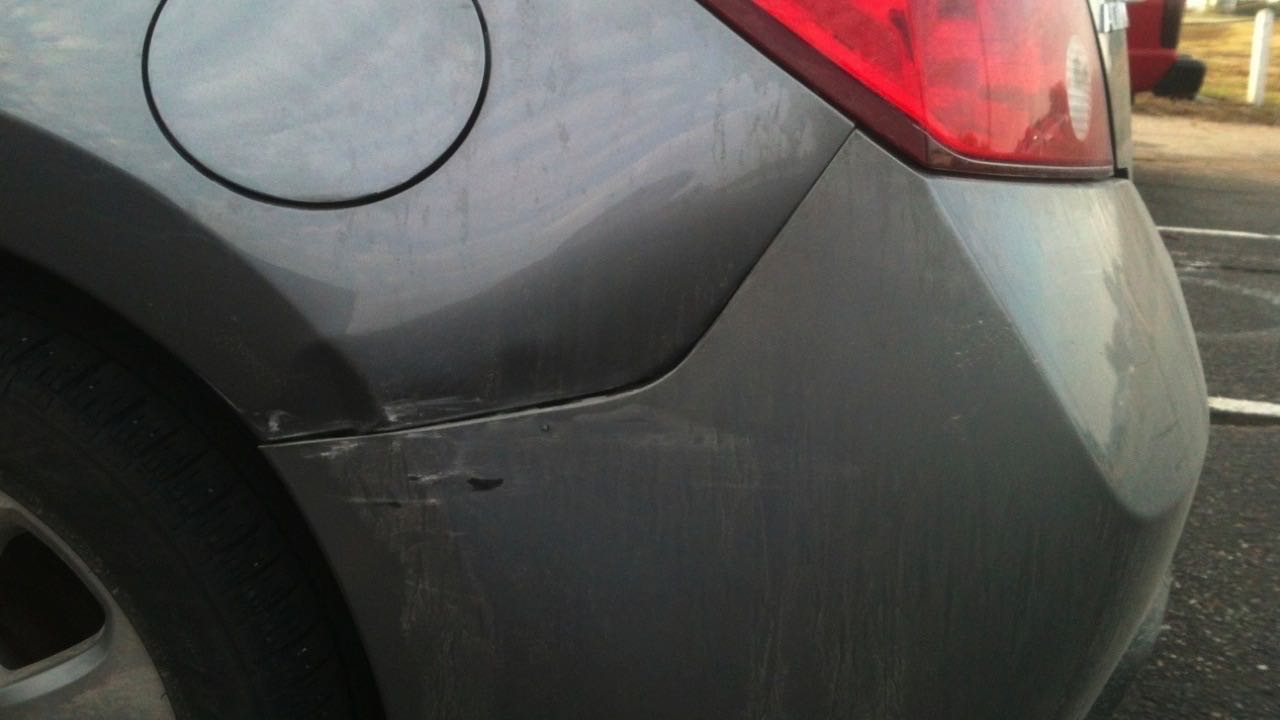
What would you do? Repair or Replace
One of the things that will need to be determined when completing the repair plan is if the part should be repaired or replaced. There are several factors we must consider.
1. Can the part be repaired? This is the most obvious reason, as some parts are too damaged to repair. If the part is not reparable, the only other option is to replace it.
2. What is considered too damaged to repair? There is a general rule of thumb, but this is not set in stone. This is the kink vs. bend rule. If the part has a crease, which is a sharp bend of a small radius at a 90-degree angle over a short distance, the part is kinked and should be replaced. If the crease is less than described, you may repair it. Other indications of a kinked part include buckles, rips, or tears. As I mentioned, however, this is just a general rule of thumb.
3. Is the part available? This is certainly going to help you determine if it should be repaired or replaced. As mentioned, some damage may be too severe to repair, but if you can find a replacement part, it may be worth putting in extra effort and time to repair the part, if it can be saved.
4. Will it cost more to repair? This is also going to have a variation of answers. For example, if you’re a body shop that charges $50 per hour, it would be better to replace an $80 front fender if it has a 3-hour dent. Replacement is $80, and the repair would cost $150 . . . simple math, right? What if you are a DIY doing this in your garage? Well, the labor is free, so it may be worth your time to spend three to five hours on an $80 fender.
5. Is it recommended? Some material is not recommended for repair. Different material types are going to be covered in this chapter, but replacement may be the only option.
Types of Materials Used To Manufacture Vehicles

There is a wide range of materials used to manufacture vehicles. On a modern-day vehicle, you may find different types of steel, aluminum, magnesium, plastic, and composites.
Types Of Steel
There several types of steel used to produce automobiles. In addition to the types of steel used, a galvanized coating may be applied to the part to provide superior corrosion protection.
Galvanized coating can be identified by the pattern of the steel. If you have ever noticed what an unpainted tin barn or shop looks like, then you should be able to identify galvanized coated metal.
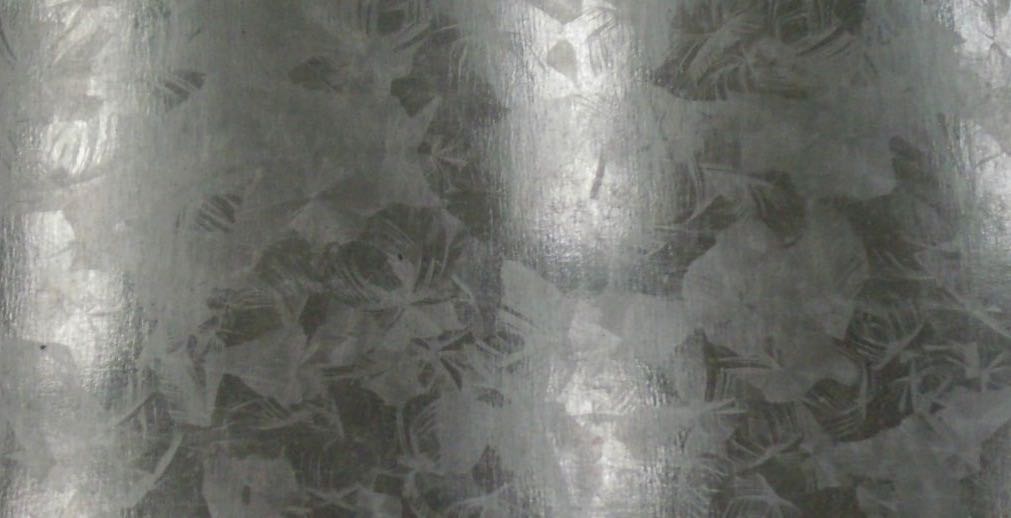
Example of galvanized coated steel.
Another way to determine galvanized coating is by inspecting a panel after it has been damaged. If there is bare metal exposed that is visible but no rust is present, then the part is probably galvanized. It is possible that during the accident some of the galvanized coating was scraped off and starting to rust, but if you look closely, you will probably see portions of the metal adjacent to the rust that are not rusted.
NOTE: Extra safety precautions should be taken when welding galvanized steel. The coating produces a harmful gas when welded, and an approved respirator must be worn when welding galvanized steel. A respirator should always be worn when welding body parts, but it’s extremely important with galvanized steel.
Mild Steel
Mild steel is soft and flexible. This type of steel was the first steel used to produce automobiles and is still used on vehicles today, but less mild steel is being replaced with high-strength steel and ultrahigh-strength steel for strength and overall weight reduction.
The flexibility of mild steel makes it easy to shape and repair without tearing or cracking. Heat does not affect mild steel, which makes this steel easy to weld or straighten.
The problem with mild steel is that it relies on its thickness to provide strength. With the push for increased fuel mileage, lighter steels that provide the same strength are starting to be used.
High-Strength Steel
High-strength steel (HSS) is lighter and stronger than mild steel. HSS started being used on vehicles in the mid-’70s. While HSS is stronger than mild steel, the steel is harder and more rigid. Therefore, HHS is harder to straighten than mild steel and is more likely to tear or crack.
HSS is also more sensitive to heat than mild steel, and care must be taken not to overheat it. Overheating could destroy the metal, resulting in an improper repair. If the vehicle is involved in an accident after the repair, the metal will not provide adequate strength and protection for the passengers, which could lead to unnecessary injuries or deaths.
There are heat indicators to let you know when the metal has reached a certain temperature to prevent overheating. The recommended procedures must be checked for each make and model of the vehicle you are working on. While some manufacturers may allow a certain amount of heat to be used during the repair process, other manufacturers may recommend that no heat be used.
Ultrahigh-Strength Steel
Ultrahigh-strength steel (UHSS) is very hard, rigid, and strong. UHSS is used to provide maximum strength and protection. This type of steel can be found on many bumper reinforcements, intrusion beams inside of doors, and other structural parts. Using this steel is on the increase to provide maximum protection to the passengers and to decrease the overall weight of the vehicle.
This type of steel is starting to surface in pillars and other structural parts around the passenger compartment. Therefore, it is crucial to check the recommended procedures to determine where this steel is located and the repair recommendations for each make and model.
Typically, UHSS cannot be heated or repaired. The part will need to be replaced. This steel is extremely hard and rigid and will crack or tear if attempting to repair it. Anchoring points may also be damaged before this type of steel is straightened, which may require additional anchoring if attempting to straighten the damage.
Heating could destroy the metal, resulting in improper repair. If the vehicle is involved in an accident after the repair, the metal will not provide adequate strength and protection for the passengers, which could lead to unnecessary injuries or deaths.
Boron Steel
Boron steel is extremely hard and rigid but generally cannot be repaired or heated. If the part is made from boron, it will need to be replaced. Be certain to check recommended procedures when removing and replacing boron parts.
Laminated Steel
Laminated steel aka quiet steel is composed of layers of steel with a laminate between them. Laminated steel reduces road noise and vibration, providing a quieter experience for the passengers.
Generally, it is not recommended to weld this type of steel. The laminated steel is attached using rivet bonding methods. Check the recommended procedures for repair or replacement recommendations.
Hydroformed Steel
Hydroforming is a specialized type of die that uses high-pressure hydraulic fluid to press room temperature working material into a die to form the part. This works well for making complex shapes and produces a strong, rigid, and lightweight part.
Hydroformed steel is used on structural parts for unibody and body over frame vehicles. This type of steel is generally weldable and allows for sectioning. Be certain to check the recommended procedures before attempting to section or repair hydroformed steel.
Plastic
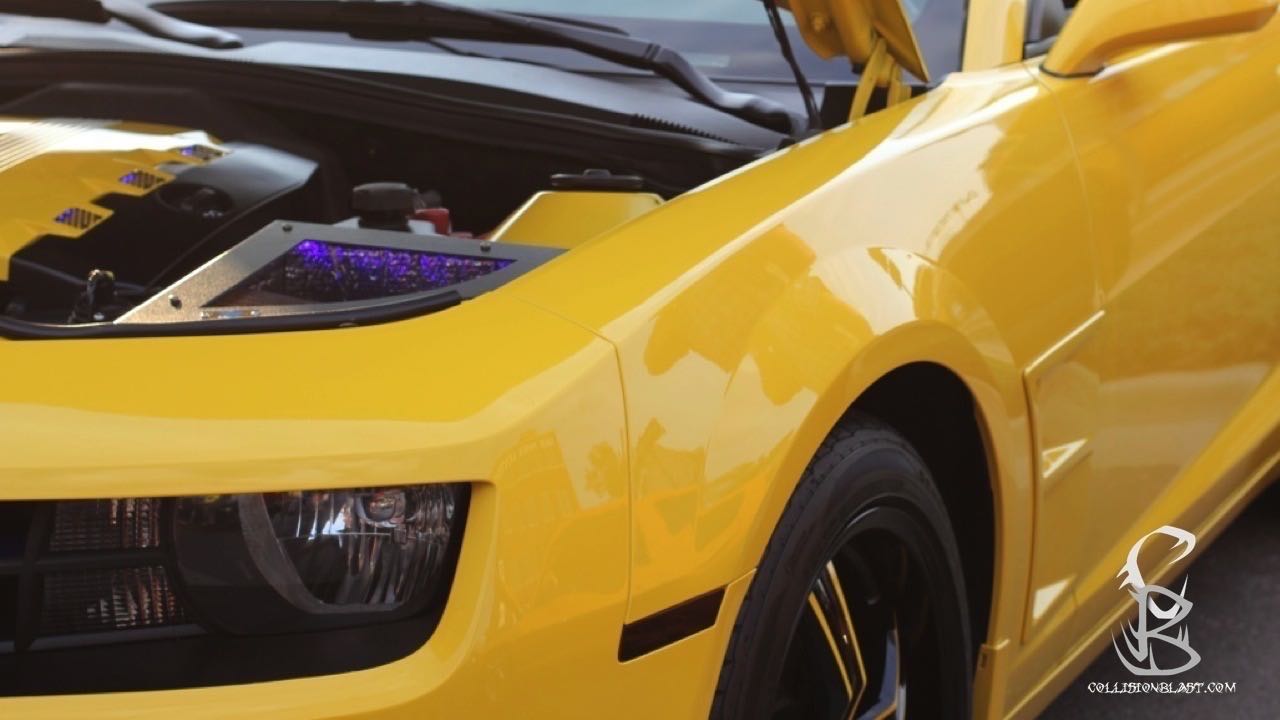
The government started pushing carmakers to make cars more fuel efficient. One obvious solution was to make the car lighter, so carmakers started working with metals and other materials to reduce weight in vehicles. Lighter metal started being designed, such as high-strength steel, to allow the metal to have equivalent strength with much thinner and lighter metal. At the same time, engineers started brainstorming and began using lightweight plastic for many of the parts that had been made of steel in the past. Apparently, the results were positive, as there is now more plastic in each new body style of cars.
More Fuel Economy
To this day, the government requires carmakers to meet certain standards in order to sell cars in the US. Automakers are going to do whatever it takes to make this happen.
Now that the Department of Transportation and the EPA have locked in the new fuel efficiency of 54.5 miles per gallon by 2025, I believe there will be a push to increase the use of plastics, composites, and aluminum to lighten cars. We are currently at 27.5 MPG, so auto manufacturers have a lot of work to do over the next 11 years. You may be thinking that more economical cars will be produced, but the vehicles will need to sell too! Customers demand all the bells and whistles, room, and luxury. To meet customer demand and the required MPG rules, who knows what may be coming our way.
Here is an article with more information about the new 54.5 MPG rules. http://www.cnbc.com/id/48829545/Getting_to_54_MPG_Will_Change_What_We_Drive
Identifying Plastic
One way to determine the type of plastic on a part is to look for International Organization for Standardization (ISO) stamped on the backside of the part. These codes are not all located in the same place, which makes it hard to find the plastic type. Some parts may not even have the the ISO.
If you are not able to find the ISO, it is difficult to determine the type of plastic, which may also be a blend of various plastics. If this is the case, the process of selecting the best plastic rod will be difficult to determine if trying to weld a damaged plastic part.
Here is a link to help identify types of plastic: http://www.urethanesupply.com/identify.php
Two Types Of Plastic
Plastic falls into two categories—thermoset plastic and thermoplastic.
•Plastic that can be reshaped with heat and/or welded using a plastic welding system is a thermoplastic part.
•Plastic that cannot be reshaped with heat or plastic welded is a thermoset plastic part.
•Adhesive repairs can be made on both thermoplastic and thermoset plastics.
Composites
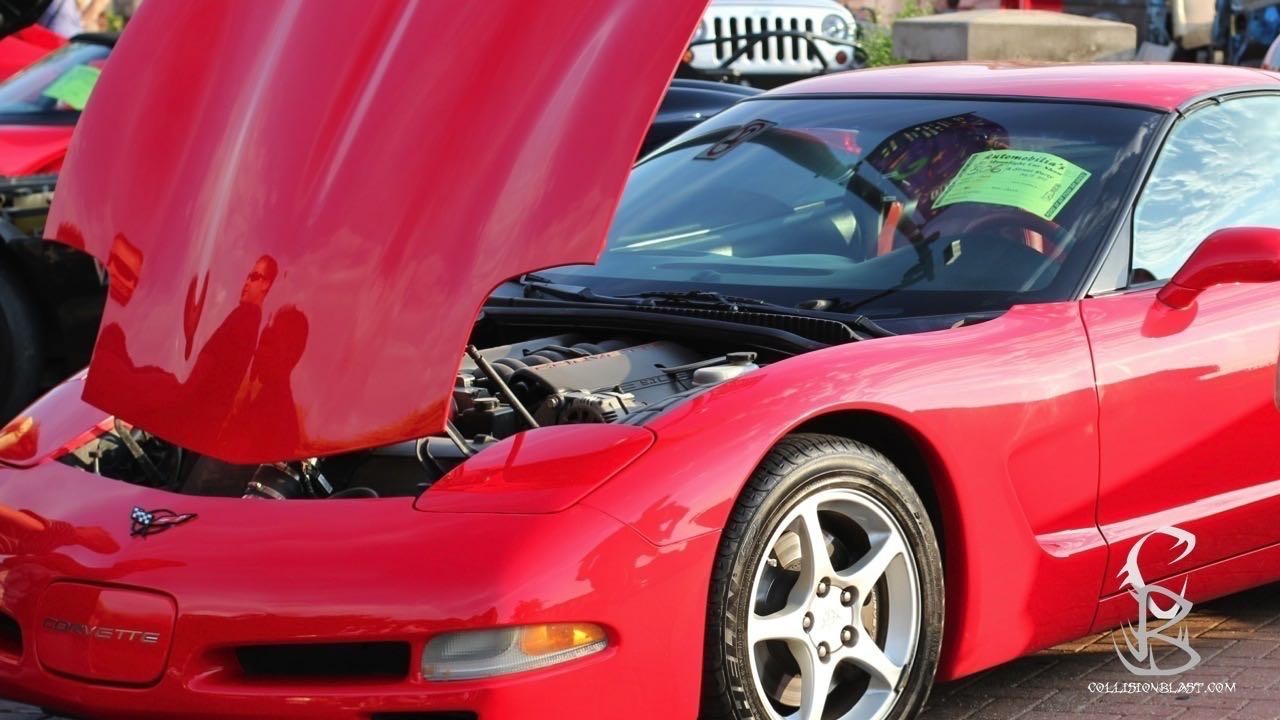
Corvettes have been made with different composite through the years. Starting with fiberglass, then SMC, and now carbon fiber.
Composites consist of disparate or separate parts or elements; compound. For instance, mixing fiberglass strands and resin creates a strong material known as fiberglass. Most composites in the automotive industry use some sort of fiber reinforcement.
Sheet Molded Compound
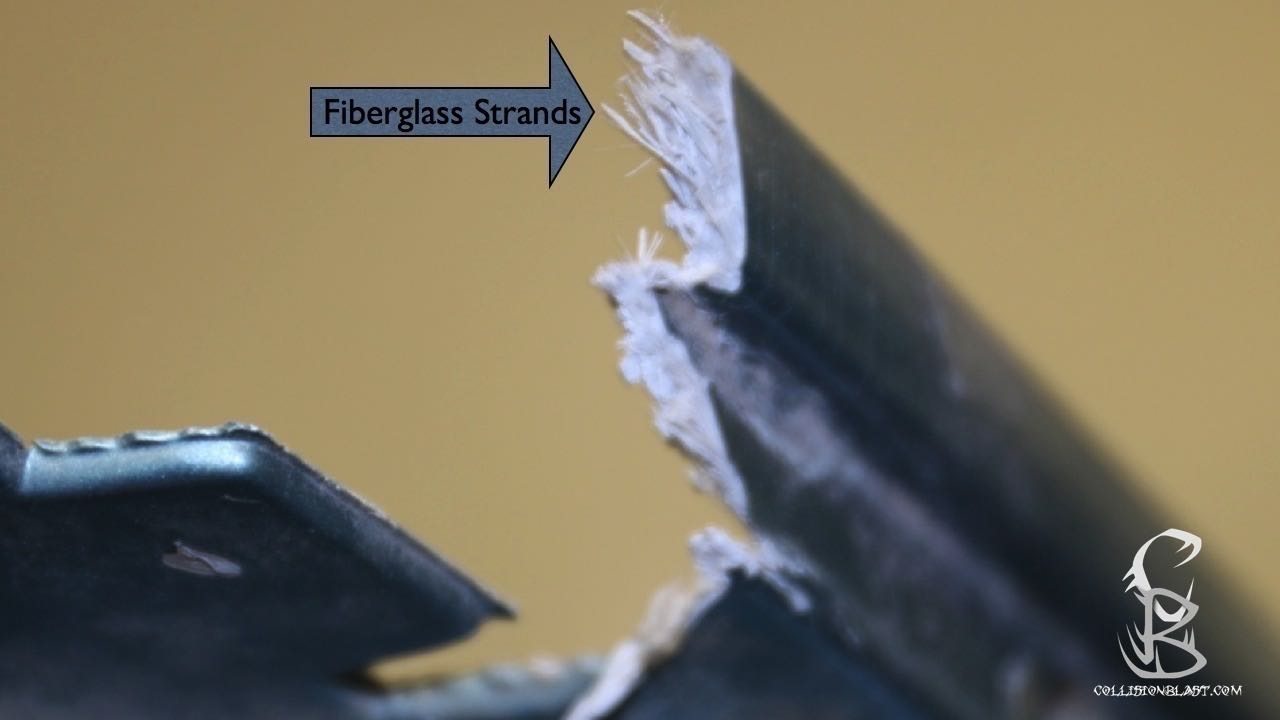
Notice the fiber strands in this broken panel.
Fiberglass or SMC?
Sheet-molded compound (SMC) is fiber-reinforced plastic. It is a strong, rigid, and lightweight composite material.
This type of composite has replaced most of the parts that used to be made with fiberglass. In fact, the two could be confused if the fiber strands are visible when an SMC part is broken. SMC has a smooth surface on the backside, while fiberglass strands can been seen on the backside of fiberglass.
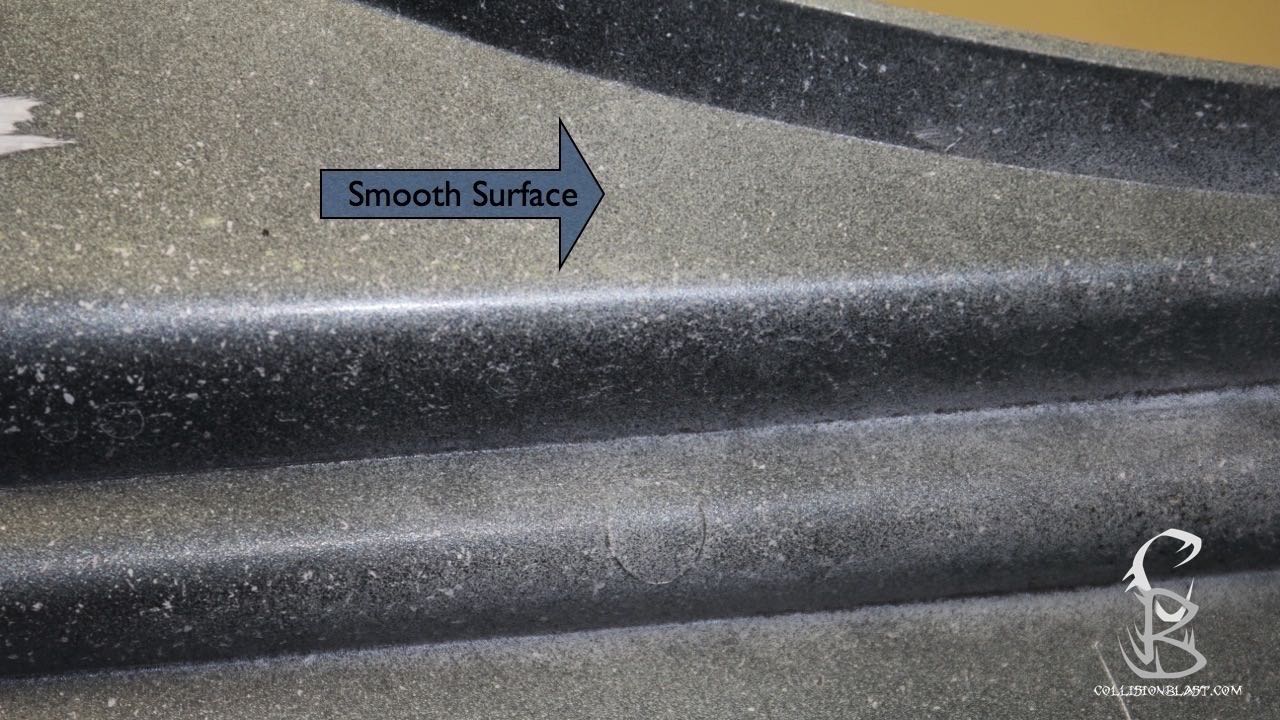
This is the back side of the broken piece above. The backside is smooth, which is an indication of SMC.
SMC is used for body parts, such as header panels and hoods, on a vehicle. SMC must be repaired using SCM repair adhesive. Traditional fiberglass repair methods will not properly repair SMC.
Carbon Fiber
Carbon fiber is a strong, stiff, thin fiber of nearly pure carbon, made by subjecting various organic raw materials to high temperatures, combined with synthetic resins to produce a strong, lightweight material.
Carbon fiber has been used in aviation for years, but some carbon fiber is being used to manufacture vehicles, and with the increased push for fuel economy, carbon fiber may be used more in the automotive industry as we move forward. Many aftermarket parts are also using carbon fiber to produce lightweight performance parts.
The disadvantage of carbon fiber is the cost. It is more expensive than other materials used to manufacture vehicles. There are some repair procedures for repairing carbon fiber, but recommendations are limited.
Aluminum
Aluminum is currently being used on vehicles, but aluminum will perhaps be used more in upcoming years. Aluminum is lighter than steel, provides adequate strength, and is not susceptible to rust like steel.
Many higher-end cars, like Jaguar, have already been produced with an all-aluminum structure. However, the common body shop that does not work on higher-end cars has not been too concerned about the new trend of aluminum. That is about to change because the next-generation F-150 Ford pickup is switching from steel to aluminum. What body shop does not work on Ford pickups? That’s right. This trend will affect every body shop in business.
One problem with aluminum is that body shop technicians don’t have experience with this material. Less welding and more rivet bonding procedures are going to be recommended from auto manufacturers.
Another problem is galvanic corrosion, which occurs when two dissimilar metals are immersed in a conductive solution and are electrically connected. If aluminum and steel come in contact with each other, galvanic corrosion will occur.
This could happen by simply working on a metal vehicle next to an aluminum vehicle. If any metal sparks or dust lands on aluminum, the steel particles will become embedded in the aluminum. This may not even be noticeable at first, but after the aluminum part has been primed and painted, the galvanic corrosion process begins underneath the coatings. The vehicle may look great when it leaves the repair shop, but it may be back due to galvanic corrosion spreading and bubbling the paint.
This will require repair shops to have a completely separate work area or building and separate tools for aluminum repairs.
Body repair shops will need to develop a particular process for working on aluminum parts and have an extra work area or sublet aluminum work to an aluminum specialty shop.
Magnesium
Magnesium is a silver-white metal of the alkaline earth series. It is used to make strong, lightweight alloys, especially for the aerospace industry, and is also used for some automotive parts.
It is extremely important to check the recommended procedures for the make and model of each vehicle you are working on to determine what materials are used on the vehicle. If magnesium is used for a part, be certain to follow the recommended procedures for the part.
If magnesium catches fire, it is extremely hard to put out. It burns very hot and may cause the entire vehicle to burn. Extreme caution should be taken when welding near magnesium parts.
Glass
Two types of glass are used on vehicles. Tempered glass is used for the back glass and side glass, and laminated glass is used for front windshield glass.
Tempered Glass
Tempered glass is a toughened safety glass designed to withstand more impact without breaking than regular glass. Tempered glass is used for all of the glass parts on a vehicle except for the windshield. If this glass breaks, it’s designed to crumble into small pieces that do not splinter and are not extremely sharp.
Tempered glass will not crack. The entire glass part will crumble if broken. You will never see a crack in side or back glass.
Laminated Glass
Laminated glass is used for front windshields. This type of glass has layers of glass with a laminate between the glass. Laminate glass is designed to stay together in one piece, but the glass can easily crack. Broken laminated glass can break into sharp splinters.
Windshields are considered a structural part on unibody vehicles because they are glued to the A pillars and roof, which help support the structure.
Methods Used For Attaching Parts
Many methods are used to attach parts in the automotive industry, including clips, rivets, adhesives, fasteners, and welds.
Clips
Clips come in every shape and size imaginable and can be metal or plastic. Clips can be difficult to remove and be damaged if care is not taken. In fact, some clips are designed to be broken if removed and replaced. Clips can be made from metal, but plastic clips are more common on modern vehicles.
To properly remove clips, special clip removal tools are needed. Using a screwdriver to pry on the clips will usually result in breaking the clip. If clips are broken during the removal process, new clips will need to be used when reinstalling the part.
Rivets
Rivets are perhaps one of the biggest changes in repair methods that I have seen lately. Rivets used along with adhesive are replacing many welding methods. They also work well for joining different kinds of metals.
Adhesives and Welds
More adhesives are being used to secure parts. For example, a door skin or roof panel may use adhesive around the flanges. Quarter panels may use a combination of welds and adhesives. Regardless of where adhesives are used on a vehicle, it can make removal difficult if not aware of the adhesive. Once you know where the adhesive is located, simply use a heat gun to heat the area where adhesives are applied. This will soften the adhesive, making it easier to remove.
Structural parts are usually welded together. One advantage of using welds over other methods of attachment is that welds do not add much weight if any to the vehicle. For instance, a factory spot weld does not use any filler material during the welding process. Therefore, no weight is added to the vehicle.
Fasteners
Fasteners consist of screws, nuts and bolts, rivets, or clips. A wide range of fasteners is used on vehicles. We’ve already covered many of them, but now let’s go over speciality fasteners.
One-Time Fasteners
One-time fasteners are fasteners that should not be reused. This may be due to stretching, deforming, and corrosion to name a few. Let’s look at a few of these types of fasteners.
Torque-To-Yield Bolts
These bolts are recommended to be torqued to a specific amount, but this may stretch, deform, or weaken the bolt. Once removed, the bolt should not be used again. Although the bolt may look undamaged, it should be replaced.
Coated Fasteners
Some fasteners are coated to prevent corrosion. For instance, when bolting an aluminum fender with a steel bolt, galvanic corrosion will occur where the two metals touch. The coating acts like insulation to prevent the two metals from touching each other. If the aluminum fender is replaced, it may be recommended to replace all fender bolts.
Safety Fasteners
Some clips are designed to have a specific amount of resistance, for instance, a clip attaching a panel where an air bag is located. If the clip is too tight or too big, it may delay the air bag timing. If the clip is too small, worn, or too loose, the air bag may deploy too soon. Anytime the clip is removed, it must be replaced with a new one.
How To Identify One-Time Fasteners
Many of the torque-to-yield bolts are going to be steering and suspension parts, restraint system parts, and driveline parts. Coated fasteners may be used with aluminum parts, but manufacturer-recommended procedures should always be viewed to determine the location of one-time fasteners and procedures to replace them.
 Dallas Paintless Dent Repair says
September 14, 2010 at 3:50 amAwesome! I now have a good idea regarding auto repairs estimates in relation to billing computation. It's undeniable that auto body repair is expensive. Hence, as a good customer, it is essential to know the basic when it comes to bill payments. In our place, we're grateful to have such collision repair Plano, T.X. based shop that offer quality repair services. We're certain that we're getting our money's worth.
I'm grateful for the informative post, Donnie! Keep them coming.